
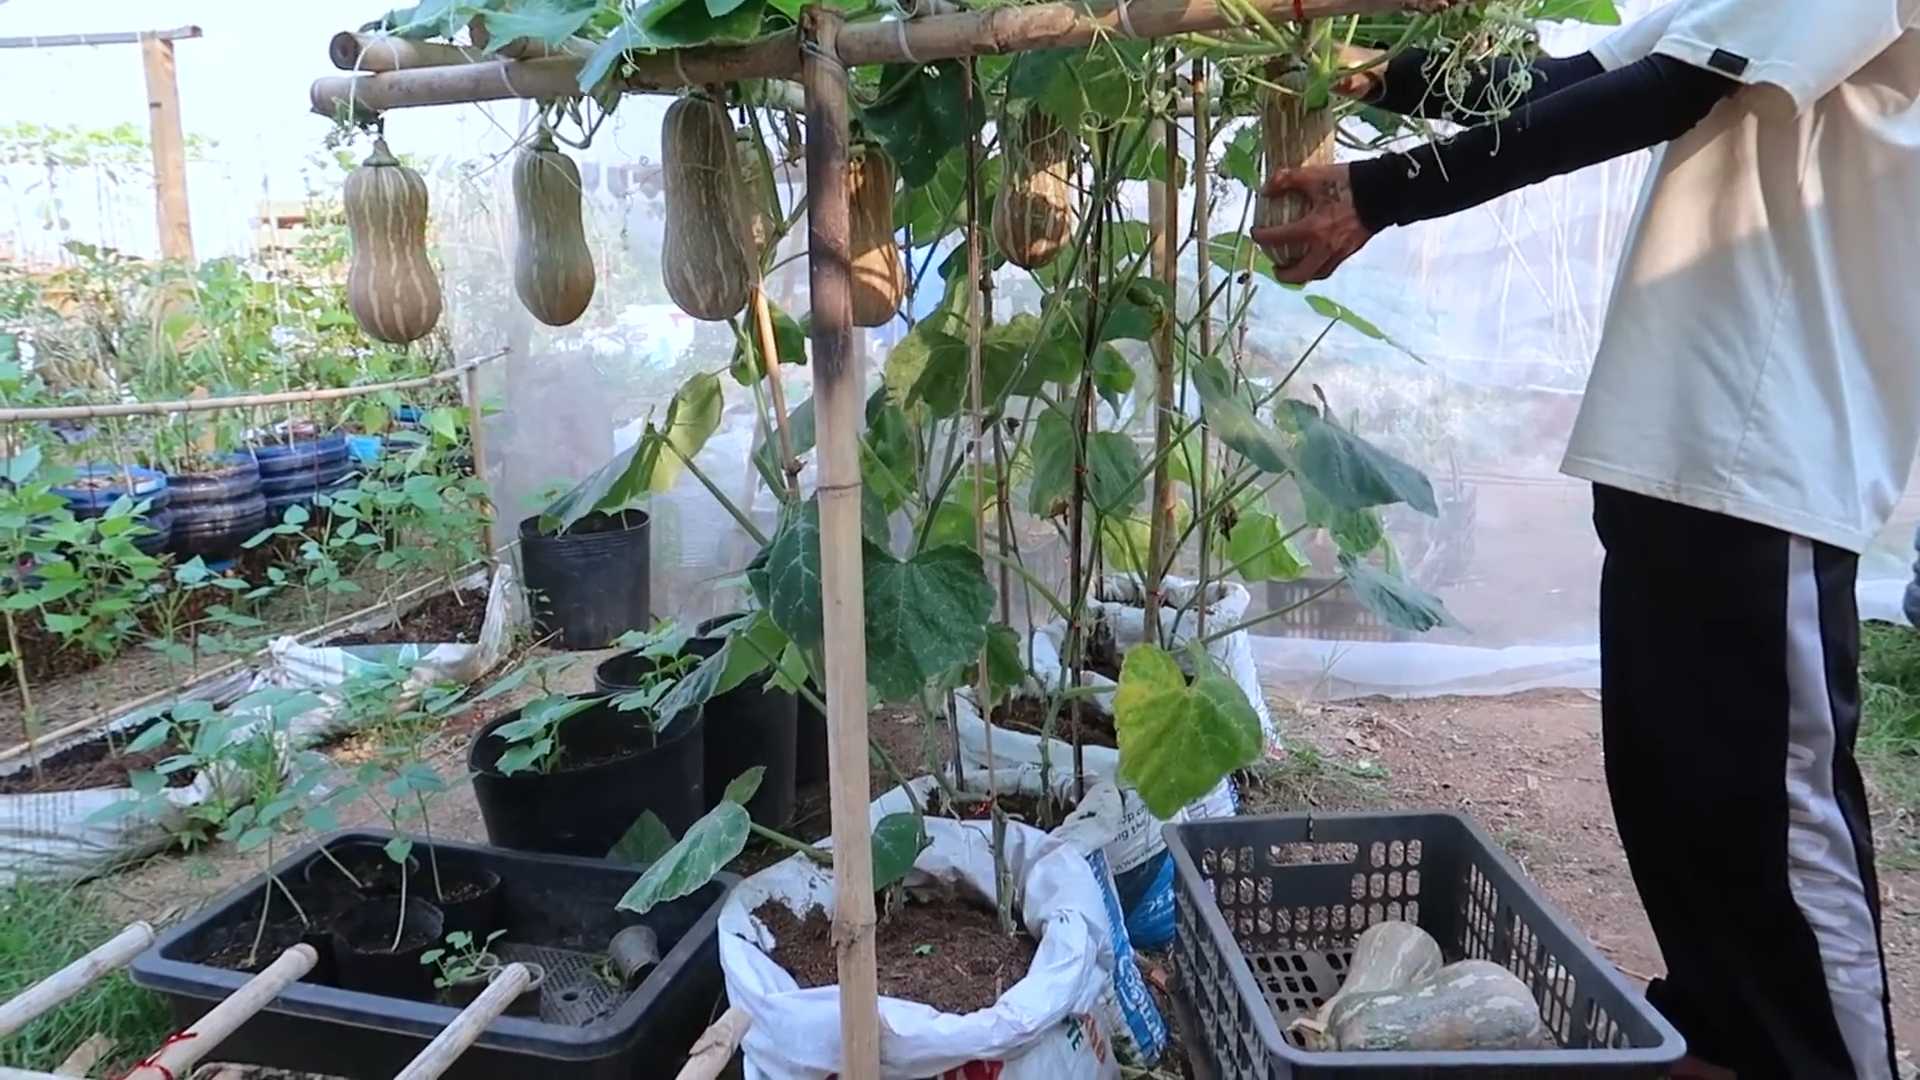
Growing Butternut Squash at Home might seem daunting, conjuring images of sprawling farms and endless fields. But what if I told you that you could cultivate these delicious, nutrient-packed gourds right in your own backyard, or even on a sunny balcony? Imagine the satisfaction of harvesting your own butternut squash, knowing exactly where it came from and how it was grown!
Butternut squash, with its sweet, nutty flavor, has been a culinary staple for centuries. Originating in Central America, it has since become a beloved ingredient in dishes around the world. From creamy soups to roasted side dishes, its versatility is unmatched. But beyond its culinary appeal, growing your own butternut squash offers a unique connection to nature and a chance to embrace sustainable living.
In today’s world, where we’re increasingly conscious of food miles and the impact of our choices, growing butternut squash at home is more relevant than ever. Not only will you have access to fresh, organic produce, but you’ll also reduce your carbon footprint and save money. Plus, let’s be honest, there’s something incredibly rewarding about nurturing a plant from seed to harvest. This DIY guide will provide you with all the essential tricks and hacks you need to successfully grow butternut squash at home, regardless of your gardening experience. So, grab your gardening gloves, and let’s get started!
Supercharge Your Scrub Daddy: Genius Cleaning Hacks You Need to Know!
Okay, so you’ve got a Scrub Daddy. Awesome! These smiley-faced sponges are already pretty amazing, but trust me, you can unlock even MORE cleaning power with a few simple hacks. I’ve been experimenting with my Scrub Daddy for ages, and I’m excited to share my favorite tips and tricks to make your cleaning routine faster, easier, and way more effective. Let’s dive in!
Hack #1: The Microwave Sanitization Power-Up
Did you know your Scrub Daddy can get a little… funky? All those food particles and grime can build up over time. But don’t worry, you don’t need to throw it away! The microwave is your secret weapon for sanitizing and refreshing your Scrub Daddy.
Why this works: Microwaving kills bacteria and germs that can accumulate in the sponge, leaving it fresh and ready for action.
What you’ll need:
* Your Scrub Daddy
* A microwave-safe bowl
* Water
Step-by-step instructions:
1. Rinse Thoroughly: First, give your Scrub Daddy a good rinse under running water to remove any large debris.
2. Soak in Water: Place the Scrub Daddy in the microwave-safe bowl and cover it completely with water. Make sure it’s fully submerged.
3. Microwave Time: Microwave on high for 1-2 minutes. The exact time will depend on your microwave’s power, so start with 1 minute and check. If it still seems a bit grimy, add another 30 seconds.
4. Handle with Care: Be CAREFUL when removing the bowl from the microwave! It will be HOT. Use oven mitts or a towel to protect your hands.
5. Cool Down: Let the water and Scrub Daddy cool down for a few minutes before handling.
6. Squeeze and Rinse: Once it’s cool enough to touch, squeeze out the excess water and give it one final rinse under running water.
7. Air Dry: Let your Scrub Daddy air dry completely before using it again.
Hack #2: The Freezer Hardening Trick for Stubborn Messes
This is one of my absolute favorite Scrub Daddy hacks! The FlexTexture material changes its firmness based on temperature. By freezing your Scrub Daddy, you can make it super rigid, perfect for tackling those tough, stuck-on messes.
Why this works: The cold temperature hardens the FlexTexture material, providing extra scrubbing power for baked-on food, dried paint, or other stubborn residues.
What you’ll need:
* Your Scrub Daddy
* A freezer-safe bag or container (optional)
Step-by-step instructions:
1. Wet the Sponge: Lightly dampen your Scrub Daddy with water. You don’t want it soaking wet, just slightly moist.
2. Bag It (Optional): Place the damp Scrub Daddy in a freezer-safe bag or container. This will help prevent it from absorbing any freezer odors.
3. Freeze for at Least 2 Hours: Place the bag or container in the freezer and let it freeze for at least 2 hours, or even overnight for maximum hardness.
4. Ready to Scrub: Remove the frozen Scrub Daddy from the freezer. It will be rock solid!
5. Attack the Mess: Use the frozen Scrub Daddy to scrub away stubborn messes on pots, pans, stovetops, or any other surface that needs some extra elbow grease.
6. Thaw and Clean: As the Scrub Daddy thaws, it will gradually soften. Once you’re done scrubbing, rinse it thoroughly and let it air dry.
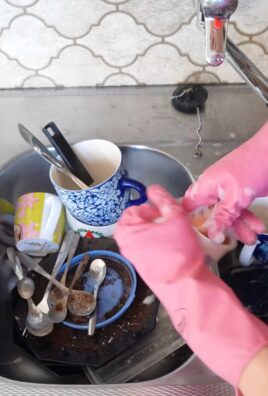
Hack #3: The Dish Soap Dispensing Master
Tired of constantly reaching for the dish soap bottle? This hack will turn your Scrub Daddy into a soap-dispensing machine!
Why this works: By creating small slits in the Scrub Daddy, you can allow dish soap to seep out gradually as you scrub, saving you time and effort.
What you’ll need:
* Your Scrub Daddy
* A sharp knife or scissors
* Dish soap
Step-by-step instructions:
1. Make Small Slits: Using a sharp knife or scissors, carefully make a few small slits on the non-smiling side of the Scrub Daddy. Don’t make them too big, just enough to allow soap to seep through. I recommend starting with 2-3 slits and adding more if needed.
2. Soak in Soap: Place the Scrub Daddy in a bowl or container filled with dish soap. Let it soak for a few minutes to absorb the soap.
3. Squeeze and Scrub: Squeeze the Scrub Daddy gently to release the soap and start scrubbing your dishes.
4. Refill as Needed: When the soap starts to run out, simply soak the Scrub Daddy in dish soap again.
Hack #4: The Odor-Busting Baking Soda Soak
Sometimes, even after microwaving, your Scrub Daddy might still retain some lingering odors. Baking soda is a natural deodorizer that can help eliminate those smells.
Why this works: Baking soda neutralizes odors and helps to absorb any remaining grime, leaving your Scrub Daddy smelling fresh and clean.
What you’ll need:
* Your Scrub Daddy
* A bowl or container
* Warm water
* Baking soda
Step-by-step instructions:
1. Prepare the Solution: Fill a bowl or container with warm water. Add about 1-2 tablespoons of baking soda and stir until it dissolves.
2. Soak the Sponge: Place your Scrub Daddy in the baking soda solution and let it soak for at least 30 minutes, or even overnight for stubborn odors.
3. Rinse Thoroughly: After soaking, rinse the Scrub Daddy thoroughly under running water to remove any baking soda residue.
4. Air Dry: Let your Scrub Daddy air dry completely before using it again.
Hack #5: The Vinegar Disinfecting Dip
Vinegar is another fantastic natural cleaner and disinfectant. This hack is perfect for keeping your Scrub Daddy germ-free and ready for action.
Why this works: Vinegar’s acidity helps to kill bacteria and viruses, making it an effective disinfectant for your Scrub Daddy.
What you’ll need:
* Your Scrub Daddy
* A bowl or container
* White vinegar
* Water (optional)
Step-by-step instructions:
1. Prepare the Solution: You can use straight white vinegar or dilute it with water (a 1:1 ratio is fine). Pour the vinegar (or vinegar solution) into a bowl or container.
2. Soak the Sponge: Place your Scrub Daddy in the vinegar solution and let it soak for at least 30 minutes.
3. Rinse Thoroughly: After soaking, rinse the Scrub Daddy thoroughly under running water to remove any vinegar smell.
4. Air Dry: Let your Scrub Daddy air dry completely before using it again.
Hack #6: The Toothbrush Cleaning Companion
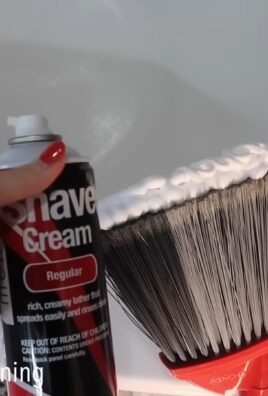
Those little nooks and crannies on your Scrub Daddy can be tricky to clean. An old toothbrush is the perfect tool for getting into those hard-to-reach areas.
Why this works: The bristles of a toothbrush can effectively dislodge trapped food particles and grime from the textured surface of the Scrub Daddy.
What you’ll need:
* Your Scrub Daddy
* An old toothbrush
* Dish soap (optional)
Step-by-step instructions:
1. Apply Soap (Optional): If you want, you can apply a small amount of dish soap to the toothbrush.
2. Scrub the Sponge: Use the toothbrush to scrub the entire surface of the Scrub Daddy, paying special attention to the eyes, mouth, and any other areas where grime tends to accumulate.
3. Rinse Thoroughly: Rinse the Scrub Daddy thoroughly under running water to remove any dislodged debris and soap residue.
4. Air Dry: Let your Scrub Daddy air dry completely before using it again.
Hack #7: The Extend-Your-Life Rotation System
To make your Scrub Daddy last even longer, consider using a rotation system.
Why this works: Rotating between multiple Scrub Daddies allows each sponge to dry completely between uses, preventing bacteria growth and extending its lifespan.
What you’ll need:
* At least two Scrub Daddies
Step-by-step instructions:
1. Label Your Sponges (Optional): You can label your Scrub Daddies with numbers or colors to easily keep track of them.
2. Alternate Daily: Use one Scrub Daddy for a day or two, then switch to the other one.
3. Allow to Dry Completely: Make sure each Scrub Daddy dries completely before using it again. This will help prevent bacteria growth and extend
Conclusion
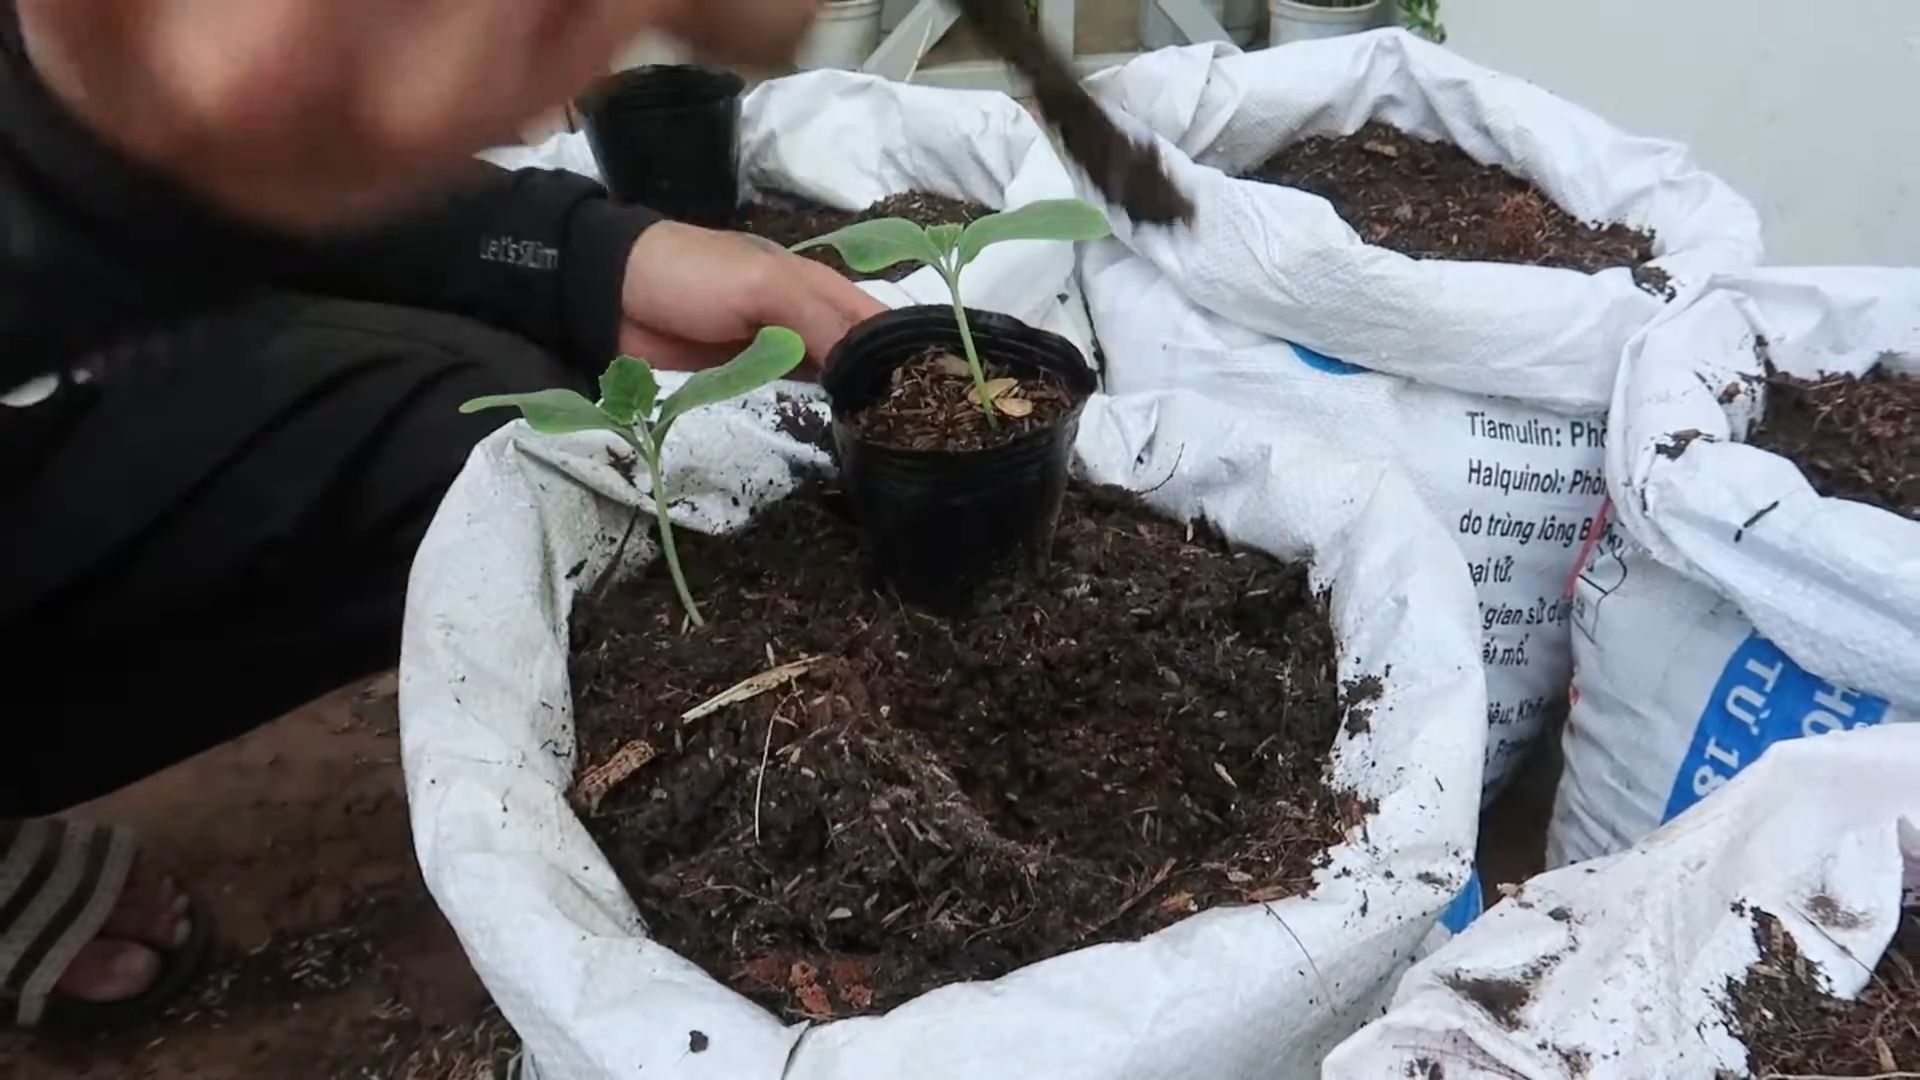
So, there you have it! Growing butternut squash at home is not only achievable, but it’s also incredibly rewarding. From the satisfaction of nurturing a tiny seed into a sprawling vine laden with delicious, homegrown squash to the unparalleled flavor that surpasses anything you can find in a grocery store, the benefits are undeniable. We’ve walked you through the entire process, from selecting the right seeds and preparing your garden to harvesting your bountiful crop.
But why is this DIY trick a must-try? Beyond the obvious advantages of fresh, organic produce, growing your own butternut squash offers a unique connection to nature. You’ll gain a deeper appreciation for the effort that goes into producing the food we often take for granted. Plus, it’s a fantastic way to get some exercise, relieve stress, and spend time outdoors. And let’s not forget the bragging rights that come with serving a dish made with ingredients you cultivated yourself!
Consider these variations to personalize your butternut squash growing experience:
* Vertical Gardening: If you’re short on space, train your butternut squash vines to grow up a trellis or fence. This not only saves space but also improves air circulation, reducing the risk of disease.
* Companion Planting: Plant beneficial companions like marigolds, nasturtiums, or basil near your butternut squash to deter pests and attract pollinators.
* Heirloom Varieties: Explore different heirloom butternut squash varieties for unique flavors and textures. Some popular options include ‘Waltham Butternut,’ ‘Butterscotch PMR,’ and ‘Early Butternut.’
* Seed Saving: Once you’ve successfully grown your butternut squash, consider saving the seeds from your best fruits to plant next year. This is a great way to preserve genetic diversity and adapt your squash to your local climate.
Ultimately, the best way to discover the joys of growing butternut squash is to simply dive in and give it a try. Don’t be afraid to experiment, learn from your mistakes, and adapt your approach as needed. Every garden is different, and what works for one person may not work for another.
We are confident that with a little patience and effort, you’ll be harvesting your own delicious butternut squash in no time. We encourage you to embark on this gardening adventure and experience the satisfaction of growing your own food.
Now, we want to hear from you! Have you tried growing butternut squash at home before? What challenges did you face, and what tips would you share with other aspiring gardeners? Share your experiences, photos, and questions in the comments below. Let’s create a community of butternut squash enthusiasts and learn from each other. Happy gardening!
Frequently Asked Questions (FAQ)
Q: How much space does a butternut squash plant need?
A: Butternut squash plants are vining plants that require a significant amount of space to spread. Ideally, each plant should have at least 4 to 6 feet of space in all directions. If you’re growing them in rows, space the rows about 6 to 8 feet apart. If space is limited, consider growing them vertically on a trellis or fence. This will not only save space but also improve air circulation and reduce the risk of fungal diseases. Remember to provide sturdy support for the heavy fruits as they develop.
Q: When is the best time to plant butternut squash?
A: The best time to plant butternut squash depends on your local climate. Butternut squash requires a long growing season of about 90 to 100 days. In general, you should plant butternut squash seeds or transplants after the last expected frost in spring, when the soil has warmed to at least 60°F (15°C). You can start seeds indoors about 3 to 4 weeks before the last frost to get a head start. If you live in a warmer climate with a longer growing season, you can plant butternut squash directly in the ground in late spring or early summer.
Q: How often should I water my butternut squash plants?
A: Butternut squash plants need consistent moisture, especially during hot, dry weather. Water deeply and regularly, providing about 1 to 1.5 inches of water per week. Water at the base of the plants to avoid wetting the foliage, which can increase the risk of fungal diseases. Mulching around the plants with straw or wood chips can help retain moisture in the soil and suppress weeds. Check the soil moisture regularly and adjust your watering schedule as needed, depending on the weather conditions.
Q: What kind of fertilizer should I use for butternut squash?
A: Butternut squash plants are heavy feeders and benefit from regular fertilization. Before planting, amend the soil with compost or well-rotted manure to provide a good foundation of nutrients. During the growing season, fertilize every 2 to 3 weeks with a balanced fertilizer (e.g., 10-10-10) or a fertilizer specifically formulated for vegetables. You can also use organic fertilizers like fish emulsion or seaweed extract. Avoid over-fertilizing, as this can lead to excessive foliage growth and reduced fruit production.
Q: How do I know when my butternut squash is ripe?
A: Determining when a butternut squash is ripe is crucial for optimal flavor and storage. Look for these signs:
* Color: The skin should be a deep tan or beige color, with no green patches.
* Hardness: The skin should be hard and resistant to scratching. You shouldn’t be able to easily pierce it with your fingernail.
* Stem: The stem should be dry, hard, and corky.
* Sound: When you tap the squash, it should sound hollow.
Once your butternut squash is ripe, cut it from the vine, leaving a few inches of stem attached. This will help prevent rot and extend its storage life.
Q: How do I store butternut squash?
A: Proper storage is essential for preserving the quality of your homegrown butternut squash. Store ripe butternut squash in a cool, dry, and well-ventilated place, such as a basement or pantry. The ideal storage temperature is between 50°F and 55°F (10°C and 13°C). Avoid storing butternut squash in the refrigerator, as this can cause chilling injury and affect its flavor and texture. When stored properly, butternut squash can last for several months. Check the squash regularly for signs of spoilage, such as soft spots or mold.
Q: What are some common pests and diseases that affect butternut squash?
A: Butternut squash plants can be susceptible to various pests and diseases, including:
* Squash bugs: These pests suck sap from the leaves and stems, causing wilting and stunted growth.
* Squash vine borers: These insects bore into the stems of the plants, causing them to collapse and die.
* Powdery mildew: This fungal disease causes a white, powdery coating on the leaves.
* Downy mildew: This fungal disease causes yellow spots on the upper surface of the leaves and a grayish-purple fuzz on the underside.
To prevent pests and diseases, practice good garden hygiene, such as removing plant debris and weeds. You can also use organic pest control methods, such as insecticidal soap or neem oil. For fungal diseases, improve air circulation and avoid overhead watering.
Q: Can I grow butternut squash in containers?
A: While butternut squash plants are typically grown in the ground, it is possible to grow them in containers, especially if you choose a compact variety. Select a large container, at least 20 gallons in size, with good drainage. Use a high-quality potting mix and provide a trellis or other support for the vines to climb. Water and fertilize regularly, and be prepared to hand-pollinate the flowers if necessary. Container-grown butternut squash plants may not produce as many fruits as those grown in the ground, but they can still provide a satisfying harvest.
Q: How do I hand-pollinate butternut squash flowers?
A: Butternut squash plants have separate male and female flowers. If you’re not seeing many fruits developing, it may be due to poor pollination. You can hand-pollinate the flowers to increase fruit set. To do this, identify the male and female flowers. The male flowers have a long, slender stem, while the female flowers have a small, immature fruit at the base. In the early morning, use a small paintbrush or cotton swab to collect pollen from the male flower and transfer it to the stigma of the female flower. Repeat this process for several days to ensure pollination.

Leave a Comment