
Shaving foam cleaning hacks – who knew something you use to get a smooth shave could also be your secret weapon for a sparkling clean home? I’m always on the lookout for clever, budget-friendly ways to tackle household chores, and let me tell you, this one is a game-changer! For generations, folks have relied on elbow grease and harsh chemicals to keep their homes tidy, but now, we’re uncovering the hidden potential of everyday items.
Think about it: shaving foam is designed to lift and lubricate, making it perfect for loosening grime and dirt. It’s like a gentle, foamy hug for your surfaces! But why is this DIY trick so essential? Well, for starters, it’s incredibly cost-effective. You’re likely already buying shaving foam, so you’re not adding another expensive cleaning product to your shopping list. More importantly, many commercial cleaners are packed with harsh chemicals that can be harmful to your health and the environment. Shaving foam cleaning hacks offer a safer, gentler alternative, especially if you have kids or pets.
In this article, I’m going to share my favorite shaving foam cleaning hacks that will revolutionize your cleaning routine. From tackling stubborn stains on carpets to making your bathroom sparkle, you’ll be amazed at the versatility of this humble product. Get ready to ditch the harsh chemicals and embrace a cleaner, greener, and more affordable way to keep your home looking its best!

Shaving Foam: Your Unexpected Cleaning Superhero!
Okay, friends, let’s talk about shaving foam. Yes, you read that right! That fluffy stuff you (or someone you know) uses to get a smooth shave is actually a surprisingly versatile cleaning agent. I know, I know, it sounds crazy, but trust me on this one. I’ve been experimenting with shaving foam cleaning hacks for a while now, and I’m here to share my favorite tips and tricks with you. Get ready to be amazed!
Why Shaving Foam?
Before we dive into the how-to, let’s quickly address the “why.” Shaving foam is effective because of its unique properties:
* It’s a gentle cleaner: Most shaving foams are designed to be gentle on the skin, which means they’re less likely to damage delicate surfaces.
* It’s foamy and clings: The foam consistency allows it to cling to surfaces, giving it time to break down dirt and grime.
* It contains surfactants: Surfactants are ingredients that help to lift dirt and oil away from surfaces.
* It’s readily available and affordable: Let’s be honest, most of us have a can of shaving foam lurking somewhere in the bathroom. Plus, it’s much cheaper than many specialized cleaning products.
Cleaning Your Bathroom Mirror with Shaving Foam
Say goodbye to streaks and fog! This is probably the most well-known shaving foam hack, and for good reason – it works like a charm.
1. Gather your supplies: You’ll need a can of shaving foam (any kind will do, but I prefer the plain, unscented variety), a clean, dry microfiber cloth, and a spray bottle filled with water (optional).
2. Apply the shaving foam: Spray a generous amount of shaving foam directly onto the mirror. Don’t be shy! Cover the entire surface.
3. Spread it around: Use your hand or the microfiber cloth to spread the foam evenly over the mirror.
4. Let it sit: Allow the shaving foam to sit on the mirror for a few minutes (around 5-10 minutes is ideal). This gives it time to work its magic and break down any grime or buildup.
5. Wipe it clean: Using a clean, dry microfiber cloth, wipe away the shaving foam. Use circular motions to ensure you’re removing all the residue.
6. Buff to a shine: If you notice any streaks, buff the mirror with a clean, dry section of the microfiber cloth.
7. (Optional) Lightly mist with water: For an extra-sparkly finish, lightly mist the mirror with water and then buff it dry with a clean microfiber cloth. This helps to remove any lingering residue and leaves your mirror gleaming.
Bonus Tip: This trick also works wonders on bathroom windows and shower doors! It helps to prevent fogging and keeps them looking clean and clear.
Removing Carpet Stains with Shaving Foam
Accidents happen, and carpet stains are a fact of life. But don’t despair! Shaving foam can come to the rescue.
1. Act fast: The sooner you treat the stain, the better your chances of removing it completely.
2. Blot the stain: Use a clean cloth or paper towel to blot up as much of the stain as possible. Avoid rubbing, as this can spread the stain and make it harder to remove.
3. Apply shaving foam: Apply a generous amount of shaving foam directly onto the stain. Make sure the stain is completely covered.
4. Let it sit: Allow the shaving foam to sit on the stain for at least 30 minutes, or even longer for stubborn stains. I sometimes leave it overnight for really tough stains.
5. Blot and scrub: After the shaving foam has had time to work, use a clean, damp cloth to blot and gently scrub the stain. Work from the outside of the stain towards the center to prevent it from spreading.
6. Rinse with water: Use a clean, damp cloth to rinse the area with water. Be sure to remove all traces of the shaving foam.
7. Blot dry: Use a clean, dry cloth to blot the area dry.
8. Vacuum: Once the area is completely dry, vacuum it to restore the carpet’s texture.
Important Note: Always test the shaving foam on an inconspicuous area of the carpet first to ensure it doesn’t cause any discoloration or damage.
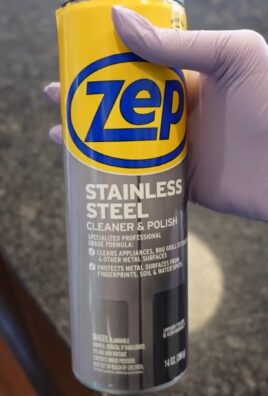
Cleaning Stainless Steel Appliances with Shaving Foam
Fingerprints and smudges on stainless steel appliances are a constant battle. But shaving foam can help you win the war!
1. Gather your supplies: You’ll need a can of shaving foam, a clean, soft cloth, and a spray bottle filled with water (optional).
2. Apply the shaving foam: Spray a small amount of shaving foam onto the stainless steel surface.
3. Spread it around: Use the soft cloth to spread the foam evenly over the surface.
4. Wipe clean: Wipe the surface clean with the soft cloth, following the grain of the stainless steel.
5. (Optional) Rinse with water: If you notice any residue, lightly rinse the surface with water and then dry it with a clean cloth.
6. Buff to a shine: Buff the surface with a clean, dry cloth to remove any streaks and leave it sparkling.
Pro Tip: This works great on refrigerators, dishwashers, ovens, and even stainless steel sinks!
Cleaning Jewelry with Shaving Foam
Yes, you can even use shaving foam to clean your jewelry! It’s a gentle and effective way to remove dirt and grime without damaging delicate stones or metals.
1. Gather your supplies: You’ll need a can of shaving foam, a soft-bristled toothbrush, and a bowl of warm water.
2. Apply the shaving foam: Apply a small amount of shaving foam to your jewelry.
3. Gently scrub: Use the soft-bristled toothbrush to gently scrub the jewelry, paying attention to any crevices or hard-to-reach areas.
4. Rinse with warm water: Rinse the jewelry thoroughly with warm water to remove all traces of the shaving foam.
5. Dry with a soft cloth: Dry the jewelry with a soft, lint-free cloth.
Important Note: This method is generally safe for most types of jewelry, but avoid using it on delicate or porous stones like pearls or opals.
Cleaning Upholstery with Shaving Foam
Similar to carpet cleaning, shaving foam can also be used to spot clean upholstery.
1. Test First: As always, test the shaving foam on a hidden area of the upholstery to ensure it doesn’t cause any discoloration or damage.
2. Apply to Stain: Apply a small amount of shaving foam directly onto the stain.
3. Gentle Rub: Gently rub the foam into the stain using a clean, damp cloth. Avoid excessive scrubbing.
4. Let it Sit: Allow the foam to sit for about 15-20 minutes.
5. Wipe Clean: Wipe away the foam with a clean, damp cloth.
6. Dry: Blot the area dry with a clean, dry cloth. You can use a fan to speed up the drying process.
Removing Sticky Residue with Shaving Foam
Those pesky stickers that leave behind a sticky residue? Shaving foam to the rescue!
1. Apply Shaving Foam: Apply a generous amount of shaving foam to the sticky residue.
2. Let it Soak: Allow the foam to soak for about 10-15 minutes.
3. Wipe Away: Wipe away the foam and the sticky residue with a clean cloth. You may need to repeat this process for stubborn residue.
Cleaning Leather Shoes with Shaving Foam
Keep your leather shoes looking their best with this simple hack.
1. Apply Shaving Foam: Apply a small amount of shaving foam to a clean cloth.
2. Wipe Shoes: Gently wipe the leather shoes with the cloth, paying attention to any scuffs or dirt.
3. Buff: Buff the shoes with a clean, dry cloth to remove any excess foam and restore the shine.
Cleaning Your Oven Door with Shaving Foam
This is a great way to loosen up grease and grime on your oven door without harsh chemicals.
1. Apply Shaving Foam: Cover the inside of your oven door with a thick layer of shaving foam.
2. Let it Sit: Let the foam sit for several hours, or even overnight.
3. Wipe Clean: Wipe away the foam and the loosened grime with a damp cloth. You may need to scrub a bit for stubborn spots.
A Few Extra Tips and Precautions:
* Always test in an inconspicuous area first: This is especially important when cleaning delicate surfaces or fabrics.
*
Conclusion
So, there you have it! Shaving foam, that humble bathroom staple, is revealed as a surprisingly versatile and effective cleaning agent. We’ve explored how it can tackle everything from stubborn carpet stains to grimy bathroom mirrors, and even bring a sparkle back to your stainless steel appliances. But why is this DIY trick a must-try?
Firstly, it’s incredibly accessible. Most households already have a can of shaving foam tucked away, making it a readily available and cost-effective cleaning solution. No need to rush out and buy expensive, specialized cleaners filled with harsh chemicals. Secondly, it’s gentle yet effective. The foaming action lifts dirt and grime without being overly abrasive, making it safe for a variety of surfaces. And thirdly, let’s be honest, it’s a little bit fun! Who wouldn’t enjoy spraying a cloud of foam and watching it work its magic?
But the possibilities don’t stop there. Feel free to experiment with different types of shaving foam. While the classic, non-gel variety is generally recommended, you might find that a moisturizing shaving foam works wonders on leather surfaces, or that a sensitive skin formula is ideal for delicate fabrics. You can also add a few drops of your favorite essential oil to the foam for a pleasant scent boost. Lavender, lemon, or tea tree oil are all great options that also offer additional cleaning and disinfecting properties. For particularly stubborn stains, try letting the shaving foam sit for a longer period of time before wiping it away. You can even use a soft-bristled brush to gently scrub the area for enhanced cleaning power.
We’ve covered a lot of ground, from using shaving foam to clean upholstery to reviving your jewelry. The key takeaway is that this simple product offers a surprisingly effective and affordable alternative to many commercial cleaners. It’s a fantastic way to reduce your reliance on harsh chemicals and embrace a more eco-friendly cleaning routine.
Now it’s your turn! We highly encourage you to give these shaving foam cleaning hacks a try. You might be surprised at just how effective and versatile this unexpected cleaning agent can be. Don’t be afraid to experiment and discover new ways to incorporate shaving foam into your cleaning routine.
And most importantly, we want to hear about your experiences! Share your before-and-after photos, your favorite shaving foam cleaning tips, and any variations you’ve discovered in the comments below. Let’s build a community of shaving foam cleaning enthusiasts and unlock even more of its hidden potential! Your insights could help others discover a new, easier, and more affordable way to keep their homes sparkling clean. So go ahead, grab that can of shaving foam, and get cleaning! We can’t wait to see what you discover.
Frequently Asked Questions (FAQ)
What type of shaving foam works best for cleaning?
Generally, the classic, non-gel shaving foam is recommended for most cleaning tasks. This type of foam is typically less expensive and contains fewer additives that could potentially leave a residue. Avoid using shaving gels, as they tend to be stickier and may not clean as effectively. Look for a basic, white shaving foam for the best results. However, as mentioned above, experimenting with different types can sometimes yield surprising results depending on the surface you’re cleaning. For example, a moisturizing shaving foam might be beneficial for cleaning leather, while a sensitive skin formula could be gentler on delicate fabrics.
Can I use shaving cream instead of shaving foam?
While shaving cream and shaving foam are similar, shaving foam is generally preferred for cleaning. Shaving cream tends to be thicker and richer, which can make it more difficult to rinse away completely. This can leave a sticky residue on the surface you’re cleaning. Shaving foam, on the other hand, is lighter and airier, making it easier to apply and rinse off. This reduces the risk of residue buildup and ensures a cleaner finish. If you only have shaving cream on hand, you can try using it sparingly and rinsing thoroughly, but shaving foam is the better option for most cleaning tasks.
Is shaving foam safe to use on all surfaces?
While shaving foam is generally gentle, it’s always a good idea to test it on an inconspicuous area first, especially on delicate or sensitive surfaces. This will help you ensure that it doesn’t cause any discoloration or damage. Avoid using shaving foam on surfaces that are easily damaged by moisture, such as unfinished wood or electronics. For delicate fabrics, consider using a sensitive skin shaving foam to minimize the risk of irritation. Always rinse the surface thoroughly after cleaning with shaving foam to remove any residue.
How long should I leave the shaving foam on before wiping it off?
The amount of time you should leave the shaving foam on depends on the type of stain or grime you’re trying to remove. For light cleaning, such as wiping down mirrors or stainless steel, a few seconds may be sufficient. For more stubborn stains, such as carpet stains or soap scum, you may need to let the shaving foam sit for several minutes, or even up to an hour. This will give the foam time to penetrate the stain and loosen the dirt and grime. Always check the surface periodically to ensure that the shaving foam isn’t causing any damage.
Will shaving foam damage my carpet?
Shaving foam is generally safe to use on most carpets, but it’s always a good idea to test it on a hidden area first to ensure that it doesn’t cause any discoloration or damage. Apply a small amount of shaving foam to the test area and let it sit for a few minutes. Then, blot it up with a clean cloth and check for any changes in the carpet’s color or texture. If the test area looks fine, you can proceed to use shaving foam on the stain. Be sure to blot the area thoroughly with a clean cloth after cleaning to remove any residue.
Can I use shaving foam to clean leather?
Yes, shaving foam can be used to clean leather, but it’s important to use a moisturizing shaving foam and to test it on an inconspicuous area first. Apply a small amount of shaving foam to the test area and gently rub it in with a soft cloth. Then, wipe away the excess foam with a clean, damp cloth. If the test area looks fine, you can proceed to clean the rest of the leather surface. Be sure to condition the leather after cleaning to prevent it from drying out.
Does shaving foam disinfect as well as clean?
While shaving foam can help to remove dirt and grime, it doesn’t necessarily disinfect surfaces. If you want to disinfect a surface, you’ll need to use a separate disinfectant cleaner. However, you can add a few drops of tea tree oil to the shaving foam for added disinfecting properties. Tea tree oil is a natural antiseptic and antifungal agent that can help to kill germs and bacteria.
How do I remove shaving foam residue?
To remove shaving foam residue, simply wipe the surface with a clean, damp cloth. Be sure to rinse the cloth frequently to remove any remaining foam. You may need to repeat this process several times to remove all of the residue. For stubborn residue, you can try using a solution of vinegar and water. Mix equal parts vinegar and water and apply it to the surface with a clean cloth. Then, wipe away the solution with a clean, damp cloth.
Can I use shaving foam to clean my car interior?
Yes, shaving foam can be used to clean your car interior, but it’s important to test it on an inconspicuous area first. It works well on upholstery and carpets. Avoid using it on leather seats unless you use a moisturizing shaving foam and condition the leather afterward. Be sure to wipe away any residue thoroughly to prevent staining.
Where can I find more shaving foam cleaning hacks?
Keep an eye on our blog for more tips and tricks! We’re always exploring new and innovative ways to use everyday household items for cleaning. And don’t forget to share your own discoveries in the comments below! We love hearing from our readers and learning about their experiences with shaving foam cleaning.

Leave a Comment