
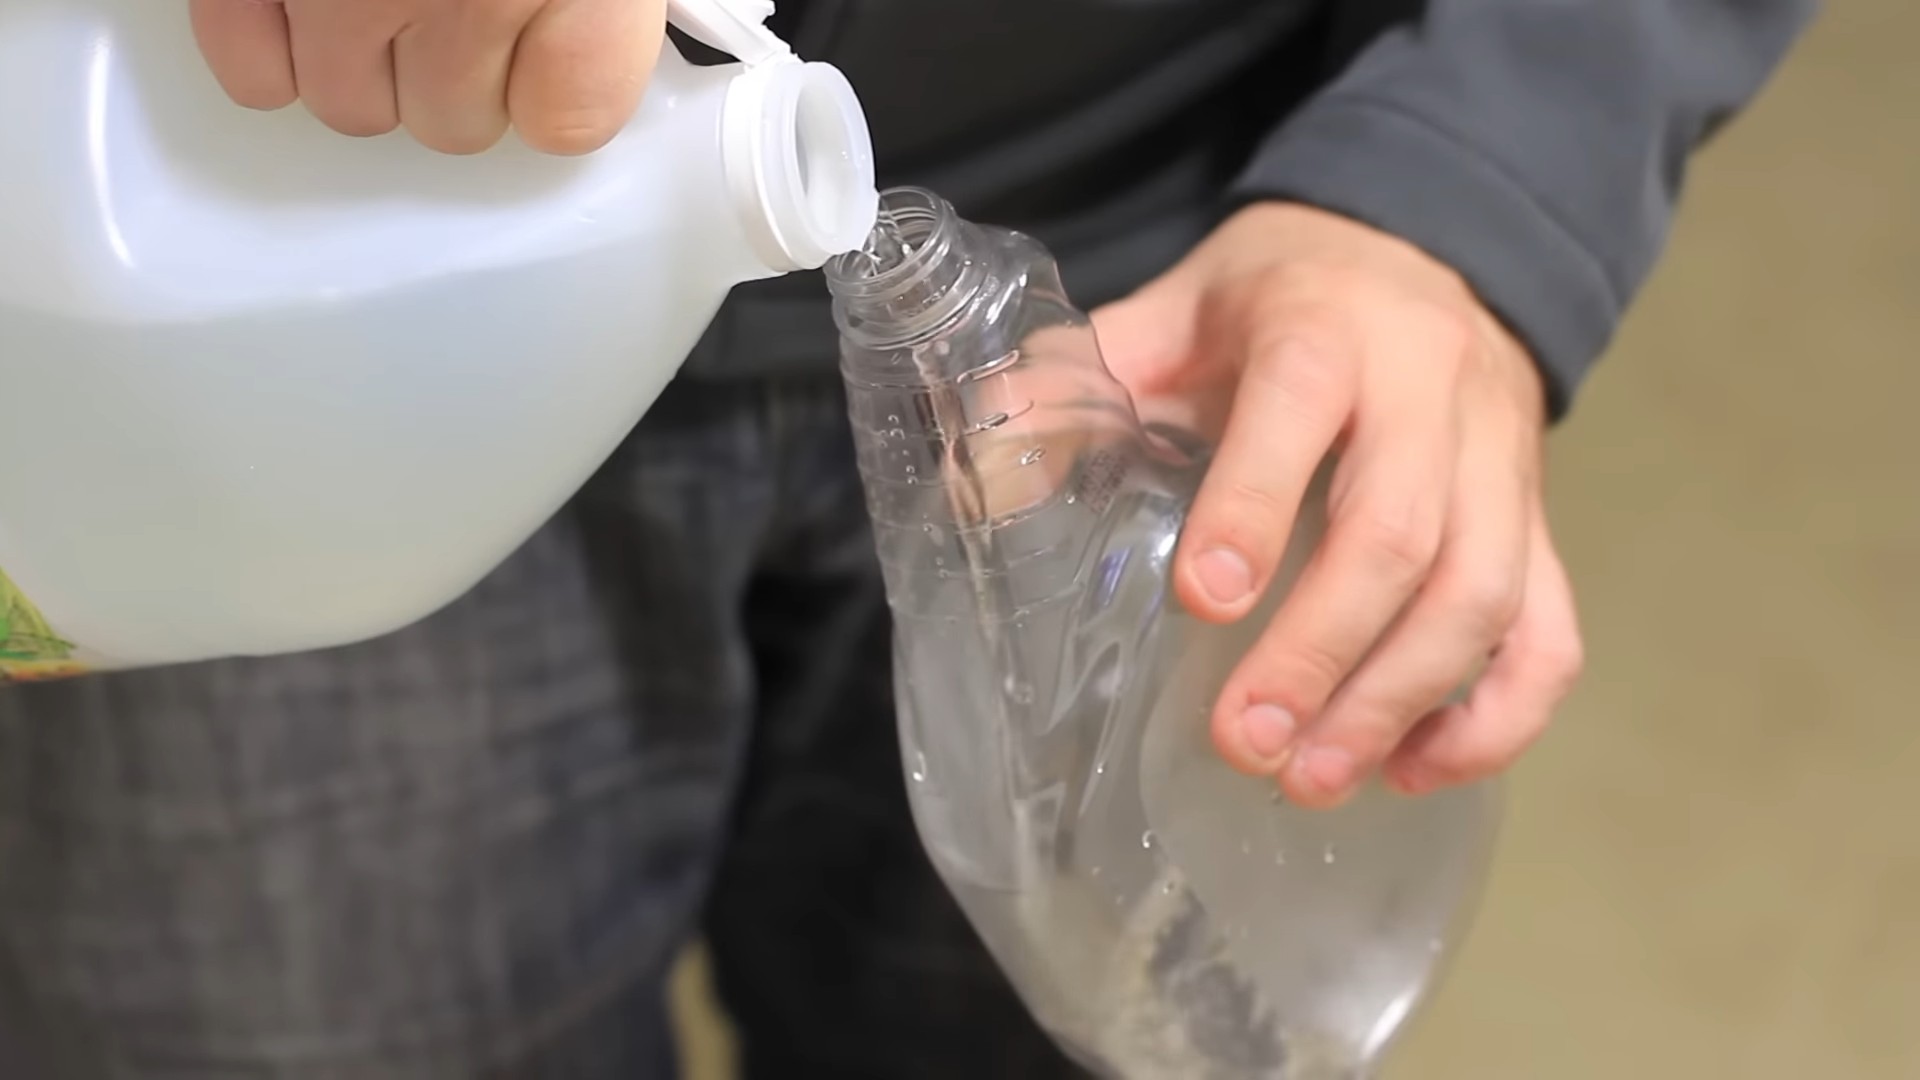
Vinegar cleaning tips – who knew such a simple pantry staple could unlock a world of sparkling clean possibilities? I’m always on the lookout for natural, effective, and budget-friendly ways to keep my home fresh, and vinegar has consistently proven to be a champion in that arena. For generations, vinegar has been a go-to cleaning agent, passed down through families as a secret weapon against grime and odors. Think about it – our grandmothers likely relied on vinegar long before fancy, chemical-laden cleaners lined supermarket shelves!
But why is vinegar still so relevant today? Well, in a world increasingly concerned with sustainability and reducing our exposure to harsh chemicals, vinegar offers a safe and powerful alternative. Plus, let’s be honest, who doesn’t love saving money? This DIY article is packed with vinegar cleaning tips that will not only make your home shine but also lighten the load on your wallet. From tackling stubborn stains to deodorizing tricky spaces, I’m going to share my favorite hacks that will transform the way you clean. Get ready to ditch the harsh chemicals and embrace the power of vinegar!
Growing Iceberg Lettuce at Home: A DIY Guide
Okay, lettuce lovers! So you’re ready to ditch the grocery store iceberg and grow your own crisp, refreshing heads at home? Awesome! It’s easier than you think, and the taste is just so much better. I’m going to walk you through everything you need to know, from starting seeds to harvesting your bounty. Let’s get started!
Choosing the Right Variety and Timing
First things first, let’s talk about variety. While we’re focusing on iceberg, there are actually a few different iceberg varieties you can choose from. Some are more heat-tolerant than others, so do a little research based on your local climate. ‘Great Lakes’ is a classic choice, known for its large, tightly packed heads. ‘Ithaca’ is another popular option, offering good disease resistance.
Timing is also crucial. Iceberg lettuce is a cool-season crop, meaning it thrives in temperatures between 60°F and 70°F (15°C and 21°C). Hot weather will cause it to bolt (go to seed), making the leaves bitter.
* For a spring harvest: Start seeds indoors 6-8 weeks before the last expected frost.
* For a fall harvest: Start seeds outdoors in late summer, about 6-8 weeks before the first expected frost.
Starting Seeds Indoors (Optional, but Recommended)
Starting seeds indoors gives you a head start, especially if you live in an area with a short growing season. Here’s how I do it:
1. Gather Your Supplies: You’ll need seed starting trays or small pots, seed starting mix (not regular potting soil!), iceberg lettuce seeds, a spray bottle, and a grow light (optional, but helpful).
2. Prepare the Seed Starting Mix: Moisten the seed starting mix with water until it’s damp but not soggy.
3. Sow the Seeds: Fill the trays or pots with the moistened mix. Sow 2-3 seeds per cell or pot, about ¼ inch deep. Gently cover the seeds with more mix.
4. Water Gently: Use a spray bottle to mist the surface of the soil. Avoid overwatering, which can cause the seeds to rot.
5. Provide Light and Warmth: Place the trays or pots in a warm location (around 70°F or 21°C). If you’re using a grow light, position it a few inches above the seedlings. If not, place them near a sunny window.
6. Keep the Soil Moist: Check the soil daily and mist with water as needed to keep it consistently moist.
7. Thin the Seedlings: Once the seedlings have their first true leaves (the second set of leaves), thin them to one seedling per cell or pot. Snip off the weaker seedlings at the soil line with scissors. Don’t pull them out, as this can disturb the roots of the remaining seedling.
Preparing the Garden Bed
While your seedlings are growing indoors, it’s time to prepare the garden bed. Iceberg lettuce needs well-drained soil that’s rich in organic matter.
1. Choose a Sunny Location: Iceberg lettuce needs at least 6 hours of sunlight per day.
2. Amend the Soil: Dig in plenty of compost or well-rotted manure to improve the soil’s drainage and fertility. I usually add a couple of inches of compost to my beds.
3. Check the Soil pH: Iceberg lettuce prefers a soil pH between 6.0 and 7.0. You can test your soil with a soil testing kit. If the pH is too low (acidic), add lime. If it’s too high (alkaline), add sulfur.
4. Create Raised Beds (Optional): Raised beds can improve drainage and warm up the soil faster in the spring.
5. Remove Weeds: Make sure to remove all weeds from the garden bed before planting. Weeds compete with lettuce for nutrients and water.
Transplanting Seedlings (or Direct Sowing)
Once the seedlings have 4-6 true leaves and the weather is consistently warm enough (no danger of frost), it’s time to transplant them into the garden. If you’re direct sowing, follow step 3 and 4.
1. Harden Off the Seedlings: Before transplanting, you need to harden off the seedlings. This means gradually exposing them to outdoor conditions over a period of 7-10 days. Start by placing them outside in a sheltered location for a few hours each day, gradually increasing the amount of time they spend outdoors.
2. Choose a Cloudy Day: Transplanting on a cloudy day will help prevent the seedlings from getting stressed.
3. Space the Seedlings: Space the seedlings 12-18 inches apart in rows that are 18-24 inches apart. This gives them enough room to grow into full-sized heads.
4. Plant Carefully: Dig a hole that’s slightly larger than the root ball of the seedling. Gently remove the seedling from its tray or pot and place it in the hole. Make sure the top of the root ball is level with the surrounding soil.
5. Water Thoroughly: Water the seedlings thoroughly after transplanting.
6. Mulch: Apply a layer of mulch around the seedlings to help retain moisture, suppress weeds, and keep the soil cool. Straw, shredded leaves, or wood chips work well.
Caring for Your Iceberg Lettuce
Now that your lettuce is in the ground, it’s time to provide it with the care it needs to thrive.
1. Water Regularly: Iceberg lettuce needs consistent moisture to grow well. Water deeply whenever the top inch of soil feels dry. Avoid overhead watering, which can promote disease. Drip irrigation or soaker hoses are ideal.
2. Fertilize Lightly: Iceberg lettuce is a heavy feeder, but it doesn’t need a lot of fertilizer. Apply a balanced fertilizer (like 10-10-10) according to the package directions. You can also side-dress with compost tea or fish emulsion every few weeks.
3. Control Weeds: Keep the garden bed free of weeds. Hand-pull weeds regularly or use a hoe to cultivate the soil.
4. Protect from Pests: Common pests of iceberg lettuce include aphids, slugs, and snails. Inspect your plants regularly and take action if you see any signs of infestation. You can use insecticidal soap for aphids, and beer traps or copper tape for slugs and snails.
5. Watch for Diseases: Iceberg lettuce can be susceptible to diseases like downy mildew and bottom rot. To prevent these diseases, provide good air circulation, avoid overhead watering, and remove any infected leaves promptly.
Harvesting Your Iceberg Lettuce
The moment you’ve been waiting for! Iceberg lettuce is typically ready to harvest 70-80 days after planting.
1. Check for Firmness: The head should feel firm and compact when you squeeze it gently.
2. Cut at the Base: Use a sharp knife to cut the head of lettuce at the base of the plant.
3. Harvest in the Morning: Harvest in the morning, when the leaves are crisp and cool.
4. Store Properly: Store the harvested lettuce in the refrigerator in a plastic bag or container. It will keep for about a week.
Troubleshooting
Even with the best care, you might encounter some problems along the way. Here are a few common issues and how to address them:
* Bolting (Going to Seed): This happens when the weather gets too hot. The leaves become bitter and the plant starts to produce a flower stalk. To prevent bolting, plant your lettuce at the right time of year and provide shade during hot weather.
* Tipburn: This is a condition where the edges of the leaves turn brown and die. It’s usually caused by calcium deficiency or inconsistent watering. To prevent tipburn, make sure your soil is rich in calcium and water regularly.
* Slugs and Snails: These pests can cause significant damage to lettuce leaves. Use beer traps, copper tape, or diatomaceous earth to control them.
* Aphids: These tiny insects suck the sap from lettuce leaves, causing them to become distorted and yellow. Use insecticidal soap or neem oil to control aphids.
Enjoying Your Homegrown Iceberg Lettuce
Now for the best part – enjoying the fruits (or rather, vegetables) of your labor! Homegrown iceberg lettuce is so much more flavorful and crisp than store-bought. Use it in salads, sandwiches, wraps, or as a garnish. You can even grill it for a unique and delicious side dish.
Growing your own iceberg lettuce is a rewarding experience. With a little bit of planning and effort, you can enjoy fresh, delicious lettuce all season long. Happy gardening!
Conclusion
So, there you have it! Embracing the power of vinegar for cleaning isn’t just a trend; it’s a return to simpler, more effective, and environmentally conscious methods. We’ve explored how this humble kitchen staple can transform your cleaning routine, tackling everything from stubborn grime to lingering odors. But why is this DIY trick a must-try?
First and foremost, it’s about effectiveness. Vinegar’s acetic acid is a natural powerhouse, cutting through grease, dissolving mineral deposits, and disinfecting surfaces with surprising efficiency. Forget harsh chemicals and their lingering fumes; vinegar offers a clean that’s both powerful and gentle.
Secondly, it’s about cost savings. A bottle of vinegar is significantly cheaper than most specialized cleaning products, making it a budget-friendly alternative that doesn’t compromise on results. Think of all the money you’ll save by replacing multiple cleaners with this single, versatile solution!
Thirdly, it’s about environmental responsibility. By choosing vinegar, you’re reducing your reliance on chemical-laden products that can harm the environment. It’s a small change that can make a big difference in creating a healthier planet for future generations.
But the beauty of vinegar cleaning lies in its adaptability. Feel free to experiment with different variations to suit your specific needs. For a more potent cleaning solution, try infusing your vinegar with citrus peels for a refreshing scent and added cleaning power. Lemon, orange, or grapefruit peels work wonders! Simply soak the peels in vinegar for a few weeks, then strain and use as usual.
For tackling tough stains, create a paste of vinegar and baking soda. This dynamic duo fizzes and foams, lifting dirt and grime from even the most stubborn surfaces. Remember to test this mixture on an inconspicuous area first, especially on delicate materials.
And don’t forget the power of essential oils! Adding a few drops of your favorite essential oil to your vinegar cleaning solution can not only enhance the scent but also provide additional antibacterial or antiviral benefits. Lavender, tea tree, and eucalyptus are all excellent choices.
Ultimately, the best way to discover the magic of vinegar cleaning is to try it for yourself. Start with a simple task, like cleaning your kitchen counters or descaling your showerhead. Observe the results, experiment with different variations, and find what works best for you.
We’re confident that once you experience the effectiveness, affordability, and eco-friendliness of vinegar cleaning, you’ll never look back. It’s a simple yet profound way to transform your home and your cleaning routine.
So, ditch the harsh chemicals, embrace the power of vinegar, and join the growing community of eco-conscious cleaners. We encourage you to try these DIY tricks and share your experiences with us! Let us know what worked best for you, what challenges you encountered, and any creative variations you discovered. Together, we can unlock the full potential of this amazing natural cleaner and create a cleaner, healthier world, one vinegar-soaked sponge at a time. Let’s make **vinegar cleaning** the new normal!
Frequently Asked Questions (FAQs)
Is vinegar safe to use on all surfaces?
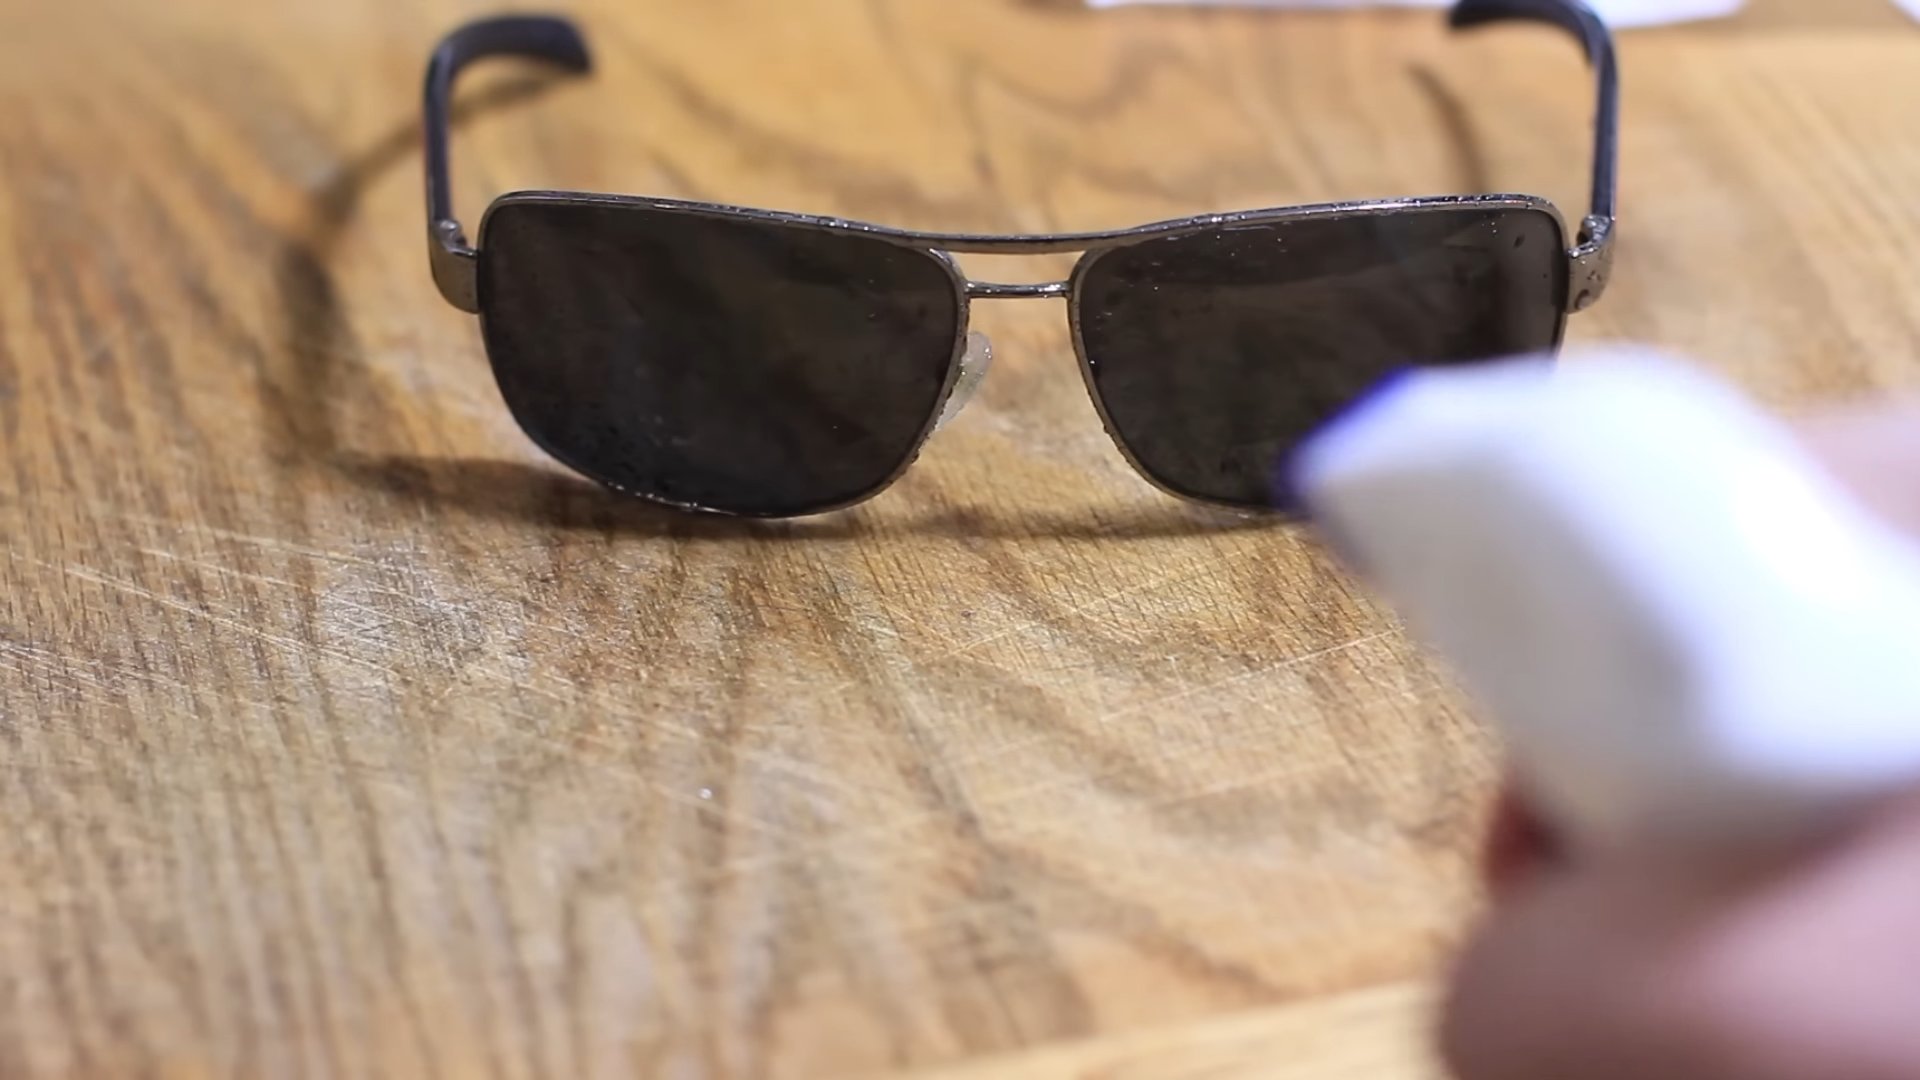
While vinegar is a versatile cleaner, it’s not suitable for all surfaces. Avoid using it on natural stone surfaces like marble, granite, and limestone, as the acidity can etch and damage them. It’s also best to avoid using vinegar on waxed wood furniture, as it can strip the wax finish. Always test vinegar on an inconspicuous area before applying it to a larger surface, especially if you’re unsure about its compatibility. For delicate surfaces, dilute the vinegar with water to reduce its acidity.
What type of vinegar is best for cleaning?
Distilled white vinegar is the most commonly recommended type of vinegar for cleaning. It’s inexpensive, readily available, and has a consistent acidity level, making it ideal for a wide range of cleaning tasks. Avoid using colored vinegars, such as apple cider vinegar or balsamic vinegar, as they can stain surfaces. Cleaning vinegar is also available, which has a slightly higher acidity level than distilled white vinegar, making it even more effective for tough cleaning jobs. However, distilled white vinegar is usually sufficient for most household cleaning needs.
How do I get rid of the vinegar smell after cleaning?
So, there you have it! Embracing the power of vinegar for cleaning isn’t just a trend; it’s a return to simpler, more effective, and environmentally conscious methods. We’ve explored how this humble kitchen staple can transform your cleaning routine, tackling everything from stubborn grime to lingering odors. But why is this DIY trick a must-try?
First and foremost, it’s about effectiveness. Vinegar’s acetic acid is a natural powerhouse, cutting through grease, dissolving mineral deposits, and disinfecting surfaces with surprising efficiency. Forget harsh chemicals and their lingering fumes; vinegar offers a clean that’s both powerful and gentle.
Secondly, it’s about cost savings. A bottle of vinegar is significantly cheaper than most specialized cleaning products, making it a budget-friendly alternative that doesn’t compromise on results. Think of all the money you’ll save by replacing multiple cleaners with this single, versatile solution!
Thirdly, it’s about environmental responsibility. By choosing vinegar, you’re reducing your reliance on chemical-laden products that can harm the environment. It’s a small change that can make a big difference in creating a healthier planet for future generations.
But the beauty of vinegar cleaning lies in its adaptability. Feel free to experiment with different variations to suit your specific needs. For a more potent cleaning solution, try infusing your vinegar with citrus peels for a refreshing scent and added cleaning power. Lemon, orange, or grapefruit peels work wonders! Simply soak the peels in vinegar for a few weeks, then strain and use as usual.
For tackling tough stains, create a paste of vinegar and baking soda. This dynamic duo fizzes and foams, lifting dirt and grime from even the most stubborn surfaces. Remember to test this mixture on an inconspicuous area first, especially on delicate materials.
And don’t forget the power of essential oils! Adding a few drops of your favorite essential oil to your vinegar cleaning solution can not only enhance the scent but also provide additional antibacterial or antiviral benefits. Lavender, tea tree, and eucalyptus are all excellent choices.
Ultimately, the best way to discover the magic of vinegar cleaning is to try it for yourself. Start with a simple task, like cleaning your kitchen counters or descaling your showerhead. Observe the results, experiment with different variations, and find what works best for you.
We’re confident that once you experience the effectiveness, affordability, and eco-friendliness of vinegar cleaning, you’ll never look back. It’s a simple yet profound way to transform your home and your cleaning routine.
So, ditch the harsh chemicals, embrace the power of vinegar, and join the growing community of eco-conscious cleaners. We encourage you to try these DIY tricks and share your experiences with us! Let us know what worked best for you, what challenges you encountered, and any creative variations you discovered. Together, we can unlock the full potential of this amazing natural cleaner and create a cleaner, healthier world, one vinegar-soaked sponge at a time. Let’s make **vinegar cleaning** the new normal!
Frequently Asked Questions (FAQs)
Is vinegar safe to use on all surfaces?
While vinegar is a versatile cleaner, it’s not suitable for all surfaces. Avoid using it on natural stone surfaces like marble, granite, and limestone, as the acidity can etch and damage them. It’s also best to avoid using vinegar on waxed wood furniture, as it can strip the wax finish. Always test vinegar on an inconspicuous area before applying it to a larger surface, especially if you’re unsure about its compatibility. For delicate surfaces, dilute the vinegar with water to reduce its acidity.
What type of vinegar is best for cleaning?
Distilled white vinegar is the most commonly recommended type of vinegar for cleaning. It’s inexpensive, readily available, and has a consistent acidity level, making it ideal for a wide range of cleaning tasks. Avoid using colored vinegars, such as apple cider vinegar or balsamic vinegar, as they can stain surfaces. Cleaning vinegar is also available, which has a slightly higher acidity level than distilled white vinegar, making it even more effective for tough cleaning jobs. However, distilled white vinegar is usually sufficient for most household cleaning needs.
How do I get rid of the vinegar smell after cleaning?
The vinegar smell is a common concern for those new to vinegar cleaning, but it typically dissipates quickly. To minimize the odor, ensure proper ventilation by opening windows or using a fan. You can also add a few drops of essential oils, such as lemon, lavender, or eucalyptus, to your vinegar cleaning solution to mask the smell. Another trick is to wipe down surfaces with a damp cloth after cleaning with vinegar to remove any lingering residue. The smell usually disappears within an hour or two.
Can I mix vinegar with other cleaning products?
It’s generally not recommended to mix vinegar with other cleaning products, especially bleach. Mixing vinegar with bleach can create toxic chlorine gas, which is harmful to breathe. Avoid mixing vinegar with ammonia as well, as this can create toxic chloramine vapors. When using vinegar for cleaning, it’s best to use it on its own or with other natural ingredients like baking soda or essential oils. Always read the labels of cleaning products carefully and avoid mixing them unless specifically instructed to do so.
How can I use vinegar to clean my washing machine?
Vinegar is an excellent natural cleaner for washing machines. To clean your washing machine with vinegar, add two cups of distilled white vinegar to the detergent dispenser and run a hot water cycle. This will help to remove detergent buildup, mineral deposits, and mildew. For a more thorough cleaning, you can also add a half cup of baking soda directly to the drum of the washing machine before running the cycle. Repeat this process every few months to keep your washing machine clean and fresh.
Is vinegar effective for disinfecting surfaces?
Vinegar has some disinfecting properties, but it’s not as effective as commercial disinfectants like bleach. Vinegar can kill some bacteria and viruses, but it may not be effective against all types of pathogens. For general cleaning and sanitizing, vinegar is a good option. However, for disinfecting surfaces that may be contaminated with harmful bacteria or viruses, such as in bathrooms or kitchens, it’s best to use a stronger disinfectant.
Can I use vinegar to clean my windows and mirrors?
Yes, vinegar is a fantastic natural cleaner for windows and mirrors. To clean your windows and mirrors with vinegar, mix equal parts of distilled white vinegar and water in a spray bottle. Spray the solution onto the surface and wipe clean with a microfiber cloth or paper towel. For streak-free results, avoid cleaning windows and mirrors in direct sunlight. Vinegar will leave your windows and mirrors sparkling clean and free of streaks.
How do I clean my coffee maker with vinegar?
Cleaning your coffee maker with vinegar is a simple and effective way to remove mineral buildup and improve the taste of your coffee. To clean your coffee maker with vinegar, fill the water reservoir with equal parts of distilled white vinegar and water. Run a full brewing cycle, then discard the vinegar solution. Repeat this process with fresh water to rinse out any remaining vinegar. Run two or three cycles with fresh water to ensure all the vinegar is gone. This will keep your coffee maker clean and functioning properly.
What are some other uses for vinegar in cleaning?
Vinegar has a wide range of uses in cleaning beyond what we’ve already discussed. It can be used to remove hard water stains from showerheads and faucets, clean grout, deodorize garbage disposals, remove stickers and adhesive residue, and even soften laundry. Its versatility and effectiveness make it a valuable tool in any eco-conscious cleaner’s arsenal. Experiment with different uses and discover the many ways vinegar can simplify your cleaning routine.


Leave a Comment