
Strawberry Growing Timeline: From tiny seed to juicy, red berry, the journey of a strawberry is a fascinating one! Have you ever dreamt of plucking sun-ripened strawberries straight from your own garden? I know I have! There’s something incredibly satisfying about nurturing a plant from its humble beginnings to a bountiful harvest. But let’s be honest, sometimes it feels like you need a secret decoder ring to understand exactly when to plant, prune, and protect your precious strawberry plants.
For centuries, strawberries have been cherished not only for their delicious flavor but also for their vibrant color and perceived health benefits. From ancient Roman gardens to the strawberry fields of California, these little berries have captured our hearts (and taste buds!). But the key to a successful strawberry harvest lies in understanding the Strawberry Growing Timeline.
That’s why I’ve put together this comprehensive guide! We’ll break down each stage, from sowing seeds (or planting runners) to enjoying that first sweet bite. Knowing the Strawberry Growing Timeline will empower you to anticipate your plant’s needs, prevent common problems, and ultimately, enjoy a more abundant and rewarding harvest. So, grab your gardening gloves, and let’s get started on this berry exciting adventure!
DIY Strawberry Tower: A Vertical Garden for Sweet Success
Hey there, fellow gardening enthusiasts! I’m so excited to share one of my favorite DIY projects with you: building a strawberry tower! This vertical garden is not only a space-saver, perfect for balconies or small patios, but it’s also a super efficient way to grow a ton of delicious strawberries. Plus, it looks absolutely gorgeous! Get ready to impress your neighbors (and yourself!) with this project.
What You’ll Need: The Supply List
Before we dive in, let’s gather our supplies. Trust me, having everything ready beforehand will make the whole process much smoother.
* **A large plastic pot or container:** Aim for something at least 18 inches in diameter and 24 inches tall. The bigger, the better, as it will hold more soil and support more plants. I personally prefer using a food-grade plastic container for safety.
* **A length of PVC pipe:** This will be the central watering system. Choose a pipe that’s about 2-3 inches in diameter and slightly taller than your container.
* **Drill and drill bits:** You’ll need a drill bit large enough to create holes for the strawberry plants and smaller bits for drainage in the PVC pipe.
* **Landscape fabric or burlap:** This will line the inside of the container to prevent soil from washing out.
* **Potting soil:** Use a high-quality potting mix specifically formulated for fruits and vegetables. It should be well-draining and rich in nutrients.
* **Gravel or small rocks:** This will go at the bottom of the container for drainage.
* **Strawberry plants:** Choose everbearing varieties for a continuous harvest throughout the season. I usually get around 20-30 plants, depending on the size of my container.
* **Measuring tape or ruler:** For accurate hole placement.
* **Marker or pen:** To mark the drilling spots.
* **Gloves:** To protect your hands.
* **Safety glasses:** Always a good idea when drilling!
* **Optional: Compost or slow-release fertilizer:** To boost the nutrient content of the soil.
Phase 1: Preparing the Container and PVC Pipe
This is where we lay the foundation for our strawberry tower. Take your time and make sure everything is secure.
1. **Drill Drainage Holes in the Container:** Turn your large plastic pot upside down. Using a drill with a medium-sized drill bit, create several drainage holes in the bottom. This is crucial to prevent waterlogging, which can lead to root rot. I usually drill about 6-8 holes, evenly spaced.
2. **Line the Container with Landscape Fabric:** Cut a piece of landscape fabric or burlap that’s large enough to line the entire inside of the container. This will prevent soil from escaping through the drainage holes. Secure it with some tape or simply let the weight of the soil hold it in place. Make sure the fabric covers the drainage holes but doesn’t block them completely.
3. **Add a Layer of Gravel:** Pour a layer of gravel or small rocks into the bottom of the container, about 2-3 inches deep. This will further improve drainage and prevent the soil from becoming compacted.
4. **Prepare the PVC Pipe for Watering:** Now, let’s work on the central watering system. Take your PVC pipe and drill small holes all along its length, spacing them about 2-3 inches apart. These holes will allow water to seep out and evenly distribute moisture throughout the tower. I like to use a small drill bit for this, creating holes that are just big enough for water to pass through.
5. **Wrap the PVC Pipe (Optional but Recommended):** To prevent soil from clogging the holes in the PVC pipe, wrap it with landscape fabric or burlap. Secure the fabric with tape or twine. This will act as a filter, allowing water to pass through while keeping the soil out.
Phase 2: Building the Strawberry Tower
Now for the fun part – assembling the tower and planting our strawberries!
1. **Position the PVC Pipe:** Place the prepared PVC pipe in the center of the container, standing upright. Make sure it’s stable and secure. You might want to temporarily brace it with some rocks or soil to keep it from falling over.
2. **Add Soil Gradually:** Start adding potting soil to the container, filling it up to a level where you want to plant your first row of strawberries. As you add soil, gently pack it down around the PVC pipe to provide support.
3. **Create Planting Holes:** Now, using your drill with a larger drill bit (the size will depend on the size of your strawberry plants’ root balls), drill holes around the sides of the container. Space the holes about 6-8 inches apart, both horizontally and vertically. These holes will be where you plant your strawberry plants. I usually start with a row of holes near the bottom of the container and work my way up.
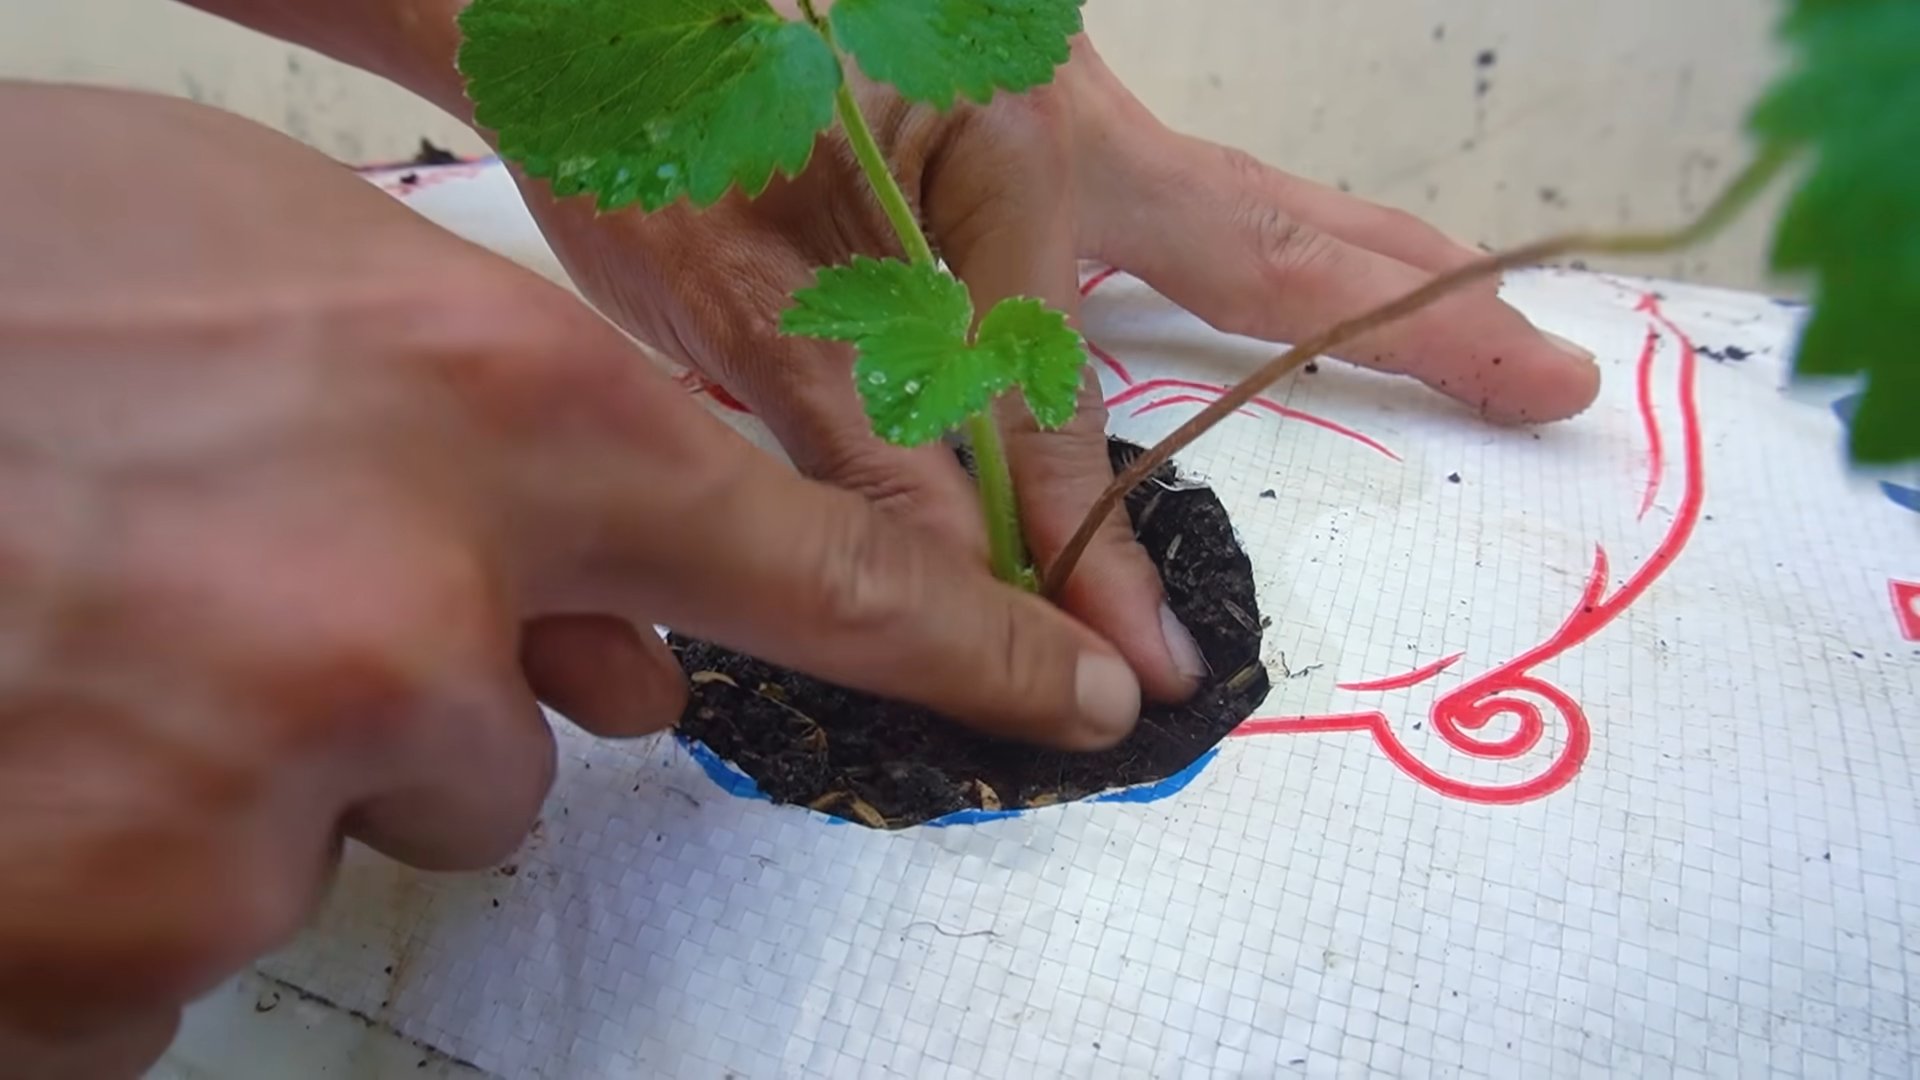
4. **Plant the First Row of Strawberries:** Carefully remove a strawberry plant from its container and gently loosen the roots. Insert the plant into one of the holes, making sure the roots are well-covered with soil. Repeat this process for all the holes in the first row.
5. **Continue Adding Soil and Planting:** Add more soil to the container, filling it up to the next level where you want to plant strawberries. Create another row of planting holes and plant the strawberries as before. Repeat this process until you reach the top of the container.
6. **Plant Strawberries on Top:** Once you’ve reached the top of the container, you can plant a few strawberry plants directly on the surface of the soil. This will create a beautiful cascading effect as the plants grow and produce fruit.
7. **Water Thoroughly:** After planting all the strawberries, water the tower thoroughly. Pour water directly into the top of the PVC pipe, allowing it to seep out through the holes and evenly distribute moisture throughout the soil. You should also water the soil directly to ensure that all the plants are well-hydrated.
Phase 3: Caring for Your Strawberry Tower
Congratulations! You’ve built your own strawberry tower. Now, let’s talk about how to keep it thriving.
1. **Sunlight:** Strawberries need at least 6-8 hours of sunlight per day to produce abundant fruit. Place your strawberry tower in a sunny location where it will receive plenty of light. If you live in a particularly hot climate, you might want to provide some afternoon shade to prevent the plants from getting scorched.
2. **Watering:** Water your strawberry tower regularly, especially during hot, dry weather. Check the soil moisture by sticking your finger into the soil. If the top inch feels dry, it’s time to water. Remember to water through the PVC pipe to ensure even distribution. Avoid overwatering, as this can lead to root rot.
3. **Fertilizing:** Strawberries are heavy feeders, so it’s important to fertilize them regularly. Use a balanced fertilizer specifically formulated for fruits and vegetables. You can also add compost or slow-release fertilizer to the soil to provide a continuous supply of nutrients. I like to fertilize my strawberry tower every 2-3 weeks during the growing season.
4. **Pruning:** Regularly prune your strawberry plants to remove dead or diseased leaves and runners. Runners are long, slender stems that grow out from the main plant. While they can be used to propagate new plants, they can also drain energy from the parent plant, reducing fruit production.
5. **Pest Control:** Keep an eye out for pests such as aphids, slugs, and snails. If you notice any pests, take action immediately to prevent them from damaging your plants. You can use organic pest control methods such as insecticidal soap or diatomaceous earth.
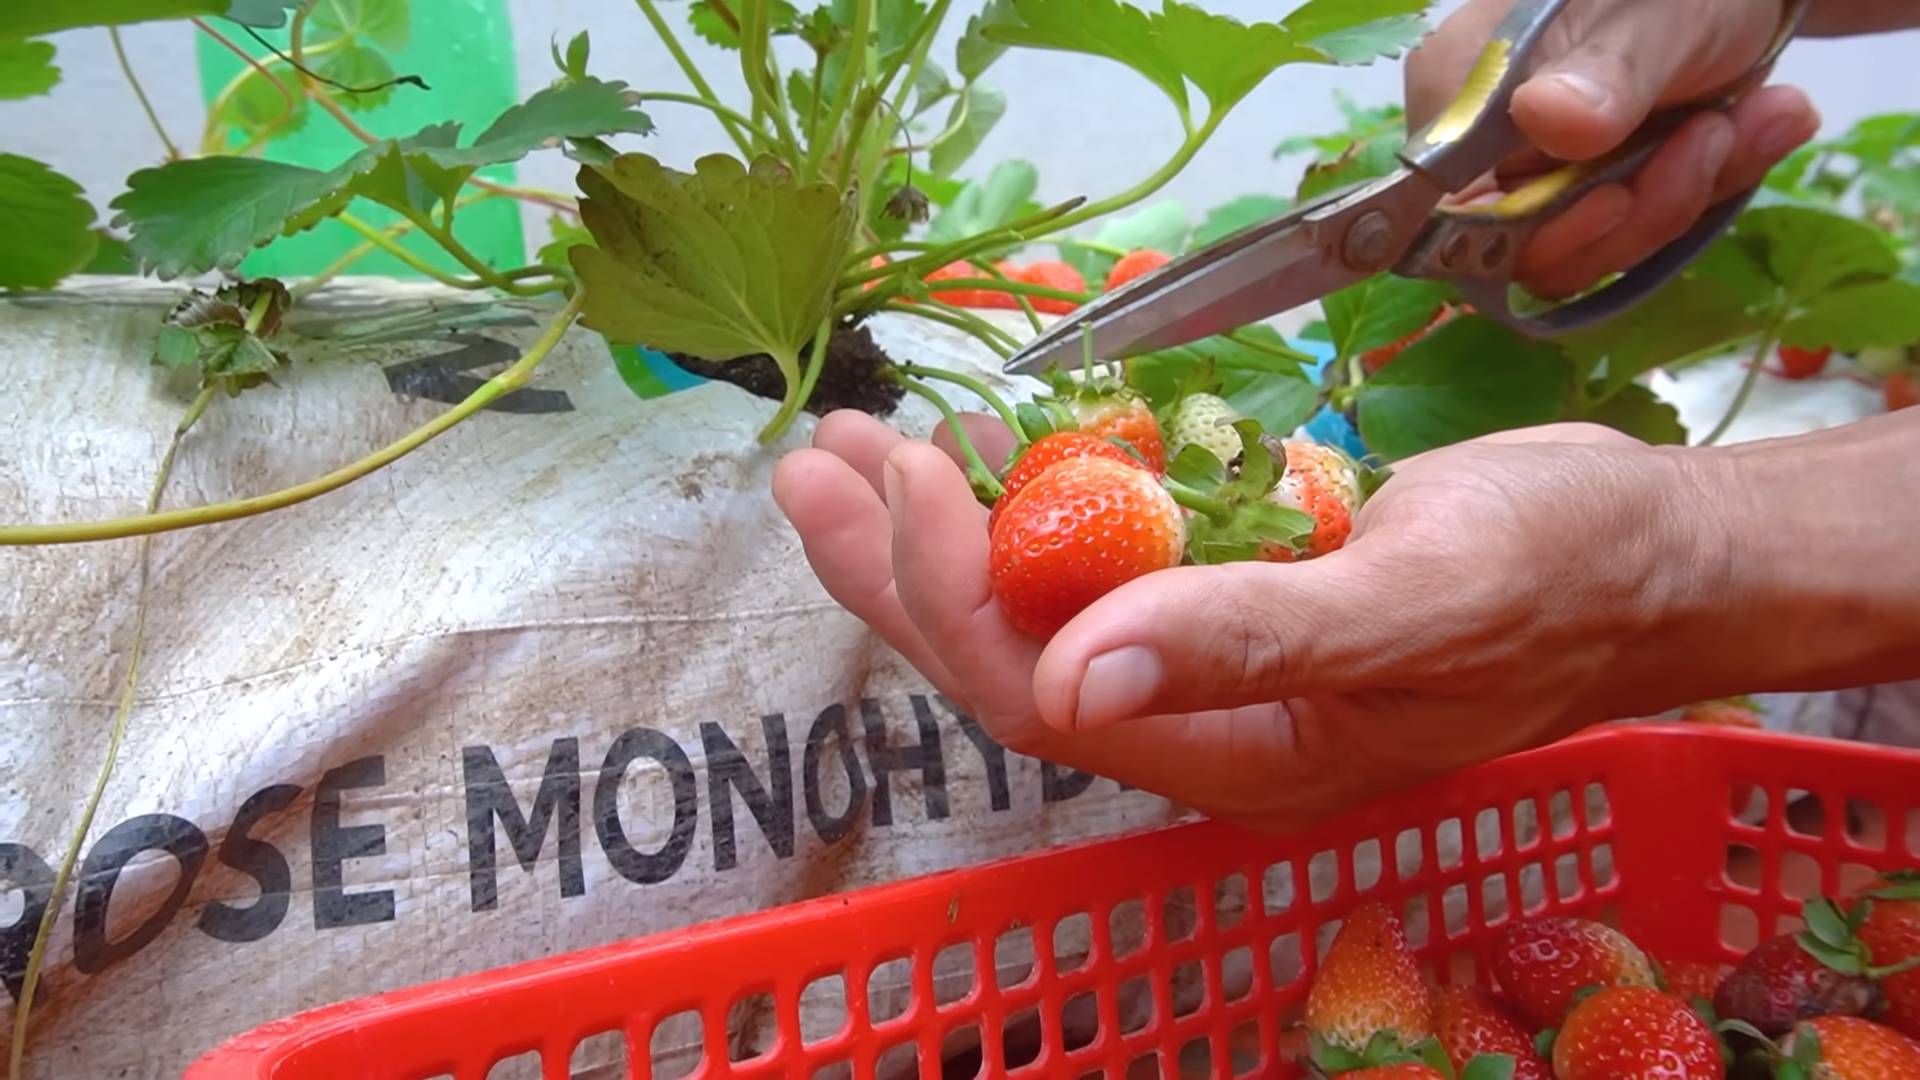
6. **Harvesting:** The best part! Harvest your strawberries when they are fully ripe and red. Gently pluck them from the plant, being careful not to damage the surrounding foliage. Enjoy your delicious, homegrown strawberries!
Troubleshooting Tips
Even with the best planning, sometimes things don’t go exactly as expected. Here are a few common issues and how to address them:
* **Yellowing Leaves:** This could indicate a nutrient deficiency. Try fertilizing with a balanced fertilizer. It could also be a sign of overwatering, so check the soil moisture.
* **Lack of Fruit:** Insufficient sunlight is a common culprit. Make sure your tower is getting enough direct sun. Also, ensure you’re fertilizing regularly.
* **Pests:** Regularly inspect your plants for pests. Early detection is key to preventing infestations.
* **Soil Drying Out Quickly:** You might need to water more frequently, especially during hot weather. Consider adding mulch to the top of the soil to help retain moisture.
Final Thoughts
Building a strawberry tower is a rewarding and fun project that will provide you with a bountiful harvest of delicious strawberries. With a little care and attention, your strawberry tower will thrive and become a beautiful and productive addition to your garden. Happy gardening!
Conclusion
So, there you have it – a comprehensive guide to understanding the strawberry growing timeline and maximizing your harvest! We’ve explored everything from the initial planting stages to the sweet reward of plump, juicy berries. But why is understanding this timeline so crucial, and why should you invest your time and effort into mastering it?
Simply put, knowledge is power. By grasping the nuances of each stage – from dormancy to flowering, fruiting to renovation – you gain the ability to proactively address potential issues, optimize growing conditions, and ultimately, enjoy a significantly larger and more flavorful strawberry yield. Ignoring the timeline is like navigating a ship without a map; you might eventually reach your destination, but the journey will be fraught with unnecessary challenges and the outcome uncertain.
This isn’t just about growing strawberries; it’s about cultivating a deeper connection with nature and experiencing the satisfaction of nurturing something from seed (or runner) to table. It’s about understanding the delicate dance between plant, environment, and grower, and learning to anticipate and respond to the plant’s needs.
And the best part? This knowledge is incredibly versatile. While we’ve focused on the general strawberry growing timeline, you can adapt these principles to different strawberry varieties, growing methods (raised beds, containers, hydroponics), and even regional climates.
Consider these variations to further enhance your strawberry growing experience:
* Succession Planting: Plant new strawberry plants every few weeks to extend your harvest season. This ensures a continuous supply of fresh berries throughout the spring and summer.
* Vertical Gardening: If space is limited, explore vertical gardening options like strawberry towers or hanging baskets. This maximizes your growing area and adds a visually appealing element to your garden.
* Companion Planting: Plant strawberries alongside beneficial companion plants like borage, marigolds, or thyme. These plants can help deter pests, attract pollinators, and improve soil health.
* Experiment with Varieties: Don’t be afraid to try different strawberry varieties to find the ones that thrive best in your local climate and suit your taste preferences. June-bearing, everbearing, and day-neutral varieties each offer unique characteristics and harvest schedules.
Ultimately, the success of your strawberry growing endeavor hinges on your willingness to learn, experiment, and adapt. The strawberry growing timeline is your roadmap, but it’s up to you to navigate the terrain and make the most of your journey.
We strongly encourage you to put this knowledge into practice. Start small, be patient, and don’t be discouraged by setbacks. Every gardener faces challenges, but the rewards of homegrown strawberries are well worth the effort.
And most importantly, we want to hear about your experiences! Share your successes, your failures, and your tips and tricks in the comments below. Let’s build a community of strawberry enthusiasts who can learn from each other and celebrate the joy of growing our own food. What strawberry varieties are you growing? What challenges have you faced, and how did you overcome them? Your insights can help others on their strawberry growing journey. So, get your hands dirty, embrace the process, and enjoy the sweet taste of success!
Frequently Asked Questions (FAQ)
What is the ideal time to plant strawberries based on the strawberry growing timeline?
The ideal time to plant strawberries depends on your climate and the type of strawberry you’re planting. Generally, early spring (after the last frost) or late summer/early fall are the best times. Spring planting allows the plants to establish themselves before the heat of summer, while fall planting gives them a head start for the following spring’s harvest. June-bearing strawberries are often planted in early spring, while everbearing and day-neutral varieties can be planted in either spring or fall. Always check your local extension office for specific recommendations for your region.
How long does it take for strawberries to produce fruit after planting, according to the strawberry growing timeline?
The time it takes for strawberries to produce fruit varies depending on the variety and planting time. June-bearing strawberries typically produce their first significant crop the year after planting. Everbearing and day-neutral varieties may produce a smaller crop in the first year if planted in early spring, with a more substantial harvest in subsequent years. Regardless of the variety, consistent watering, fertilization, and proper care are essential for maximizing fruit production.
What are the key stages of the strawberry growing timeline that I should pay close attention to?
Several key stages require careful attention:
1. Dormancy: Understanding the dormancy period is crucial for preparing your plants for the growing season. Pruning dead leaves and applying a layer of mulch can protect them from harsh winter conditions.
2. Flowering: Protect blossoms from late frosts to ensure a good fruit set. Providing adequate pollination through bees or hand-pollination is also essential.
3. Fruiting: Monitor the plants for pests and diseases, and provide consistent watering and fertilization to support fruit development. Harvest berries when they are fully ripe and red.
4. Renovation: After the harvest, renovate June-bearing strawberries by mowing the foliage and thinning out the plants. This promotes healthy growth and fruit production in the following year.
How often should I water my strawberry plants during the different stages of the strawberry growing timeline?
Watering frequency depends on the weather, soil type, and stage of growth. During the initial planting and establishment phase, water frequently to keep the soil consistently moist. Once established, water deeply but less frequently, allowing the soil to dry slightly between waterings. During flowering and fruiting, increase watering to support fruit development. Avoid overwatering, which can lead to root rot. A good rule of thumb is to water when the top inch of soil feels dry to the touch.
What type of fertilizer should I use for my strawberry plants, and when should I apply it based on the strawberry growing timeline?
Use a balanced fertilizer specifically formulated for berries or fruits. Apply fertilizer in early spring before flowering and again after the first harvest. Avoid over-fertilizing, as this can lead to excessive foliage growth at the expense of fruit production. Follow the instructions on the fertilizer package for application rates. Organic options like compost or well-rotted manure can also be used to enrich the soil.
How can I protect my strawberry plants from pests and diseases throughout the strawberry growing timeline?
Regularly inspect your plants for signs of pests and diseases. Common pests include aphids, spider mites, and slugs. Diseases include gray mold, leaf spot, and root rot. Use organic pest control methods like insecticidal soap or neem oil to control pests. Ensure good air circulation to prevent fungal diseases. Remove and destroy any infected leaves or plants to prevent the spread of disease. Consider using row covers to protect plants from pests and frost.
What should I do with my strawberry plants after the harvest is over, according to the strawberry growing timeline?
The post-harvest care depends on the type of strawberry. For June-bearing strawberries, renovate the plants by mowing the foliage to about an inch above the crown and thinning out the plants to allow for better air circulation. Fertilize and water the plants to encourage new growth. For everbearing and day-neutral strawberries, remove any dead or diseased leaves and continue to fertilize and water them throughout the summer and fall. Mulch all strawberry plants in late fall to protect them from winter damage.
Can I grow strawberries in containers, and how does the strawberry growing timeline differ in containers?
Yes, strawberries can be successfully grown in containers. The strawberry growing timeline is generally the same in containers as in the ground, but there are a few key differences. Container-grown strawberries may require more frequent watering and fertilization, as the soil in containers tends to dry out more quickly and nutrients can leach out more easily. Choose a well-draining potting mix and a container that is large enough to accommodate the plant’s root system. Consider using self-watering containers to simplify watering.
How does the climate affect the strawberry growing timeline, and what adjustments should I make?
Climate plays a significant role in the strawberry growing timeline. In colder climates, the growing season is shorter, and plants may require more protection from frost and winter damage. In warmer climates, the growing season is longer, but plants may be more susceptible to heat stress and pests. Adjust your planting time, watering schedule, and fertilization regime based on your local climate. Choose strawberry varieties that are well-suited to your region.
What are some common mistakes to avoid when growing strawberries, based on the strawberry growing timeline?
Some common mistakes include:
* Planting strawberries in poorly drained soil.
* Overwatering or underwatering the plants.
* Failing to fertilize the plants properly.
* Ignoring pests and diseases.
* Not renovating June-bearing strawberries after the harvest.
* Planting strawberries in the same location year after year, which can lead to soilborne diseases.
* Not providing adequate sunlight. Strawberries need at least 6-8 hours of sunlight per day.
By avoiding these mistakes and following the strawberry growing timeline, you can increase your chances of a successful and bountiful harvest.
Leave a Comment