
Tomato growing tips are the secret weapon every home gardener needs to unlock a season of juicy, flavorful, and abundant harvests! Imagine biting into a sun-warmed, perfectly ripe tomato, bursting with sweetness – a taste far superior to anything you can find in a grocery store. That dream can be your reality, even if you’re a beginner gardener or have limited space.
For centuries, tomatoes have been a staple in cuisines around the world, originating in South America and making their way to Europe and beyond. They’ve become synonymous with summer, fresh salads, and comforting sauces. But let’s face it, growing tomatoes can sometimes feel like a challenge. Pests, diseases, and unpredictable weather can all threaten your precious plants.
That’s where this DIY guide comes in! I’m going to share my favorite tomato growing tips and simple hacks that will help you overcome common obstacles and maximize your yield. Whether you’re dealing with blossom end rot, struggling with pests, or simply want to learn how to get the most out of your tomato plants, I’ve got you covered. These easy-to-follow techniques will empower you to create a thriving tomato garden, no matter your experience level. Get ready to enjoy the satisfaction of growing your own delicious tomatoes – let’s get started!

DIY Tomato Growing: From Seed to Sauce (and Everything In Between!)
Okay, tomato lovers, let’s get down to business! Growing your own tomatoes is seriously rewarding. There’s nothing quite like biting into a sun-warmed, juicy tomato you nurtured from a tiny seed. And trust me, it’s easier than you think! I’m going to walk you through everything you need to know, from starting seeds indoors to dealing with common tomato problems. Let’s get our hands dirty!
Choosing Your Tomato Varieties
Before we even think about soil, let’s talk tomatoes! The sheer variety can be overwhelming, but here’s a quick breakdown to help you choose:
* Determinate vs. Indeterminate: This is crucial! Determinate tomatoes grow to a certain size and produce all their fruit at once, making them great for canning. Indeterminate tomatoes keep growing and producing fruit throughout the season. I personally prefer indeterminate because I love having fresh tomatoes all summer long.
* Heirloom vs. Hybrid: Heirloom tomatoes are open-pollinated varieties passed down through generations. They often have unique flavors and colors, but can be more susceptible to diseases. Hybrid tomatoes are bred for specific traits like disease resistance and higher yields.
* Size and Use: Do you want giant beefsteak tomatoes for burgers, small cherry tomatoes for salads, or Roma tomatoes for sauce? Think about how you’ll be using your tomatoes and choose accordingly.
Some of my personal favorites include:
* ‘Brandywine’ (Heirloom, Indeterminate): Amazing flavor, but needs good support.
* ‘San Marzano’ (Heirloom, Determinate): The classic sauce tomato.
* ‘Sungold’ (Hybrid, Indeterminate): Super sweet and addictive cherry tomato.
* ‘Early Girl’ (Hybrid, Determinate): Reliable early producer.
Starting Seeds Indoors (The Early Bird Gets the Tomato!)
Starting your tomato seeds indoors gives you a head start on the growing season, especially if you live in a cooler climate. Here’s how I do it:
* When to Start: About 6-8 weeks before the last expected frost in your area. Check your local frost dates online.
* What You’ll Need:
* Seed starting trays or small pots (I like using recycled yogurt containers with drainage holes).
* Seed starting mix (this is different from regular potting soil – it’s lighter and sterile).
* Tomato seeds (obviously!).
* A spray bottle.
* A heat mat (optional, but helpful for germination).
* A grow light (essential if you don’t have a very sunny window).
Step-by-Step Instructions:
1. Prepare Your Trays: Fill your seed starting trays or pots with seed starting mix. Gently tap them to settle the soil.
2. Sow the Seeds: Make a small indentation (about 1/4 inch deep) in the soil. Place 2-3 seeds in each indentation. This increases your chances of at least one seed germinating.
3. Cover and Water: Gently cover the seeds with more seed starting mix. Lightly mist the soil with a spray bottle. You want the soil to be moist, but not soggy.
4. Provide Warmth: Place your trays on a heat mat (if using) and cover them with a clear plastic dome or plastic wrap to create a humid environment.
5. Wait for Germination: Keep the soil consistently moist. Germination usually takes 5-10 days.
6. Provide Light: Once the seedlings emerge, remove the plastic cover and place them under a grow light or in a very sunny window. If using a grow light, keep it a few inches above the seedlings.
7. Thin the Seedlings: Once the seedlings have their first true leaves (the second set of leaves that appear after the initial seed leaves), thin them out by snipping off the weaker seedlings at the soil line with scissors. Leave only the strongest seedling in each cell or pot.
8. Water Regularly: Keep the soil consistently moist, but avoid overwatering. Water from the bottom by placing the trays in a shallow dish of water and allowing the soil to absorb the water.
9. Fertilize (Optional): After a few weeks, you can start fertilizing your seedlings with a diluted liquid fertilizer specifically formulated for seedlings. Follow the instructions on the fertilizer label.
Hardening Off Your Seedlings (Toughening Them Up!)
Before you transplant your tomato seedlings outdoors, you need to “harden them off.” This process gradually acclimates them to the outdoor environment, preventing shock.
* The Process:
* Start by placing your seedlings outdoors in a sheltered location (like a porch or patio) for just an hour or two each day.
* Gradually increase the amount of time they spend outdoors each day, exposing them to more sunlight and wind.
* After about a week, they should be able to tolerate a full day outdoors.
* If the weather is particularly harsh (strong winds, heavy rain), bring them back inside.
Transplanting Your Tomato Seedlings Outdoors (Time to Plant!)
Now for the exciting part – planting your tomatoes in the garden!
* When to Transplant: After the last expected frost and when the soil has warmed up to at least 60°F (15°C).
* Choosing a Location: Tomatoes need at least 6-8 hours of sunlight per day. Choose a location with well-drained soil.
* Preparing the Soil: Amend the soil with compost or other organic matter to improve drainage and fertility.
* Spacing: Space determinate tomatoes 2-3 feet apart and indeterminate tomatoes 3-4 feet apart.
Step-by-Step Instructions:
1. Dig the Holes: Dig holes that are slightly larger than the root balls of your seedlings.
2. Add Fertilizer (Optional): Add a handful of slow-release tomato fertilizer to each hole.
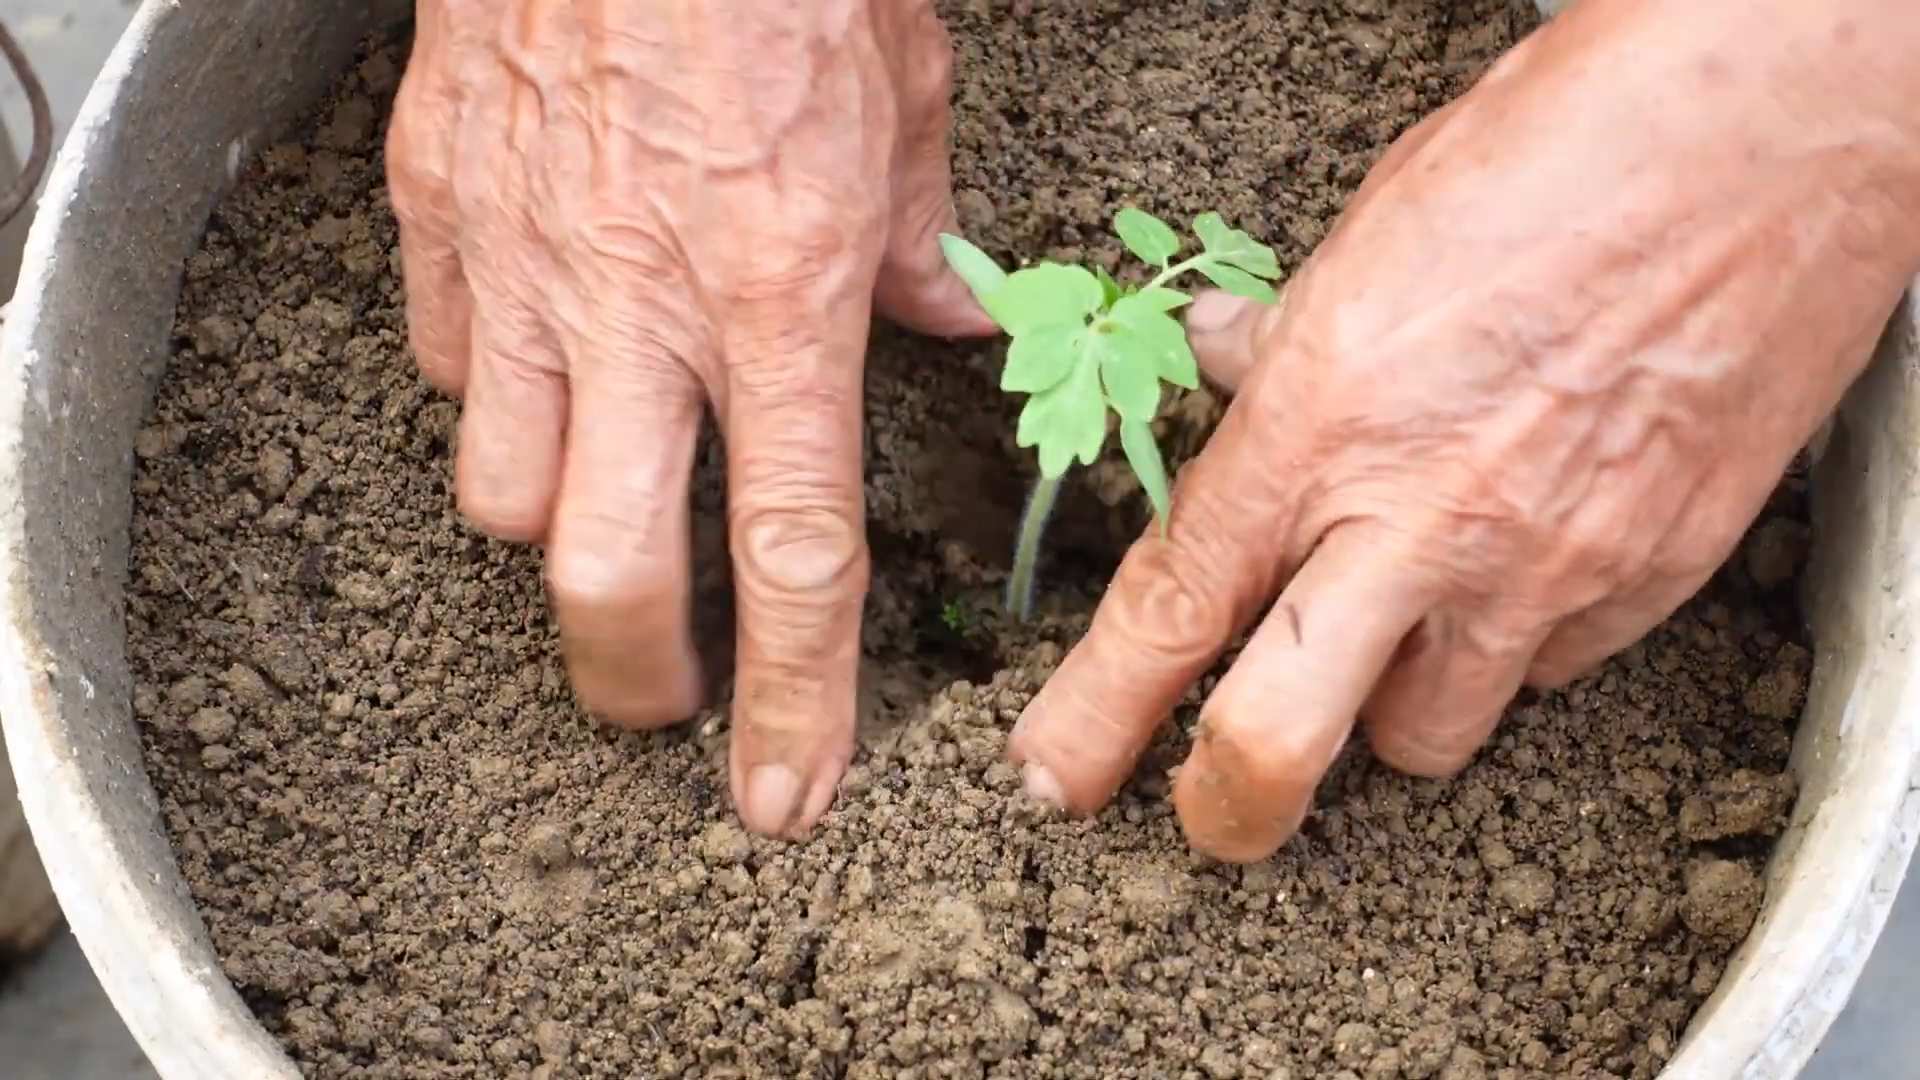
3. Plant Deep: This is a key tip! Plant your tomato seedlings deep, burying the stem up to the first set of leaves. Tomatoes can grow roots along their stems, which will result in a stronger, healthier plant.
4. Remove Lower Leaves: Remove the lower leaves that will be buried in the soil.
5. Place the Seedling: Gently remove the seedling from its container and place it in the hole.
6. Backfill with Soil: Backfill the hole with soil, gently firming it around the base of the plant.
7. Water Thoroughly: Water the newly planted seedlings thoroughly.
8. Add Support: Install stakes, cages, or trellises to support the tomato plants as they grow. Indeterminate varieties especially need support. I prefer using tomato cages because they’re easy to install and provide good support.
9. Mulch: Add a layer of mulch around the base of the plants to help retain moisture, suppress weeds, and regulate soil temperature. Straw, wood chips, or shredded leaves work well.
Caring for Your Tomato Plants (The Nurturing Phase)
Once your tomatoes are planted, it’s important to provide them with proper care to ensure a bountiful harvest.
* Watering: Water deeply and regularly, especially during hot, dry weather. Aim to water at the base of the plant to avoid wetting the foliage, which can lead to disease.
* Fertilizing: Fertilize your tomato plants every 2-3 weeks with a balanced tomato fertilizer. Follow the instructions on the fertilizer label.
* Pruning: Pruning is especially important for indeterminate tomato varieties. Remove suckers (the small shoots that grow between the main stem and the branches) to encourage the plant to focus its energy on producing fruit.
* Pest and Disease Control: Keep an eye out for common tomato pests and diseases.
Common Tomato Problems (And How to Fix Them!)
Unfortunately, growing tomatoes isn’t always smooth sailing. Here are some common problems you might encounter and how to deal with them:
* Blossom End Rot: This is caused by a calcium deficiency. The bottom of the tomato turns black and leathery. To prevent blossom end rot, ensure consistent watering and amend the soil with calcium-rich amendments like bone meal or crushed eggshells.
* Tomato Hornworms: These large green caterpillars can devour your tomato plants overnight. Handpick them off the plants or use Bacillus thuringiensis (Bt), a natural insecticide.
* Aphids: These small, sap-sucking insects can weaken your tomato plants. Spray them off with a strong stream of water or use insecticidal soap.
* Early Blight: This fungal disease causes dark spots on the lower leaves. Remove the affected leaves and apply a fungicide.
* Septoria Leaf Spot: This fungal disease causes small, circular spots on the leaves. Remove the affected leaves and apply a fungicide.
Conclusion
So, there you have it! Mastering these simple yet effective DIY tomato growing tips can truly transform your gardening experience and reward you with a bountiful harvest of juicy, flavorful tomatoes. We’ve covered everything from crafting your own nutrient-rich soil amendments to creating ingenious support systems that will keep your plants thriving.
Why is this a must-try? Because it empowers you to take control of your tomato growing journey. You’re no longer reliant on expensive store-bought solutions or vague instructions. You’re actively participating in the process, understanding the needs of your plants, and tailoring your approach to suit your specific environment. The satisfaction of nurturing a plant from seed to table, knowing you’ve used your own ingenuity and resourcefulness, is unparalleled. Plus, these DIY methods are often more sustainable and cost-effective than conventional approaches.
Consider these variations to further personalize your tomato growing experience:
* **Experiment with different compost tea recipes:** Try adding molasses for extra microbial activity or seaweed extract for enhanced nutrient uptake.
* **Build a vertical tomato garden using recycled pallets:** This is a fantastic option for small spaces and adds a rustic charm to your garden.
* **Create your own natural pest control solutions:** Use neem oil, garlic spray, or companion planting to deter unwanted visitors.
* **Explore different staking methods:** From traditional wooden stakes to elaborate cages, find the support system that best suits your tomato variety and growing style.
* **Try different soil mixes:** Experiment with adding perlite, vermiculite, or coco coir to improve drainage and aeration.
Ultimately, the best way to discover what works best for you is to get your hands dirty and experiment. Don’t be afraid to try new things, adapt our suggestions to your specific needs, and learn from your successes and failures. Remember, gardening is a journey, not a destination.
We are confident that these DIY tomato growing tips will significantly improve your tomato yield and the overall health of your plants. But don’t just take our word for it! We wholeheartedly encourage you to give these methods a try. Start small, perhaps with just a few plants, and gradually expand as you gain confidence and experience.
And most importantly, we want to hear about your experiences! Share your successes, your challenges, and your own unique DIY solutions in the comments section below. Let’s create a community of passionate tomato growers who are dedicated to sharing knowledge and supporting each other. Your insights could be invaluable to other gardeners who are just starting out. Let’s grow together!
Frequently Asked Questions (FAQ)
What if I don’t have access to all the ingredients for the DIY soil amendments?
That’s perfectly fine! The beauty of DIY is its flexibility. Focus on using what you have available. For example, if you don’t have bone meal, you can substitute it with rock phosphate or even crushed eggshells (which are a great source of calcium). If you can’t find blood meal, consider using fish emulsion or composted manure for nitrogen. The key is to understand the nutrients your tomatoes need (nitrogen, phosphorus, potassium, and micronutrients) and find alternative sources that provide those nutrients. Even a simple compost tea made from kitchen scraps can make a significant difference. Don’t let the lack of a specific ingredient deter you from trying.
How often should I apply the DIY compost tea?
Generally, applying compost tea every 2-3 weeks is a good starting point. However, the frequency can vary depending on the health of your plants and the growing conditions. If your tomatoes are showing signs of nutrient deficiency (e.g., yellowing leaves), you can apply it more frequently, perhaps once a week. Conversely, if your plants are thriving, you can reduce the frequency. Always observe your plants closely and adjust your feeding schedule accordingly. It’s also best to apply compost tea in the early morning or late evening to avoid scorching the leaves in direct sunlight.
My tomato plants are already quite large. Can I still implement these DIY tips?
Absolutely! While it’s ideal to start with these tips from the beginning, it’s never too late to improve your tomato growing practices. You can still apply the DIY soil amendments as a side dressing, gently working them into the soil around the base of the plants. The DIY support systems can also be implemented at any stage, although you may need to be more careful when installing them to avoid damaging the plants. Even if your plants are already established, these DIY tomato growing tips can help boost their health and productivity.
What if I don’t have a lot of space for a traditional garden?
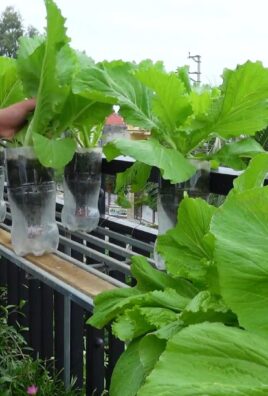
No problem! Many of these DIY tips are perfectly suited for container gardening. You can use the DIY soil amendments in your pots, and the vertical gardening techniques are ideal for small spaces like balconies or patios. Choose determinate tomato varieties, which are more compact and bushier, for container gardening. Make sure your containers have adequate drainage holes and are large enough to accommodate the root systems of your tomato plants. Even with limited space, you can still enjoy a bountiful harvest of homegrown tomatoes.
How do I know if my DIY pest control solutions are working?
Observe your plants regularly for signs of pests, such as aphids, whiteflies, or tomato hornworms. If you notice a decrease in pest activity after applying your DIY solutions, that’s a good indication that they’re working. You can also monitor the overall health of your plants. If they’re thriving and producing well, it’s likely that your pest control measures are effective. Remember that natural pest control is often a gradual process, so be patient and persistent. You may need to reapply your solutions regularly, especially after rain. If you’re still struggling with pests, consider introducing beneficial insects like ladybugs or lacewings to your garden.
Can I use these DIY tips for other vegetables besides tomatoes?
Many of these tips can be adapted for other vegetables as well. The DIY soil amendments can be used for a wide range of plants, as long as you adjust the nutrient ratios to suit their specific needs. The vertical gardening techniques are also versatile and can be used for growing herbs, lettuce, strawberries, and other vegetables. The DIY pest control solutions are generally safe for most plants, but it’s always a good idea to test them on a small area first to ensure they don’t cause any adverse reactions. With a little experimentation, you can adapt these DIY tips to create a thriving garden for all your favorite vegetables.
Leave a Comment