
Vinegar cleaning tips are about to become your new best friend! Are you tired of harsh chemicals and expensive cleaning products that promise the world but often fall short? I know I was! That’s why I dove headfirst into the world of natural cleaning solutions, and let me tell you, the results have been amazing.
Vinegar, a staple in kitchens for centuries, has a surprisingly rich history as a cleaning agent. From ancient civilizations using it to disinfect wounds to our grandmothers relying on it for sparkling windows, vinegar’s cleaning power is no secret. But did you know just how versatile it is?
In today’s world, where we’re all striving for a healthier and more sustainable lifestyle, embracing vinegar cleaning tips is more important than ever. Not only is it an eco-friendly alternative to chemical-laden products, but it’s also incredibly cost-effective. Plus, it’s safe for your family and pets! This DIY guide will unlock the secrets to using vinegar for everything from banishing stubborn stains to deodorizing your home. Get ready to ditch the chemicals and embrace the natural cleaning power of vinegar!
DIY All-Purpose Vinegar Cleaning Solution: Your Guide to a Sparkling Home
Okay, let’s dive into making an amazing all-purpose cleaning solution using vinegar! I’ve been using this for years, and it’s saved me a ton of money and reduced the harsh chemicals in my home. It’s surprisingly effective, super easy to make, and you probably already have most of the ingredients.
What You’ll Need
Before we get started, let’s gather everything we need. This will make the whole process smoother.
* White Distilled Vinegar: This is the star of the show! Make sure it’s white distilled vinegar, as other types might stain.
* Water: Tap water is fine, but distilled water will prevent mineral buildup in your spray bottle over time.
* Essential Oils (Optional): Vinegar has a strong smell, so essential oils are great for masking it and adding a pleasant fragrance. I personally love lemon, lavender, tea tree, or eucalyptus.
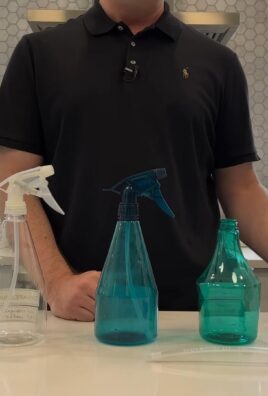
* Spray Bottle: A clean, empty spray bottle is essential for dispensing your cleaning solution.
* Measuring Cup or Spoons: For accurate measurements.
* Funnel (Optional): This makes pouring liquids into the spray bottle much easier and less messy.
* Baking Soda (Optional, for extra cleaning power): A little baking soda can boost the cleaning power for tougher jobs.
Mixing Your Vinegar Cleaning Solution
This is where the magic happens! Follow these steps carefully to create your perfect all-purpose cleaner.
1. Prepare Your Spray Bottle: Make sure your spray bottle is clean and dry. Any residue inside could affect the solution.
2. Combine Vinegar and Water: The standard ratio is 1:1 – that’s equal parts vinegar and water. For a standard 16-ounce spray bottle, I usually use 8 ounces of white distilled vinegar and 8 ounces of water. If you’re sensitive to the smell of vinegar, you can adjust the ratio to 1 part vinegar to 2 parts water (e.g., 5 ounces vinegar and 10 ounces water).
3. Add Essential Oils (Optional): This is where you can customize your cleaner! Add 10-20 drops of your favorite essential oil(s). Start with a smaller amount and add more if you want a stronger scent. Remember, some essential oils have cleaning properties too! Lemon and tea tree are great for disinfecting.
4. Add Baking Soda (Optional, for specific cleaning tasks): If you’re planning to use this solution for tougher cleaning jobs like scrubbing sinks or removing soap scum, you can add about 1 tablespoon of baking soda. Be careful, as the mixture will fizz a bit when you add baking soda. Add it slowly and gently swirl the bottle to mix. Don’t seal the bottle immediately after adding baking soda, as the pressure from the fizzing could cause it to burst. Let it sit for a few minutes until the fizzing subsides.
5. Mix Well: Secure the spray nozzle onto the bottle and gently shake the solution to ensure everything is well combined.
6. Label Your Bottle: This is important! Clearly label your spray bottle as “Vinegar Cleaning Solution” so you don’t accidentally mistake it for something else. You can also include the date you made it.
Using Your All-Purpose Vinegar Cleaner
Now that you’ve made your cleaner, let’s put it to work!
* Test First: Before using your vinegar cleaner on any surface, especially delicate ones like wood or natural stone, test it in an inconspicuous area first. This will ensure it doesn’t damage or discolor the surface.
* Spray and Wipe: Simply spray the solution onto the surface you want to clean and let it sit for a few seconds to loosen dirt and grime. Then, wipe it clean with a clean cloth or sponge.
* Rinse (If Necessary): For some surfaces, especially those that come into contact with food, you may want to rinse with clean water after wiping.
Where to Use Your Vinegar Cleaning Solution
This all-purpose cleaner is incredibly versatile! Here are some of my favorite uses:
* Kitchen Counters and Sinks: Vinegar is great for cutting through grease and grime in the kitchen. Just spray, wipe, and rinse.
* Bathroom Surfaces: Use it to clean bathroom counters, sinks, toilets, and showers. It helps remove soap scum and hard water stains.
* Mirrors and Windows: Vinegar is a fantastic glass cleaner! Spray it on mirrors and windows and wipe with a clean, lint-free cloth for a streak-free shine.
* Floors (Certain Types): Vinegar can be used to clean certain types of floors, such as tile and linoleum. However, avoid using it on hardwood floors, as the acidity can damage the finish. Always test in an inconspicuous area first.
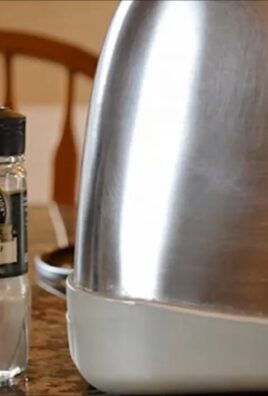
* Appliances: Clean the exterior of your appliances with vinegar to remove fingerprints and smudges.
* Coffee Maker: Descale your coffee maker by running a cycle with equal parts vinegar and water, followed by two cycles with plain water.
* Dishwasher: Pour a cup of vinegar into the bottom of your dishwasher and run a cycle to remove buildup and freshen it up.
* Laundry: Add 1/2 cup of vinegar to your washing machine’s rinse cycle to soften clothes and remove odors.
Areas to Avoid Using Vinegar
While vinegar is a great cleaner, there are some surfaces you should avoid using it on:
* Natural Stone (Granite, Marble, etc.): The acidity of vinegar can etch and damage natural stone surfaces.
* Hardwood Floors: As mentioned earlier, vinegar can damage the finish on hardwood floors.
* Waxed Furniture: Vinegar can strip the wax from waxed furniture.
* Electr
Okay, let’s dive into making an amazing all-purpose cleaning solution using vinegar! I’ve been using this for years, and it’s saved me a ton of money and reduced the harsh chemicals in my home. It’s surprisingly effective, super easy to make, and you probably already have most of the ingredients.
What You’ll Need
Before we get started, let’s gather everything we need. This will make the whole process smoother.
* White Distilled Vinegar: This is the star of the show! Make sure it’s white distilled vinegar, as other types might stain.
* Water: Tap water is fine, but distilled water will prevent mineral buildup in your spray bottle over time.
* Essential Oils (Optional): Vinegar has a strong smell, so essential oils are great for masking it and adding a pleasant fragrance. I personally love lemon, lavender, tea tree, or eucalyptus.
* Spray Bottle: A clean, empty spray bottle is essential for dispensing your cleaning solution.
* Measuring Cup or Spoons: For accurate measurements.
* Funnel (Optional): This makes pouring liquids into the spray bottle much easier and less messy.
* Baking Soda (Optional, for extra cleaning power): A little baking soda can boost the cleaning power for tougher jobs.
Mixing Your Vinegar Cleaning Solution
This is where the magic happens! Follow these steps carefully to create your perfect all-purpose cleaner.
1. Prepare Your Spray Bottle: Make sure your spray bottle is clean and dry. Any residue inside could affect the solution.
2. Combine Vinegar and Water: The standard ratio is 1:1 – that’s equal parts vinegar and water. For a standard 16-ounce spray bottle, I usually use 8 ounces of white distilled vinegar and 8 ounces of water. If you’re sensitive to the smell of vinegar, you can adjust the ratio to 1 part vinegar to 2 parts water (e.g., 5 ounces vinegar and 10 ounces water).
3. Add Essential Oils (Optional): This is where you can customize your cleaner! Add 10-20 drops of your favorite essential oil(s). Start with a smaller amount and add more if you want a stronger scent. Remember, some essential oils have cleaning properties too! Lemon and tea tree are great for disinfecting.
4. Add Baking Soda (Optional, for specific cleaning tasks): If you’re planning to use this solution for tougher cleaning jobs like scrubbing sinks or removing soap scum, you can add about 1 tablespoon of baking soda. Be careful, as the mixture will fizz a bit when you add baking soda. Add it slowly and gently swirl the bottle to mix. Don’t seal the bottle immediately after adding baking soda, as the pressure from the fizzing could cause it to burst. Let it sit for a few minutes until the fizzing subsides.
5. Mix Well: Secure the spray nozzle onto the bottle and gently shake the solution to ensure everything is well combined.
6. Label Your Bottle: This is important! Clearly label your spray bottle as “Vinegar Cleaning Solution” so you don’t accidentally mistake it for something else. You can also include the date you made it.
Using Your All-Purpose Vinegar Cleaner
Now that you’ve made your cleaner, let’s put it to work!
* Test First: Before using your vinegar cleaner on any surface, especially delicate ones like wood or natural stone, test it in an inconspicuous area first. This will ensure it doesn’t damage or discolor the surface.
* Spray and Wipe: Simply spray the solution onto the surface you want to clean and let it sit for a few seconds to loosen dirt and grime. Then, wipe it clean with a clean cloth or sponge.
* Rinse (If Necessary): For some surfaces, especially those that come into contact with food, you may want to rinse with clean water after wiping.
Where to Use Your Vinegar Cleaning Solution
This all-purpose cleaner is incredibly versatile! Here are some of my favorite uses:
* Kitchen Counters and Sinks: Vinegar is great for cutting through grease and grime in the kitchen. Just spray, wipe, and rinse.
* Bathroom Surfaces: Use it to clean bathroom counters, sinks, toilets, and showers. It helps remove soap scum and hard water stains.
* Mirrors and Windows: Vinegar is a fantastic glass cleaner! Spray it on mirrors and windows and wipe with a clean, lint-free cloth for a streak-free shine.
* Floors (Certain Types): Vinegar can be used to clean certain types of floors, such as tile and linoleum. However, avoid using it on hardwood floors, as the acidity can damage the finish. Always test in an inconspicuous area first.
* Appliances: Clean the exterior of your appliances with vinegar to remove fingerprints and smudges.
* Coffee Maker: Descale your coffee maker by running a cycle with equal parts vinegar and water, followed by two cycles with plain water.
* Dishwasher: Pour a cup of vinegar into the bottom of your dishwasher and run a cycle to remove buildup and freshen it up.
* Laundry: Add 1/2 cup of vinegar to your washing machine’s rinse cycle to soften clothes and remove odors.
Areas to Avoid Using Vinegar
While vinegar is a great cleaner, there are some surfaces you should avoid using it on:
* Natural Stone (Granite, Marble, etc.): The acidity of vinegar can etch and damage natural stone surfaces.
* Hardwood Floors: As mentioned earlier, vinegar can damage the finish on hardwood floors.
* Waxed Furniture: Vinegar can strip the wax from waxed furniture.
* Electronics Screens: Avoid spraying vinegar directly onto electronics screens, as it can damage them.
* Iron: Vinegar can corrode iron.
* Damaged or Unsealed Grout: Vinegar can penetrate and damage grout that is already cracked or unsealed.
Troubleshooting and Tips
* Vinegar Smell: If you’re bothered by the smell of vinegar, don’t worry! It dissipates quickly. Adding essential oils can also help mask the odor. You can also open windows for ventilation.
* Cloudy Solution: If your solution becomes cloudy, it’s likely due to the baking soda reacting with the vinegar. This is normal and doesn’t affect the cleaning power.
* Storage: Store your vinegar cleaning solution in a cool, dark place. It should last for several months.
* Adjusting the Strength: If you find that your solution isn’t strong enough for certain cleaning tasks, you can increase the amount of vinegar. For tougher stains, you can even use undiluted vinegar.
* Safety: While vinegar is a natural cleaner, it’s still important to use it safely. Avoid getting it in your eyes, and don’t mix it with bleach, as this can create harmful fumes.
Boosting Cleaning Power: Baking Soda Paste
For really tough stains and grime, I like to make a baking soda paste to use in conjunction with my vinegar cleaner.
1. Mix Baking Soda and Water: In a small bowl, mix baking soda with just enough water to form a thick paste.
2. Apply to Stain: Apply the paste to the stain or grime you want to remove.
3. Spray with Vinegar Cleaner: Spray the baking soda paste with your vinegar cleaning solution. It will fizz!
4. Scrub: Use a scrub brush or sponge to scrub the area.
5. Rinse: Rinse thoroughly with water.
This method is great for cleaning ovens, stovetops, and bathroom tiles.
Essential Oil Blends for Different Cleaning Needs
Here are a few of my favorite essential oil blends for different cleaning purposes:
* General Cleaning: Lemon and Lavender (10 drops lemon, 10 drops lavender)
* Disinfecting: Tea Tree and Eucalyptus (10 drops tea tree, 10 drops eucalyptus)
* Kitchen Cleaning: Lemon and Grapefruit (15 drops lemon, 5 drops grapefruit)
* Bathroom Cleaning: Tea Tree and Peppermint (10 drops tea tree, 10 drops peppermint)
Feel free to experiment with different essential oil combinations to find your favorite scents!
Making a Larger Batch
If you find yourself using this cleaner frequently, you can easily make a larger batch. Just adjust the measurements accordingly. For example, if you want to make a gallon of cleaner, you’ll need 1/2 gallon of vinegar and 1/2 gallon of water.
Cost Savings
One of the best things about making your own vinegar cleaning solution is the cost savings. Vinegar is very inexpensive, and you can save a significant amount of money compared to buying commercial cleaning products. Plus, you’re reducing your environmental impact by using fewer plastic bottles.
Final Thoughts
I hope you found this guide helpful! Making your
Conclusion
So, there you have it! This simple yet powerful DIY trick using vinegar offers a natural, cost-effective, and surprisingly versatile solution for a sparkling clean home. We’ve explored how vinegar can tackle everything from stubborn hard water stains to lingering odors, all without the harsh chemicals found in many commercial cleaners. The beauty of this method lies in its simplicity and adaptability. It’s not just about cleaning; it’s about creating a healthier living environment for you and your family.
Why is this vinegar cleaning method a must-try? Because it’s effective, eco-friendly, and economical. You’re reducing your reliance on potentially harmful chemicals, saving money on expensive cleaning products, and contributing to a more sustainable lifestyle. Plus, the satisfaction of knowing you’re cleaning with a natural ingredient is incredibly rewarding.
But don’t stop there! Experiment with different variations to find what works best for your specific needs. For instance, try infusing your vinegar with citrus peels for a refreshing scent. Simply add orange, lemon, or grapefruit peels to a jar of vinegar and let it steep for a few weeks before straining and using. This adds a pleasant aroma and can even boost the cleaning power. Another variation is to add a few drops of your favorite essential oil, such as lavender or tea tree, for added fragrance and antibacterial properties. Remember to always test a small, inconspicuous area first to ensure the vinegar doesn’t damage the surface.
Consider using different types of vinegar for specific tasks. White distilled vinegar is the workhorse of the cleaning world, ideal for general cleaning, disinfecting, and deodorizing. Apple cider vinegar, with its slightly milder acidity, can be used for more delicate surfaces or for cleaning fruits and vegetables. Cleaning with vinegar is not just a trend; it’s a return to simpler, more sustainable practices.
We are confident that once you experience the cleaning power of vinegar, you’ll be amazed by the results. It’s a game-changer for anyone looking to simplify their cleaning routine and embrace a more natural approach.
Now, we want to hear from you! Try these DIY vinegar cleaning tips and share your experiences in the comments below. What surfaces did you clean? What variations did you try? What were your results? Your feedback will help other readers discover the incredible benefits of cleaning with vinegar and inspire them to make the switch. Let’s build a community of natural cleaning enthusiasts and share our tips and tricks for a cleaner, healthier home! Don’t hesitate to ask any questions you may have; we’re here to help you on your journey to a sparkling clean, chemical-free home.
Frequently Asked Questions (FAQ)
Is vinegar safe to use on all surfaces?
No, vinegar is not safe to use on all surfaces. Avoid using vinegar on natural stone surfaces like marble, granite, and limestone, as the acidity can etch and damage them. It’s also best to avoid using vinegar on waxed furniture, as it can strip the wax finish. Always test vinegar on a small, inconspicuous area before applying it to a larger surface to ensure it doesn’t cause any damage or discoloration. Other surfaces to avoid include aluminum, cast iron, and certain types of rubber. When in doubt, consult the manufacturer’s instructions for the surface you’re cleaning.
What is the best type of vinegar to use for cleaning?
White distilled vinegar is generally considered the best type of vinegar for cleaning due to its high acidity and lack of color, which minimizes the risk of staining. It’s also readily available and relatively inexpensive. Apple cider vinegar can be used for some cleaning tasks, but it has a lower acidity and may leave a slight residue. Cleaning vinegar is also available, which has a higher acidity than regular white distilled vinegar, making it even more effective for tough cleaning jobs. However, always dilute cleaning vinegar before use to avoid damaging surfaces.
How do I dilute vinegar for cleaning?
The dilution ratio for vinegar depends on the cleaning task. For general cleaning, a 1:1 solution of vinegar and water is usually sufficient. For tougher stains or disinfecting, you can use a stronger solution, such as 2 parts vinegar to 1 part water. For delicate surfaces, you may want to use a weaker solution, such as 1 part vinegar to 2 parts water. Always start with a weaker solution and increase the concentration as needed. Remember to test the solution on a small, inconspicuous area first.
Can I mix vinegar with other cleaning products?
No, it is generally not recommended to mix vinegar with other cleaning products, especially bleach. Mixing vinegar with bleach can create toxic chlorine gas, which can be harmful or even fatal. Avoid mixing vinegar with ammonia as well, as this can create chloramine gas, which is also toxic. It’s best to use vinegar on its own or with water and other natural ingredients like baking soda or essential oils.
How do I get rid of the vinegar smell after cleaning?
The vinegar smell typically dissipates within a few hours. To speed up the process, you can open windows and doors to ventilate the area. You can also add a few drops of your favorite essential oil to the vinegar solution to mask the smell. Another option is to boil a pot of water with citrus peels or cinnamon sticks to create a pleasant aroma that will help neutralize the vinegar smell.
Is vinegar effective for disinfecting?
Yes, vinegar has some disinfecting properties, but it is not as effective as commercial disinfectants like bleach. Vinegar can kill some bacteria and viruses, but it may not be effective against all types of germs. For disinfecting purposes, use undiluted white distilled vinegar and allow it to sit on the surface for at least 30 minutes before wiping it away. For more thorough disinfection, consider using a commercial disinfectant that is specifically designed to kill a wide range of germs.
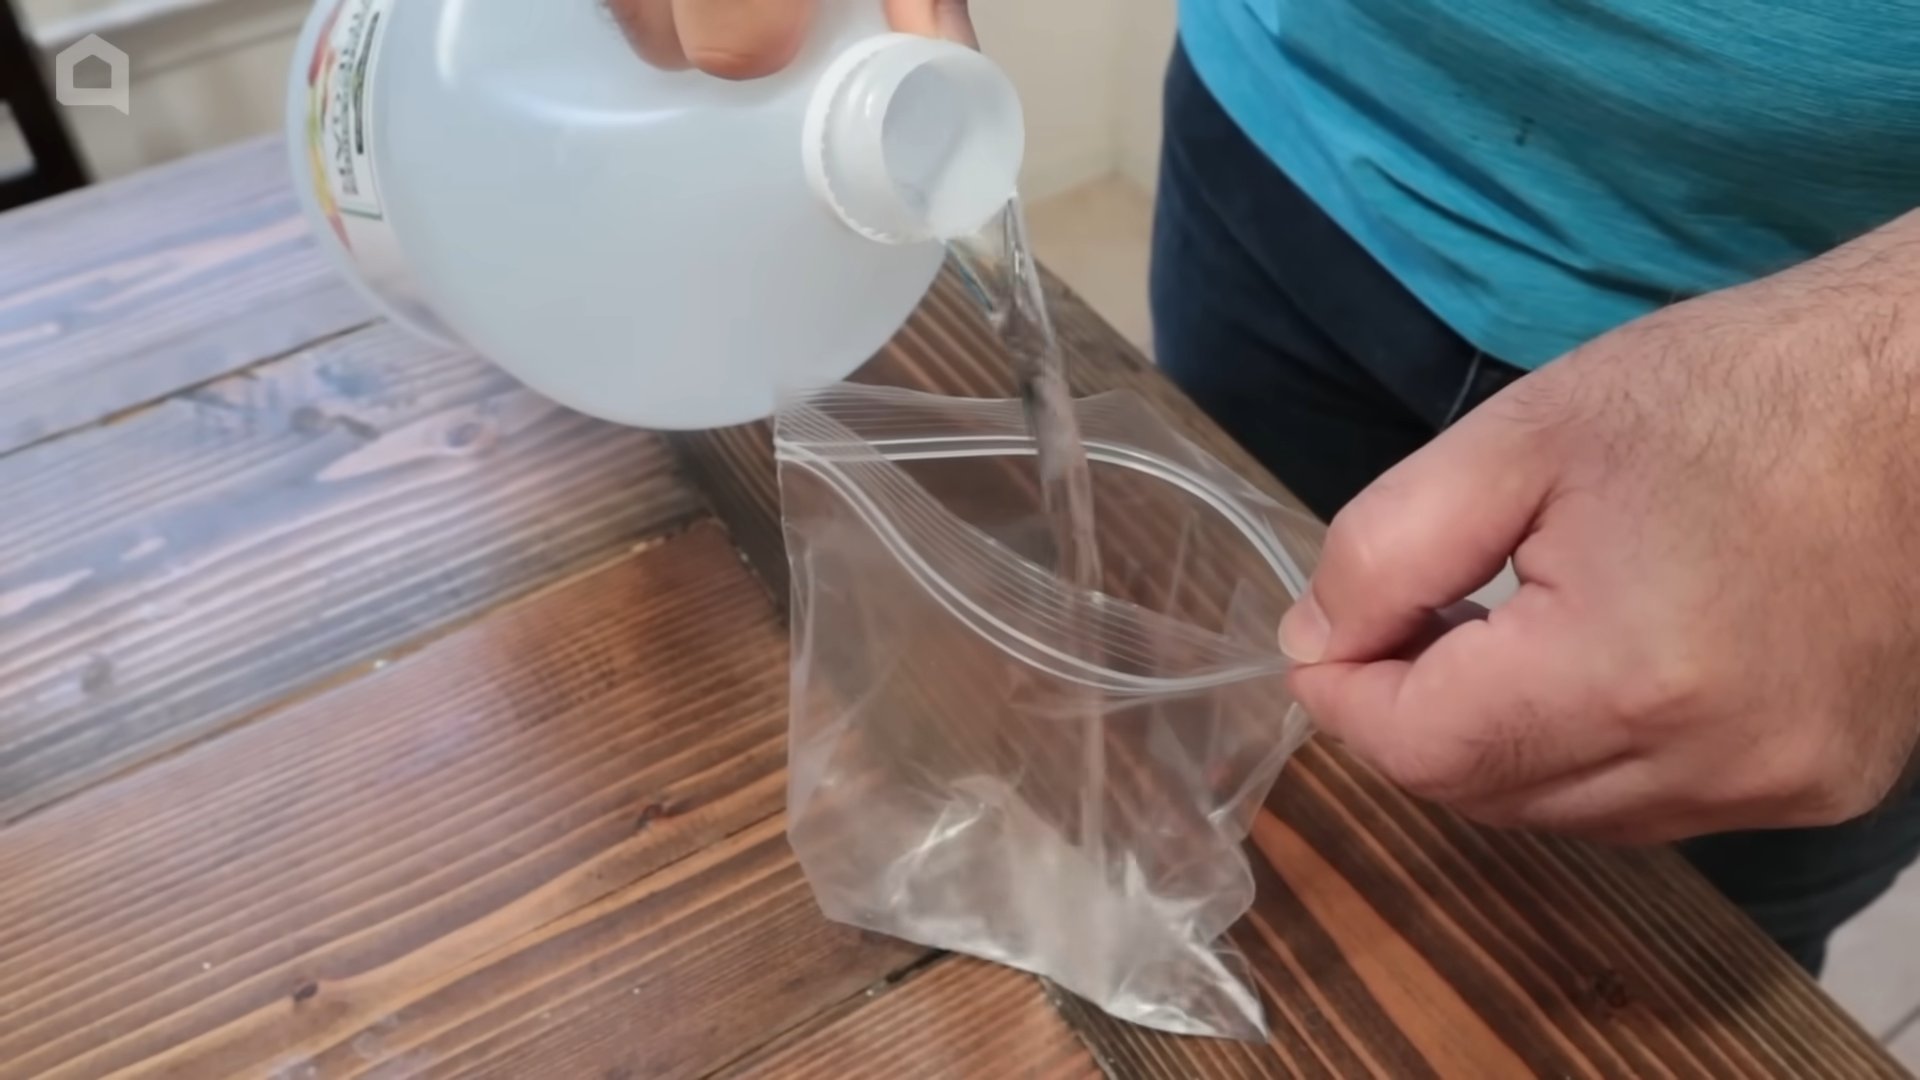
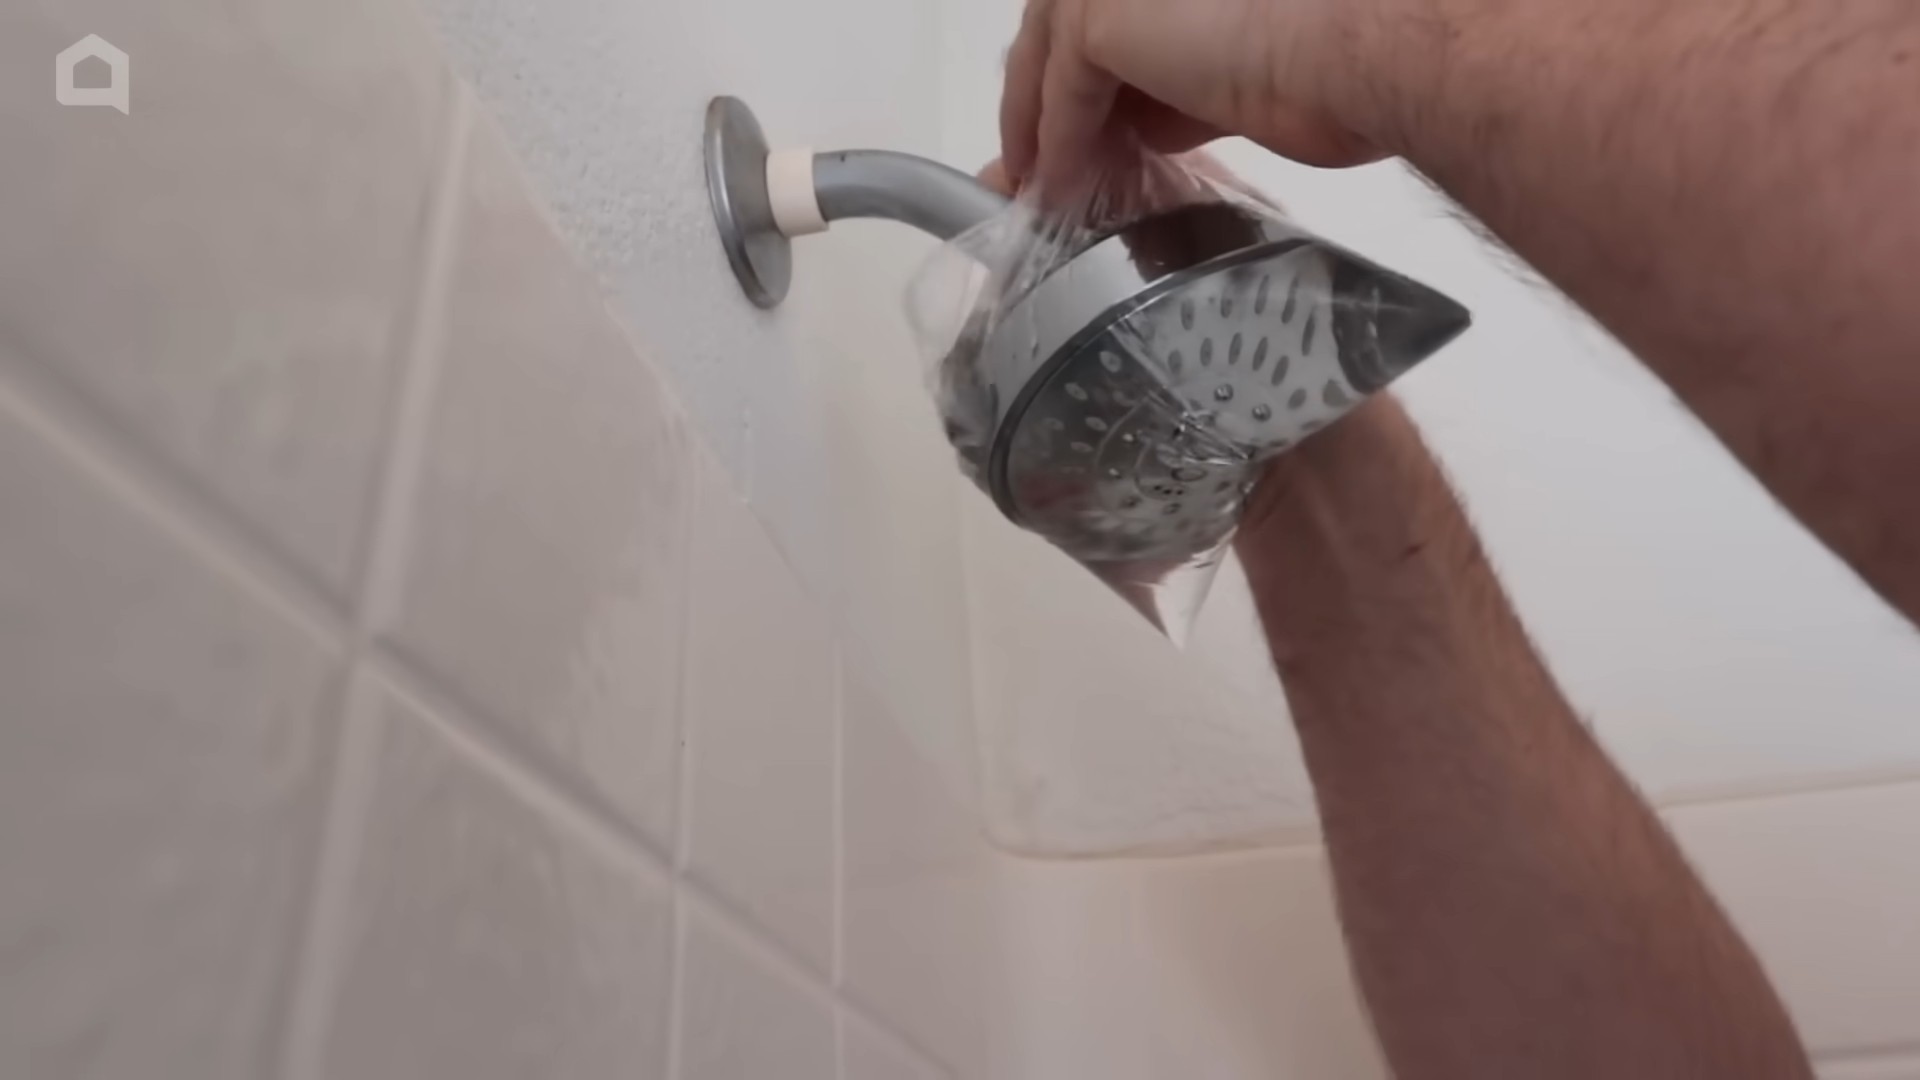
Can vinegar remove hard water stains?
Yes, vinegar is very effective at removing hard water stains due to its acidity. To remove hard water stains from faucets, showerheads, or other fixtures, soak a cloth in vinegar and wrap it around the affected area. Let it sit for at least 30 minutes, or even overnight for stubborn stains. Then, scrub the area with a brush or sponge and rinse with water. For larger surfaces like shower doors, you can spray the area with a vinegar solution and let it sit for a few minutes before scrubbing and rinsing.
How can I use vinegar to clean my coffee maker?
Vinegar is an excellent way to clean your coffee maker and remove mineral buildup. Fill the water reservoir with a 1:1 solution of vinegar and water. Run the coffee maker through a full brewing cycle. Then, run the coffee maker through two more cycles with just water to rinse out any remaining vinegar. This will help keep your coffee maker clean and functioning properly.
Can I use vinegar to clean my washing machine?
Yes, vinegar can be used to clean your washing machine and remove detergent buildup, mildew, and odors. Pour 1-2 cups of white distilled vinegar into the detergent dispenser. Run the washing machine on a hot, empty cycle. This will help clean and deodorize the washing machine. You can also use vinegar to clean the rubber gasket around the door of a front-loading washing machine to prevent mildew growth.
What are some other uses for vinegar in cleaning?
Vinegar has many other uses in cleaning, including:
* Cleaning windows and mirrors: Mix equal parts vinegar and water in a spray bottle and use it to clean windows and mirrors for a streak-free shine.
* Deodorizing drains: Pour 1/2 cup of baking soda down the drain, followed by 1 cup of vinegar. Let it fizz for 30 minutes, then flush with hot water.
* Removing mildew from bathroom tiles: Spray the affected area with vinegar and let it sit for 30 minutes before scrubbing and rinsing.
* Cleaning cutting boards: Wipe cutting boards with vinegar to disinfect them and remove odors.
* Removing stickers and labels: Soak a cloth in vinegar and apply it to the sticker or label. Let it sit for a few minutes, then peel off the sticker or label.
Leave a Comment