
Winter Kale Container Gardening: Sounds intimidating, right? But trust me, it’s not! Imagine stepping outside your door on a chilly winter day and harvesting fresh, vibrant kale right from your own patio. No more sad, wilted greens from the grocery store! This isn’t just about growing vegetables; it’s about connecting with nature, even when the world outside seems frozen.
For centuries, cultures around the globe have relied on hardy greens like kale to sustain them through the harsh winter months. From the hearty stews of Scotland to the vibrant salads of the Mediterranean, kale has been a nutritional powerhouse and a symbol of resilience. Now, you can tap into that same tradition, even with limited space.
Let’s face it, winter can be a dreary time. We crave fresh, healthy food, but the garden seems dormant. That’s where winter kale container gardening comes in! This DIY guide will walk you through everything you need to know to successfully grow kale in containers, providing you with a continuous supply of nutritious greens throughout the winter. I’ll share my favorite tips and tricks, from choosing the right container and soil to protecting your plants from frost. Get ready to enjoy delicious, homegrown kale all winter long!
DIY Winter Kale Container Garden: A Step-by-Step Guide
Hey there, fellow gardening enthusiasts! Winter doesn’t have to mean the end of fresh greens. I’m going to walk you through creating a thriving winter kale container garden that will provide you with delicious and nutritious leaves all season long. It’s easier than you think, and so rewarding!
Choosing the Right Kale Varieties
First things first, let’s talk kale. Not all kale varieties are created equal when it comes to cold hardiness. Some are much better suited for winter growing than others. Here are a few of my favorites:
* **Red Russian Kale:** This variety is incredibly cold-tolerant and has a slightly sweet flavor that I absolutely love. The frilly, reddish-purple leaves add a beautiful pop of color to the winter garden.
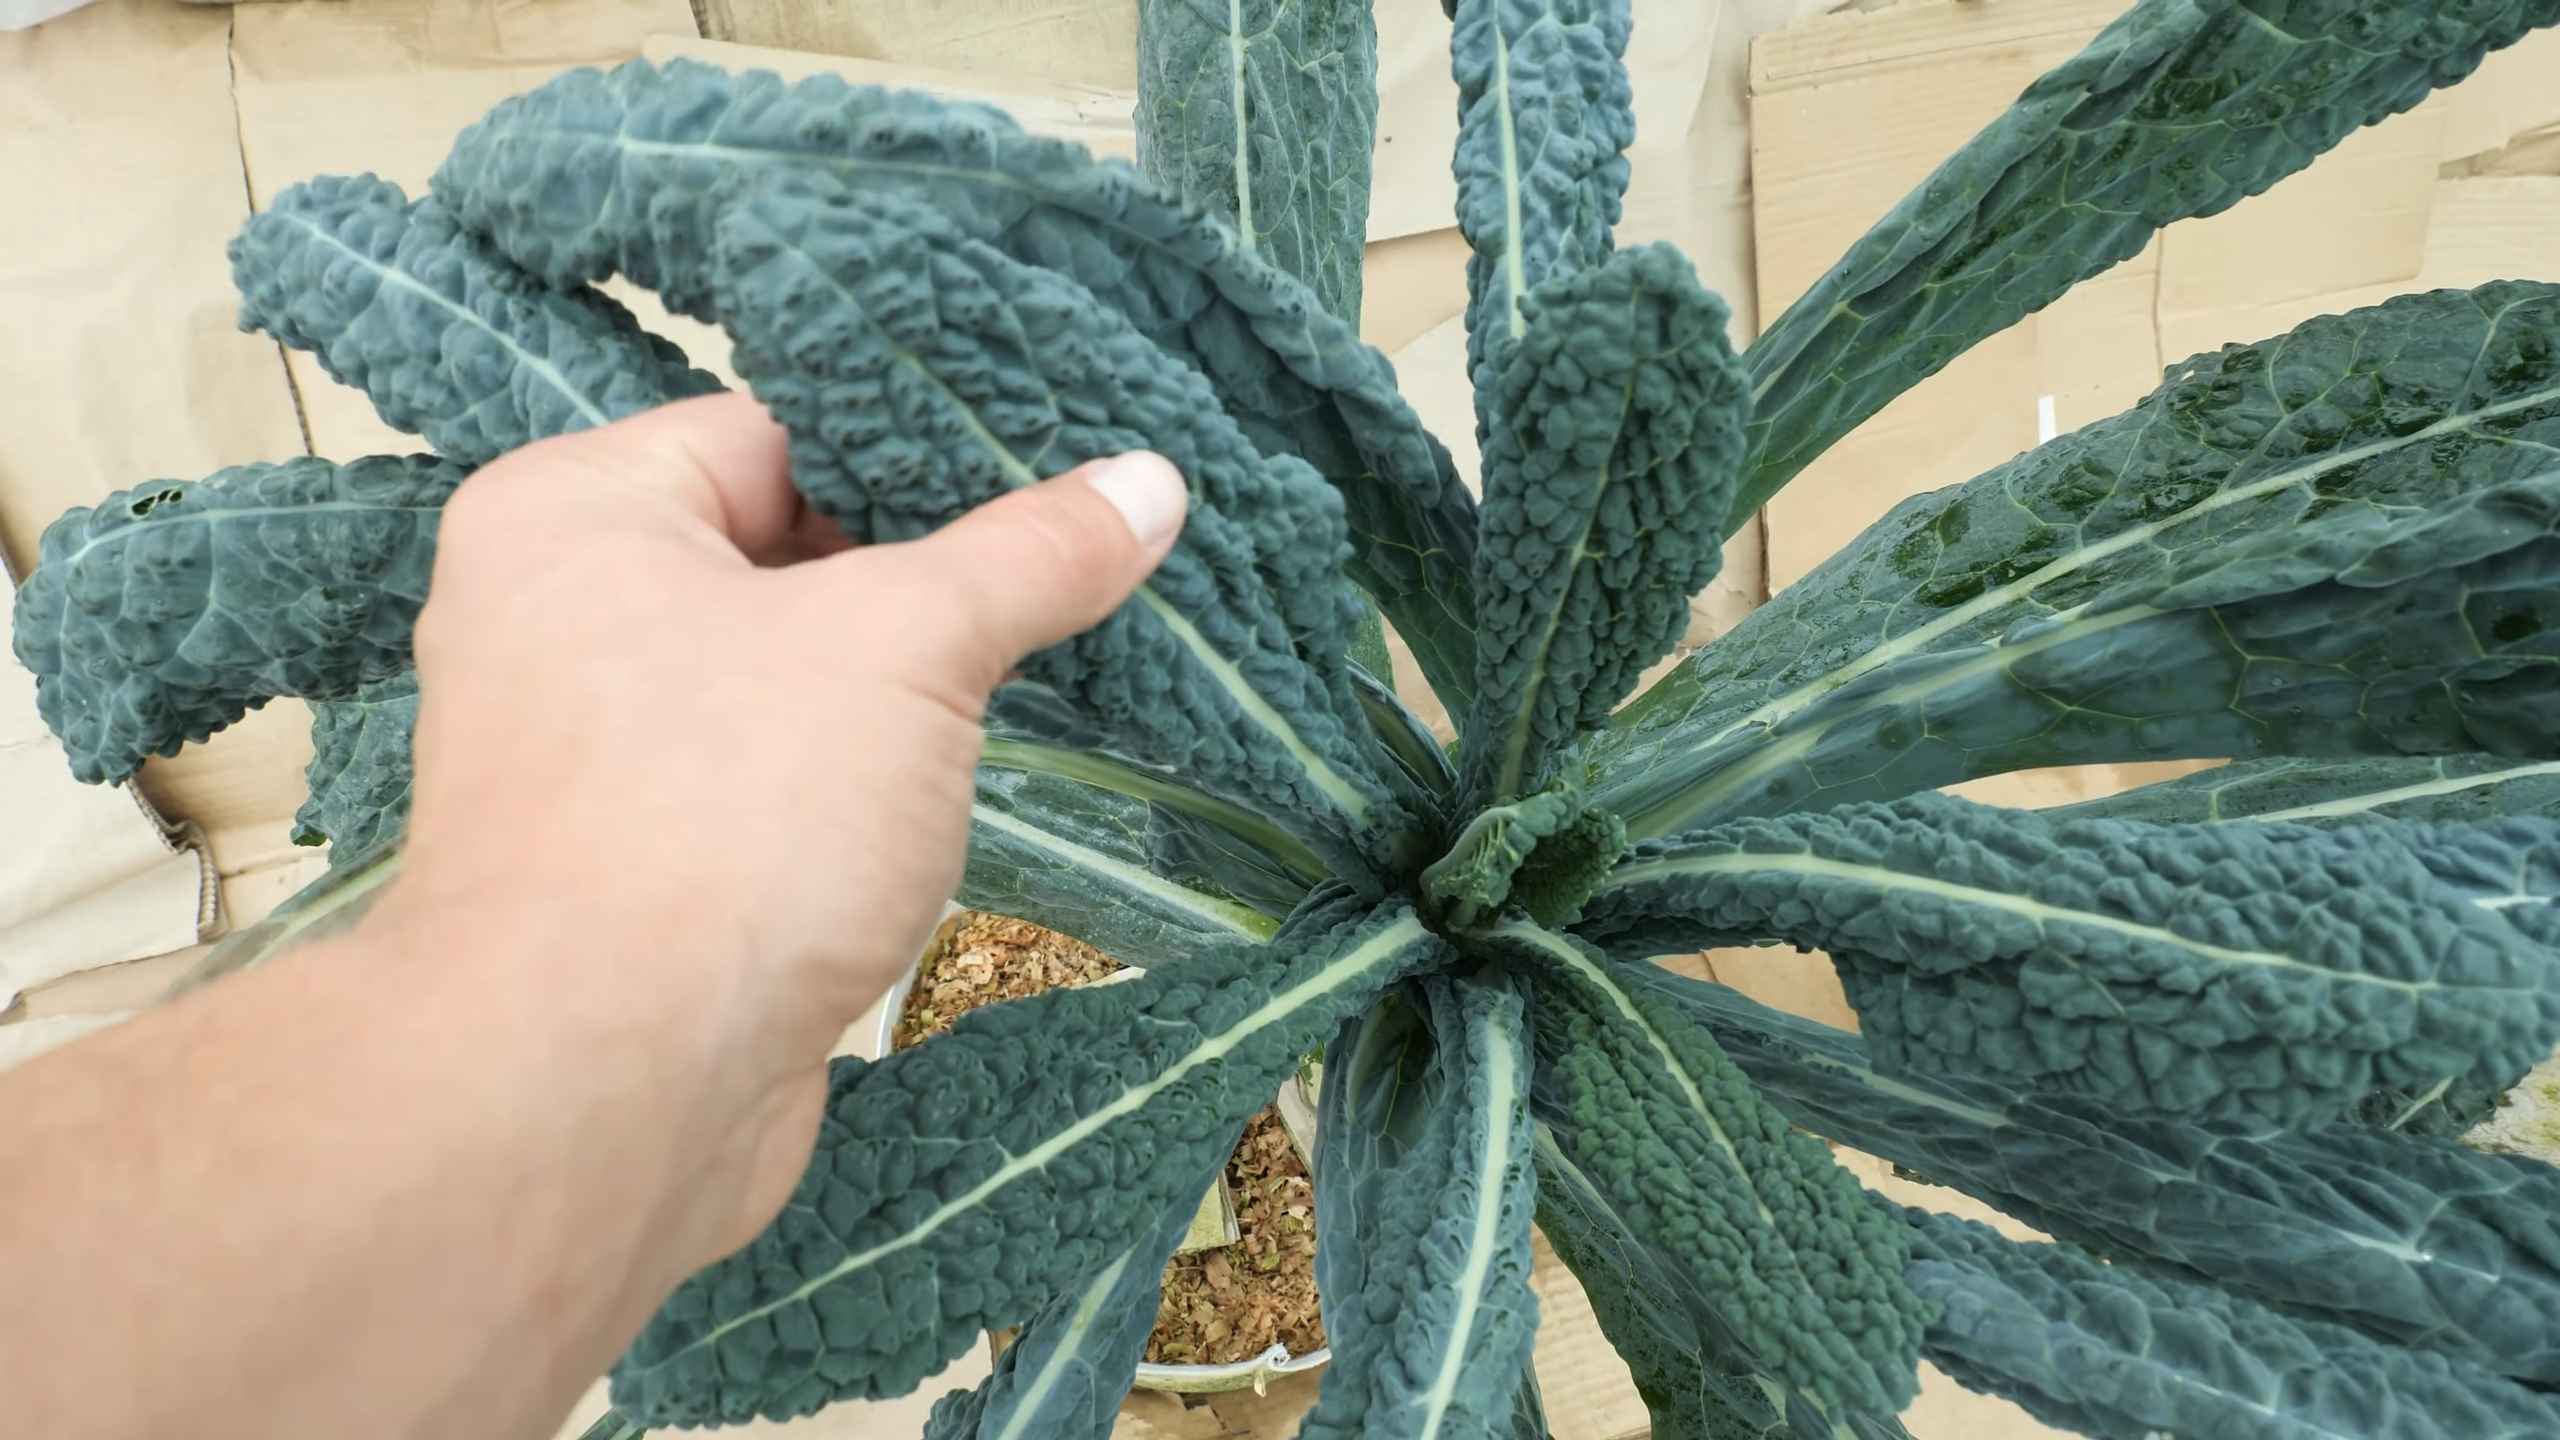
* **Lacinato Kale (Dinosaur Kale or Tuscan Kale):** This dark green, almost black, kale is another winter winner. It has a slightly nutty flavor and holds up well in colder temperatures.
* **Siberian Kale:** As the name suggests, this kale is super hardy. It’s a bit tougher in texture than other varieties, but it’s incredibly reliable for winter harvests.
* **Redbor Kale:** This one is more for ornamental value, but it’s also edible! The deeply ruffled, purple leaves are stunning and add a dramatic touch to your container garden.
Gathering Your Supplies
Okay, now that we’ve picked our kale, let’s gather the necessary supplies. Here’s what you’ll need:
* **Containers:** Choose containers that are at least 12 inches in diameter and 12 inches deep. This will give your kale roots plenty of room to grow. Make sure the containers have drainage holes!
* **Potting Mix:** Don’t use garden soil in containers! It compacts too easily and doesn’t drain well. Opt for a high-quality potting mix specifically designed for containers. I prefer a mix that contains peat moss, perlite, and vermiculite.
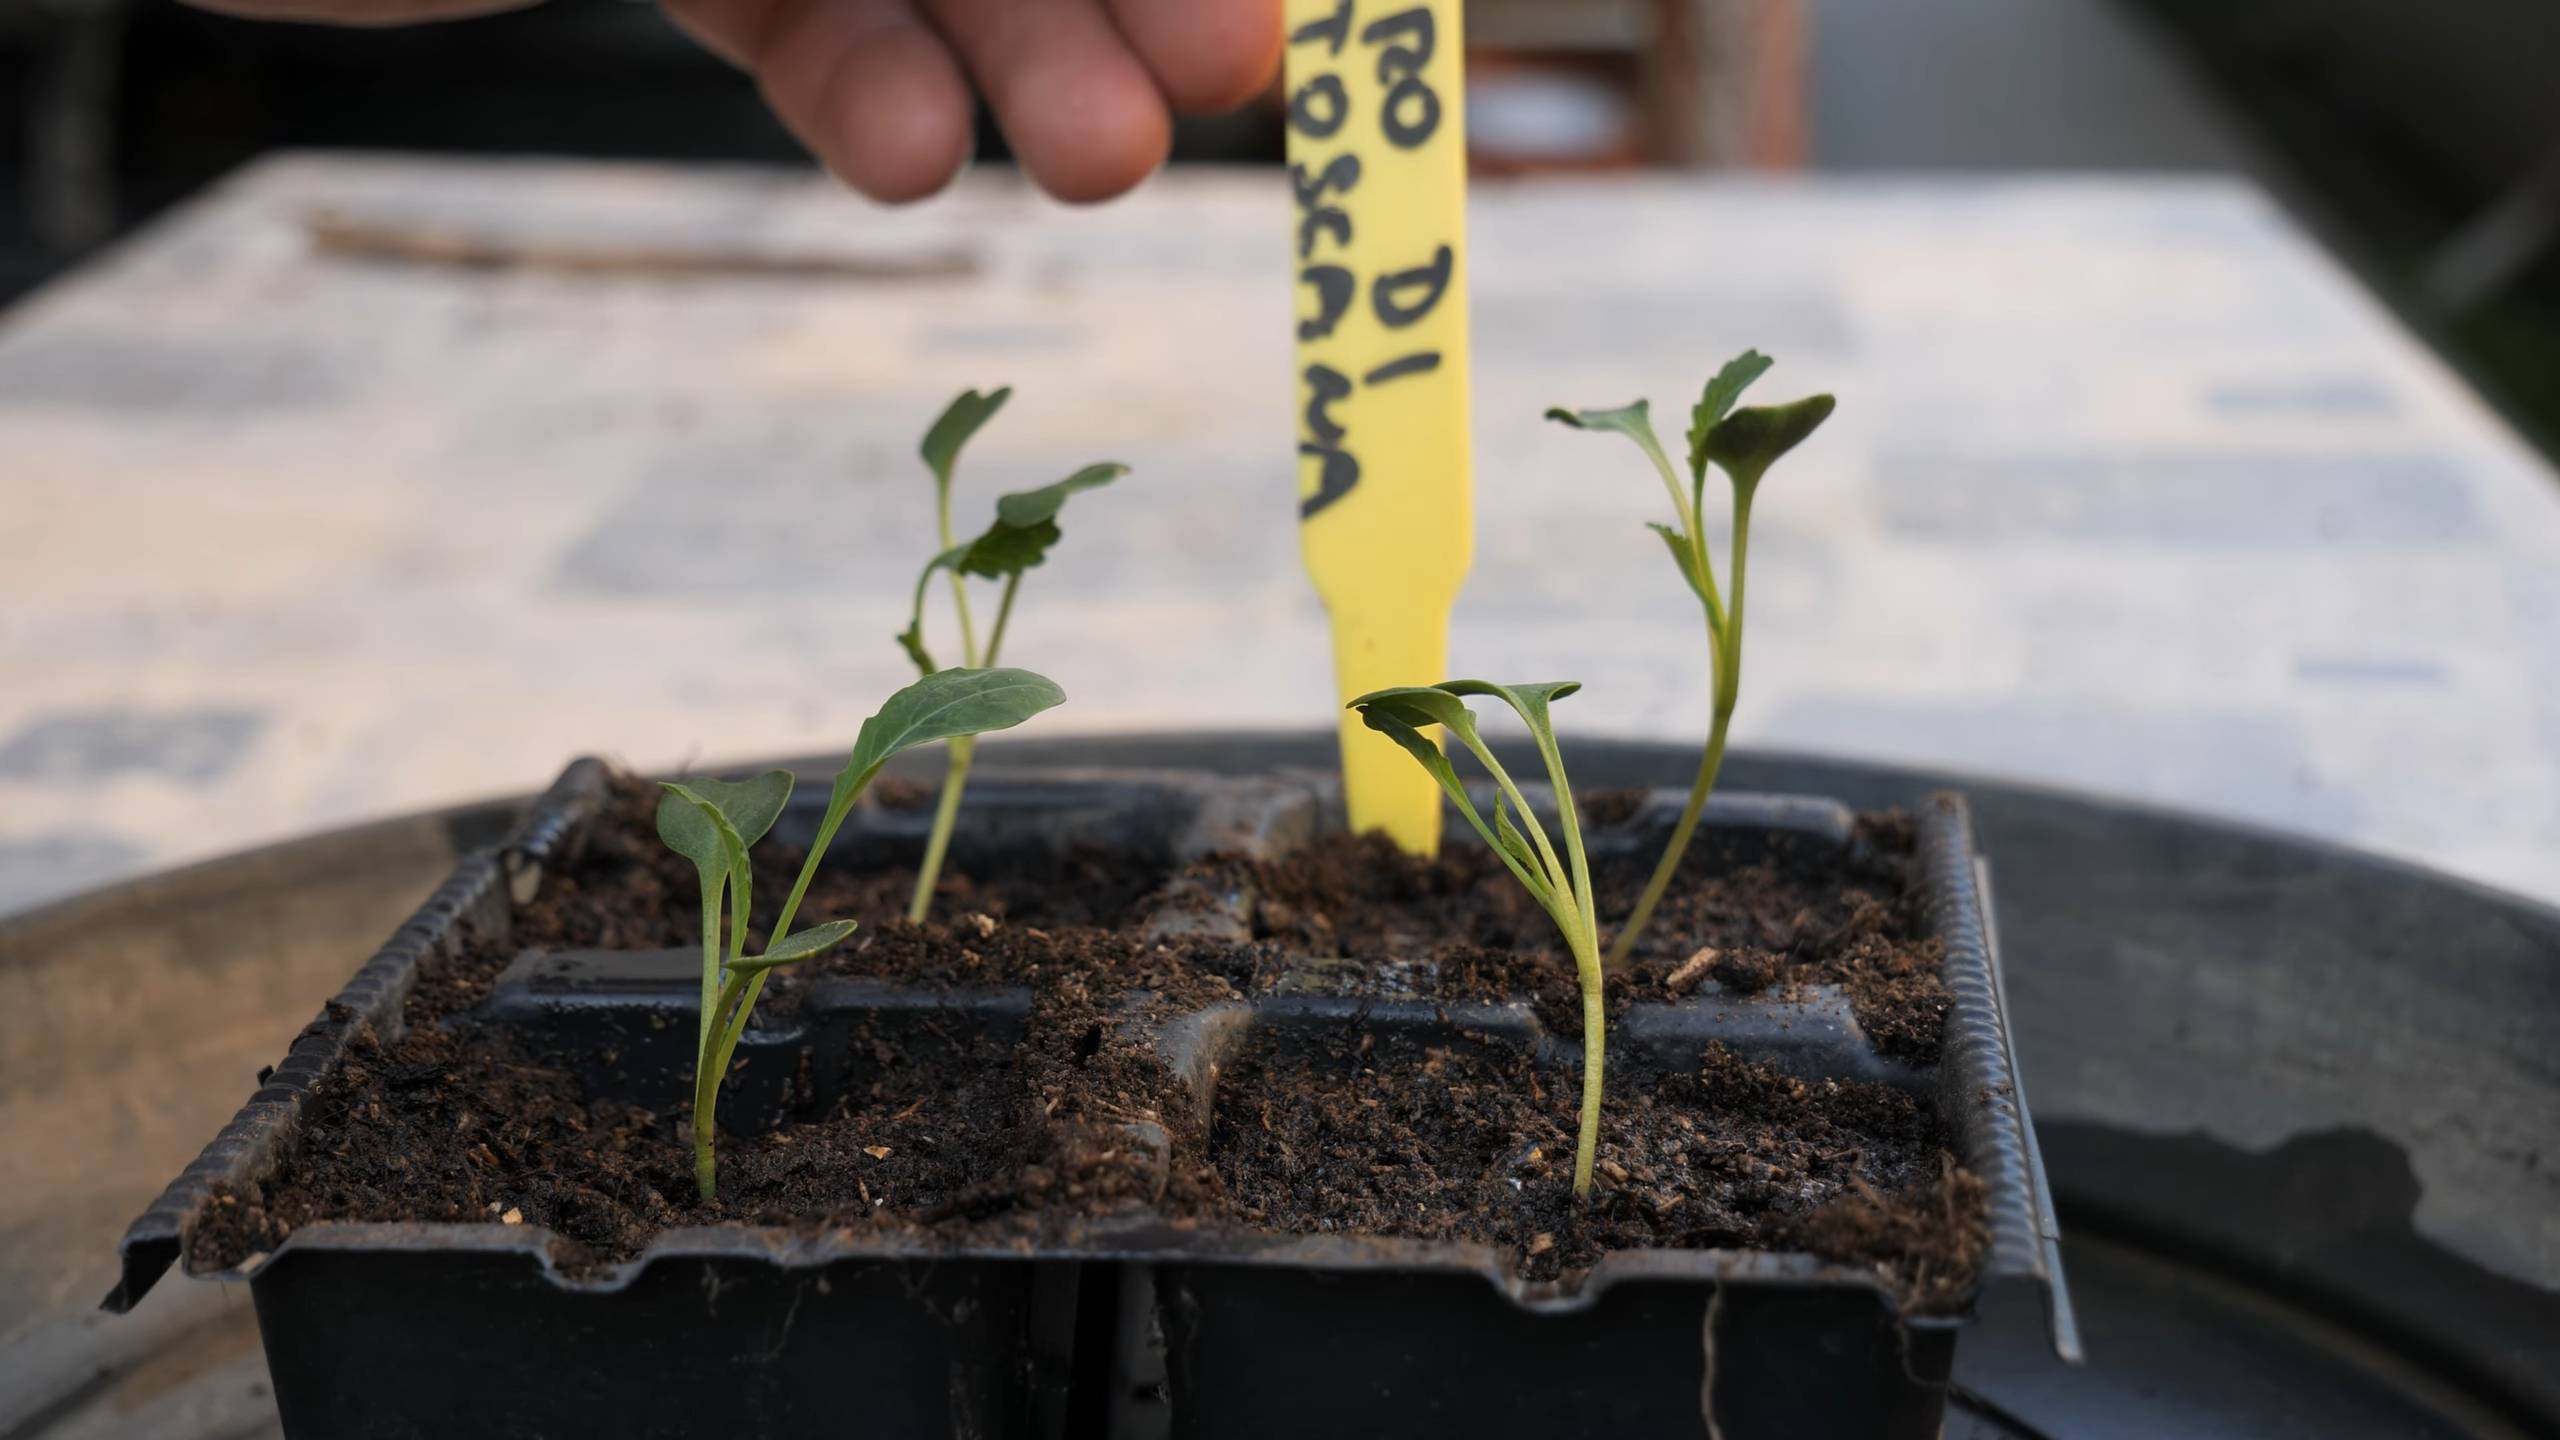
* **Kale Seedlings or Seeds:** You can start your kale from seed indoors or purchase seedlings from a local nursery. Seedlings are a quicker option, but starting from seed is more economical.
* **Slow-Release Fertilizer:** Kale is a heavy feeder, so a slow-release fertilizer will provide it with the nutrients it needs throughout the growing season. Look for a fertilizer with a balanced NPK ratio (nitrogen, phosphorus, potassium).
* **Watering Can or Hose:** Essential for keeping your kale hydrated.
* **Trowel or Small Shovel:** For planting and transplanting.
* **Optional: Mulch:** Mulch helps retain moisture, suppress weeds, and regulate soil temperature. Straw, shredded leaves, or wood chips work well.
* **Optional: Row Covers or Cold Frames:** If you live in an area with particularly harsh winters, row covers or cold frames can provide extra protection for your kale.
Planting Your Kale
Alright, let’s get our hands dirty! Here’s how to plant your kale in containers:
1. **Prepare the Containers:** Fill your containers with potting mix, leaving about an inch or two of space at the top.
2. **Add Fertilizer:** Sprinkle a slow-release fertilizer evenly over the surface of the potting mix, following the instructions on the fertilizer package.
3. **Plant Seedlings (if using):** Gently remove the kale seedlings from their nursery pots. Loosen the roots slightly and plant them in the containers, spacing them about 8-12 inches apart. Make sure the top of the root ball is level with the surface of the potting mix.
4. **Sow Seeds (if using):** Sow kale seeds about 1/4 inch deep and 1 inch apart. Once the seedlings emerge, thin them to 8-12 inches apart, selecting the strongest seedlings to keep.
5. **Water Thoroughly:** Water the containers thoroughly after planting, until water drains out of the drainage holes.
6. **Add Mulch (optional):** Apply a layer of mulch around the kale plants to help retain moisture and suppress weeds.
Caring for Your Winter Kale
Now that your kale is planted, it’s time to provide it with the care it needs to thrive throughout the winter.
1. **Watering:** Water your kale regularly, especially during dry spells. The soil should be consistently moist, but not waterlogged. Check the soil moisture by sticking your finger into the soil. If the top inch feels dry, it’s time to water.
2. **Sunlight:** Kale needs at least 6 hours of sunlight per day. Place your containers in a sunny location. If you live in an area with limited sunlight, you may need to supplement with grow lights.
3. **Fertilizing:** Even with slow-release fertilizer, your kale may need an occasional boost of nutrients. You can fertilize with a liquid fertilizer every few weeks, following the instructions on the fertilizer package.
4. **Pest Control:** Kale is relatively pest-resistant, but it can be susceptible to aphids, cabbage worms, and flea beetles. Inspect your plants regularly for pests. You can control aphids with a strong spray of water or insecticidal soap. Cabbage worms can be handpicked or controlled with Bacillus thuringiensis (Bt). Flea beetles can be controlled with row covers or insecticidal soap.
5. **Weed Control:** Keep your containers free of weeds. Weeds compete with kale for nutrients and water.
6. **Protection from Cold:** If you live in an area with particularly harsh winters, you may need to protect your kale from frost and freezing temperatures. Row covers or cold frames can provide extra insulation. You can also move your containers to a sheltered location, such as a garage or shed, during extreme cold snaps.
Harvesting Your Kale
The best part! You can start harvesting kale leaves as soon as they are large enough to eat, usually about 6-8 inches long.
1. **Harvest Outer Leaves:** Harvest the outer leaves first, leaving the inner leaves to continue growing. This will allow you to harvest kale continuously throughout the winter.
2. **Cut or Snap Leaves:** You can cut or snap the leaves off the plant. I prefer to use scissors or pruning shears for a clean cut.
3. **Wash and Store:** Wash the kale leaves thoroughly before eating. You can store kale in the refrigerator for up to a week.
Troubleshooting
Even with the best care, you might encounter a few challenges along the way. Here are some common problems and how to address them:
* **Yellowing Leaves:** Yellowing leaves can be a sign of nutrient deficiency, overwatering, or underwatering. Check the soil moisture and fertilize if necessary.
* **Stunted Growth:** Stunted growth can be caused by poor soil, lack of sunlight, or pests. Make sure your kale is planted in a high-quality potting mix, receives adequate sunlight, and is free of pests.
* **Holes in Leaves:** Holes in leaves are usually caused by pests, such as cabbage worms or flea beetles. Inspect your plants regularly for pests and take appropriate control measures.
* **Bolting:** Bolting (premature flowering) can occur if kale is exposed to prolonged periods of cold weather followed by warm weather. This is more common in the spring than in the winter. To prevent bolting, choose cold-hardy varieties and protect your plants from extreme temperature fluctuations.
Extending the Harvest
Want to keep your kale harvest going even longer? Here are a few tips:
* **Succession Planting:** Plant new kale seedlings every few weeks to ensure a continuous supply of fresh leaves.
* **Overwintering:** In mild climates, kale can overwinter and continue producing leaves in the spring. Cut back the plants in the fall and protect them from frost.
* **Seed Saving:** If you allow your kale to flower and go to seed, you can save the seeds and plant them next year.
Enjoying Your Winter Kale
Now that you’ve harvested your kale, it’s time to enjoy it! Kale is incredibly versatile and can be used in a variety of dishes. Here are a few of my favorite ways to eat kale:
* **Salads:** Add chopped kale to salads for a boost of nutrients and flavor. Massage the kale with olive oil and lemon juice to soften it.
* **Smoothies:** Blend kale into smoothies for a healthy and delicious breakfast or snack.
* **Soups and Stews:** Add chopped kale to soups and stews for added flavor and nutrition.
* **Sautéed Kale:** Sauté kale with garlic and olive oil for a simple and flavorful side dish.
* **Kale Chips:** Bake kale leaves in the oven for crispy and healthy kale chips.
I hope this guide has inspired you to create your own winter kale container garden. It’s a rewarding and delicious way to enjoy fresh greens all season long! Happy gardening!
Conclusion
So, there you have it! Mastering winter kale container gardening is not only achievable but also incredibly rewarding. Imagine stepping outside on a crisp winter morning and harvesting fresh, vibrant kale right from your patio or balcony. No more relying solely on grocery store produce, often shipped from afar and lacking the peak flavor and nutrients of homegrown greens. This DIY trick empowers you to enjoy delicious, healthy kale throughout the colder months, adding a burst of color and vitality to your winter meals.
The beauty of container gardening lies in its flexibility. You’re not limited by garden space or soil conditions. Whether you have a sprawling backyard or a tiny apartment balcony, you can successfully grow kale in containers. Plus, moving your containers allows you to optimize sunlight exposure as the seasons change, ensuring your kale receives the light it needs to thrive.
Beyond the basic method outlined, there are numerous variations you can explore to personalize your winter kale container gardening experience. Consider experimenting with different kale varieties. Curly kale, Lacinato kale (also known as dinosaur kale), and Red Russian kale each offer unique textures and flavors. Try planting a mix of varieties in the same container for a visually appealing and diverse harvest.
Another variation involves companion planting. Certain herbs and flowers can deter pests and attract beneficial insects, creating a healthier environment for your kale. Marigolds, nasturtiums, and rosemary are excellent choices for companion planting in your kale containers.
Don’t be afraid to get creative with your container selection. While standard plastic pots work perfectly well, you can also use repurposed items like old buckets, wooden crates, or even galvanized tubs. Just ensure your chosen container has adequate drainage holes to prevent waterlogging.
Furthermore, think about the aesthetic appeal of your kale containers. Add a layer of mulch to the soil surface to retain moisture and suppress weeds. Use decorative stones or pebbles to add visual interest. Arrange your containers in a pleasing manner to create a mini-garden oasis on your patio or balcony.
The key to successful winter kale container gardening is consistent care. Regularly check the soil moisture and water as needed. Fertilize your kale every few weeks with a balanced organic fertilizer. Monitor for pests and diseases and take action promptly if any problems arise.
We wholeheartedly encourage you to give this DIY trick a try. It’s a simple, affordable, and incredibly satisfying way to enjoy fresh, healthy kale throughout the winter. Once you experience the joy of harvesting your own homegrown greens, you’ll be hooked!
And most importantly, we want to hear about your experiences! Share your photos, tips, and challenges with us in the comments section below. Let’s build a community of winter kale container gardeners and learn from each other. What varieties did you plant? What challenges did you face? What successes did you celebrate? Your insights will help others embark on their own winter kale container gardening adventures. So, grab your containers, seeds, and soil, and let’s get growing!
Frequently Asked Questions (FAQ)
What is the best time to start winter kale container gardening?
The ideal time to start your winter kale container garden depends on your local climate. Generally, you should aim to plant your kale seedlings or seeds about 6-8 weeks before the first expected frost. This allows the kale plants to establish themselves before the onset of colder weather. In many regions, this means planting in late summer or early fall. Check your local frost dates to determine the optimal planting time for your area. If you live in a region with mild winters, you may be able to plant even later in the fall.
What type of container is best for growing kale?
The best type of container for growing kale is one that is at least 12 inches deep and 12 inches wide. This provides ample space for the kale roots to grow and develop. The container should also have adequate drainage holes to prevent waterlogging, which can lead to root rot. You can use plastic pots, terracotta pots, wooden crates, or even repurposed containers like old buckets or tubs. Just make sure the container is clean and free of any harmful chemicals. Dark-colored containers will absorb more heat, which can be beneficial in colder climates, but may overheat the soil in warmer regions.
What kind of soil should I use for winter kale container gardening?
Use a well-draining potting mix specifically formulated for container gardening. Avoid using garden soil, as it can become compacted in containers and hinder drainage. A good potting mix will contain a blend of peat moss, perlite, and vermiculite, which provides good aeration and water retention. You can also amend your potting mix with compost or other organic matter to improve its fertility. Ensure the pH of the soil is slightly acidic to neutral, ideally between 6.0 and 7.0.
How much sunlight does kale need in the winter?
Kale needs at least 6 hours of sunlight per day to thrive. In the winter, sunlight can be limited, so it’s important to choose a location for your containers that receives maximum sunlight exposure. If you don’t have a sunny spot, you can supplement with grow lights. Rotate your containers regularly to ensure that all sides of the plants receive adequate sunlight. Consider using reflective surfaces, such as white walls or aluminum foil, to bounce sunlight onto your kale plants.
How often should I water my kale in the winter?
Water your kale when the top inch of soil feels dry to the touch. The frequency of watering will depend on the weather conditions and the type of container you’re using. In general, you’ll need to water less frequently in the winter than in the summer. Avoid overwatering, as this can lead to root rot. Water deeply, allowing the water to drain out of the drainage holes. Water in the morning to allow the foliage to dry before nightfall, which can help prevent fungal diseases.
Do I need to fertilize my kale in the winter?
Yes, kale benefits from regular fertilization, even in the winter. Use a balanced organic fertilizer, such as compost tea or fish emulsion, every few weeks. Follow the instructions on the fertilizer label for application rates. Avoid over-fertilizing, as this can burn the roots of the plants. You can also amend your soil with slow-release fertilizer pellets at planting time to provide a steady supply of nutrients throughout the growing season.
How do I protect my kale from frost and freezing temperatures?
Kale is relatively cold-hardy, but it can still be damaged by severe frost and freezing temperatures. To protect your kale, you can cover your containers with frost blankets or burlap sacks. You can also move your containers to a sheltered location, such as a garage or shed, during periods of extreme cold. Avoid using plastic sheeting to cover your kale, as this can trap moisture and lead to fungal diseases. Mulching around the base of the plants can also help insulate the roots.
What are some common pests and diseases that affect kale?
Common pests that affect kale include aphids, cabbage worms, and flea beetles. You can control these pests by handpicking them off the plants, spraying with insecticidal soap, or using row covers to prevent them from reaching the plants. Common diseases that affect kale include powdery mildew and black rot. You can prevent these diseases by providing good air circulation, avoiding overwatering, and using disease-resistant varieties. If you notice signs of disease, remove the affected leaves and spray with a fungicide.
How do I harvest kale from my container garden?
Harvest kale by cutting off the outer leaves, leaving the inner leaves to continue growing. This allows you to harvest kale continuously throughout the winter. Harvest the leaves when they are about 6-8 inches long. Avoid harvesting more than one-third of the plant at a time. Wash the leaves thoroughly before eating. Kale leaves are most flavorful after a frost.
Can I grow other vegetables in the same container as kale?
While it’s generally best to give kale its own dedicated container, you can potentially grow certain companion plants alongside it. Good companion plants for kale include herbs like rosemary, thyme, and sage, as well as flowers like marigolds and nasturtiums. These plants can help deter pests and attract beneficial insects. Avoid planting kale with other members of the brassica family, such as broccoli, cabbage, and cauliflower, as they can compete for nutrients and attract the same pests and diseases.

Leave a Comment