
Year-Round Homegrown Kitchen Veggies: Imagine stepping into your kitchen, not to a barren countertop, but to a vibrant display of fresh, homegrown vegetables – even in the dead of winter! Sounds like a dream, right? Well, it doesn’t have to be! For centuries, humans have sought ways to extend the growing season, from ancient Roman greenhouses to ingenious cold frames used by early American settlers. The desire to nourish ourselves with fresh, local produce is deeply ingrained in our history.
But let’s face it, modern life is busy. We’re often tempted by the convenience of the grocery store, even if it means sacrificing flavor and freshness. That’s where these DIY tricks come in. I’m here to show you how to cultivate year-round homegrown kitchen veggies, regardless of your climate or experience level. No more relying solely on seasonal availability or questionable supermarket produce!
This article is packed with simple, effective strategies to help you enjoy delicious, nutrient-rich vegetables straight from your own home, all year long. We’ll explore everything from choosing the right varieties and utilizing indoor growing techniques to building simple protective structures for your outdoor garden. Get ready to unlock the secrets to a constant supply of fresh, flavorful ingredients and say goodbye to bland, store-bought veggies forever!
Grow Your Own Kitchen Garden: Year-Round Veggie Bounty!
Hey there, fellow gardening enthusiasts! Ever dreamt of snipping fresh herbs and veggies right from your kitchen, no matter the season? Well, I’m here to tell you it’s totally achievable! I’ve been experimenting with indoor gardening for years, and I’m excited to share my secrets to creating a thriving, year-round kitchen garden. Get ready to enjoy delicious, homegrown goodness all year long!
Choosing Your Veggies and Herbs
Before we dive into the nitty-gritty, let’s talk about what you can actually grow indoors. Not everything thrives under artificial light, so it’s important to choose wisely. Here are some of my favorite and most successful indoor crops:
* Leafy Greens: Lettuce (loose-leaf varieties are best), spinach, kale, arugula, and Swiss chard are all relatively easy to grow indoors. They don’t need intense light and can be harvested continuously.
* Herbs: Basil, mint, chives, parsley, oregano, thyme, and rosemary are fantastic choices. They add flavor to your dishes and fill your kitchen with wonderful aromas.
* Scallions (Green Onions): These are super easy to regrow from scraps!
* Microgreens: Radish, broccoli, sunflower, and pea shoots are quick to grow and packed with nutrients.
* Peppers: Smaller pepper varieties, like chili peppers or dwarf bell peppers, can do well indoors with enough light.
* Tomatoes: Dwarf or determinate tomato varieties are your best bet for indoor growing.
* Radishes: These root vegetables mature quickly and don’t require a lot of space.
Setting Up Your Indoor Garden
Okay, now for the fun part! Let’s get your indoor garden set up. Here’s what you’ll need:
* Grow Lights: This is the most crucial element! You’ll need artificial lights to mimic sunlight. LED grow lights are energy-efficient and effective. I personally use a combination of full-spectrum LED panels and strip lights.
* Containers: Choose pots or containers with drainage holes. The size will depend on what you’re growing. Small herbs and microgreens can thrive in smaller pots, while larger plants like tomatoes will need bigger containers.
* Potting Mix: Use a high-quality potting mix specifically designed for containers. Avoid using garden soil, as it can compact and drain poorly.
* Seed Starting Supplies (Optional): If you’re starting from seeds, you’ll need seed trays, a humidity dome, and a heat mat (optional, but helpful for germination).
* Watering Can or Spray Bottle: For watering your plants.
* Fertilizer: A balanced liquid fertilizer is essential for providing your plants with the nutrients they need.
* Timer: To automate your grow lights.
* pH Meter (Optional): To monitor the pH of your soil.
* Small Fan: To provide air circulation and prevent fungal diseases.
Step-by-Step Guide to Starting Your Indoor Garden
Alright, let’s get our hands dirty! Here’s a step-by-step guide to starting your indoor garden:
1. Choose Your Location
* Find a spot in your home that’s relatively stable in temperature and away from drafts. A spare room, a corner of your kitchen, or even a well-lit basement can work.
* Make sure the area is easily accessible for watering and maintenance.
2. Set Up Your Grow Lights
* Mount your grow lights above your growing area. The distance between the lights and the plants will depend on the type of light and the plant species. Generally, start with the lights about 12-18 inches above the seedlings and adjust as needed.
* Use a timer to set the lights to run for 14-16 hours per day for leafy greens and herbs, and 16-18 hours for fruiting plants like tomatoes and peppers.
3. Prepare Your Containers
* Fill your containers with potting mix, leaving about an inch of space at the top.
* Moisten the potting mix thoroughly before planting.
4. Planting Your Seeds or Seedlings
* Starting from Seeds: Sow seeds according to the instructions on the seed packet. Gently press the seeds into the soil and cover them lightly. Water gently with a spray bottle. Place the seed trays under the grow lights and cover them with a humidity dome to maintain moisture.
* Transplanting Seedlings: Gently remove the seedlings from their starter trays and plant them in your prepared containers. Make sure the top of the root ball is level with the soil surface. Water thoroughly.
5. Watering and Fertilizing
* Water your plants when the top inch of soil feels dry to the touch. Avoid overwatering, as this can lead to root rot.
* Fertilize your plants every 2-3 weeks with a balanced liquid fertilizer, following the instructions on the fertilizer label.
6. Providing Air Circulation
* Place a small fan near your plants to provide air circulation. This will help prevent fungal diseases and strengthen the stems of your plants.
7. Monitoring and Adjusting
* Keep a close eye on your plants and adjust the lighting, watering, and fertilization as needed.
* If you notice any signs of pests or diseases, take action immediately.
Specific Plant Care Tips
Now, let’s delve into some specific care tips for some of the most popular indoor veggies and herbs:
Leafy Greens (Lettuce, Spinach, Kale)
* Light: These greens prefer moderate light, so 14-16 hours of light per day is sufficient.
* Watering: Keep the soil consistently moist, but not soggy.
* Harvesting: Harvest outer leaves as needed, allowing the plant to continue producing. This is called “cut-and-come-again” harvesting.
* Fertilizing: Fertilize every 2-3 weeks with a balanced liquid fertilizer.
Herbs (Basil, Mint, Chives, Parsley)
* Light: Herbs generally need more light than leafy greens, so aim for 16-18 hours per day.
* Watering: Water when the top inch of soil feels dry. Be careful not to overwater, especially mint.
* Harvesting: Pinch off leaves and stems regularly to encourage bushier growth.
* Fertilizing: Fertilize every 2-3 weeks with a balanced liquid fertilizer.
Scallions (Green Onions)
* Regrowing from Scraps: Save the white root ends of your scallions after using the green tops. Place the root ends in a glass of water, making sure the roots are submerged. Change the water every day or two.
* Planting: Once the roots have grown a few inches, plant the scallion ends in a pot of soil.
* Light: Scallions prefer bright light.
* Watering: Keep the soil consistently moist.
* Harvesting: Harvest the green tops as needed.
Microgreens (Radish, Broccoli, Sunflower, Pea Shoots)
* Growing Medium: Use a shallow tray filled with seed starting mix or coco coir.
* Sowing: Sprinkle seeds densely over the growing medium.
* Watering: Mist the seeds with water and cover the tray with a lid or plastic wrap to maintain humidity.
* Light: Once the seeds germinate, remove the lid and place the tray under grow lights.
* Harvesting: Harvest the microgreens when they are about 1-2 inches tall, usually within 7-14 days.
Peppers (Chili Peppers, Dwarf Bell Peppers)
* Light: Peppers need a lot of light, so provide them with 16-18 hours of light per day.
* Watering: Water when the top inch of soil feels dry.
* Fertilizing: Fertilize every 2 weeks with a fertilizer high in phosphorus and potassium to encourage flowering and fruiting.
* Pollination: You may need to hand-pollinate the flowers by gently shaking the plant or using a small brush to transfer pollen from one flower to another.
Tomatoes (Dwarf or Determinate Varieties)
* Light: Tomatoes need a lot of light, so provide them with 16-18 hours of light per day.
* Watering: Water deeply when the top inch of soil feels dry.
* Fertilizing: Fertilize every 2 weeks with a fertilizer high in phosphorus and potassium to encourage flowering and fruiting.
* Support: Provide support for the plants with stakes or cages.
* Pollination: You may need to hand-pollinate the flowers by gently shaking the plant or using a small brush to transfer pollen from one flower to another
Conclusion
So, there you have it! Unlocking the secret to year-round homegrown kitchen veggies is not some unattainable dream reserved for seasoned gardeners with acres of land. It’s a tangible reality accessible to anyone with a sunny windowsill, a spare corner, or even just a dedicated shelf under a grow light. We’ve explored simple, effective techniques that empower you to cultivate a continuous supply of fresh, flavorful produce right in your own home, regardless of the season.
Why is this DIY trick a must-try? Because it’s about more than just saving money on groceries (though that’s certainly a perk!). It’s about reconnecting with your food, understanding its origins, and experiencing the unparalleled satisfaction of nurturing life from seed to table. Imagine the joy of snipping fresh herbs for your pasta sauce in the dead of winter, or adding vibrant greens to your salad when snow is falling outside. It’s about bringing a touch of nature indoors, improving your air quality, and adding a splash of vibrant green to your living space.
But the benefits extend beyond the purely practical. Growing your own food is a therapeutic activity, a mindful practice that can reduce stress and improve your overall well-being. It’s a chance to slow down, connect with the natural world, and appreciate the simple beauty of growth and renewal. Plus, it’s an incredibly rewarding experience to share your homegrown bounty with friends and family, knowing that you’ve provided them with something truly special.
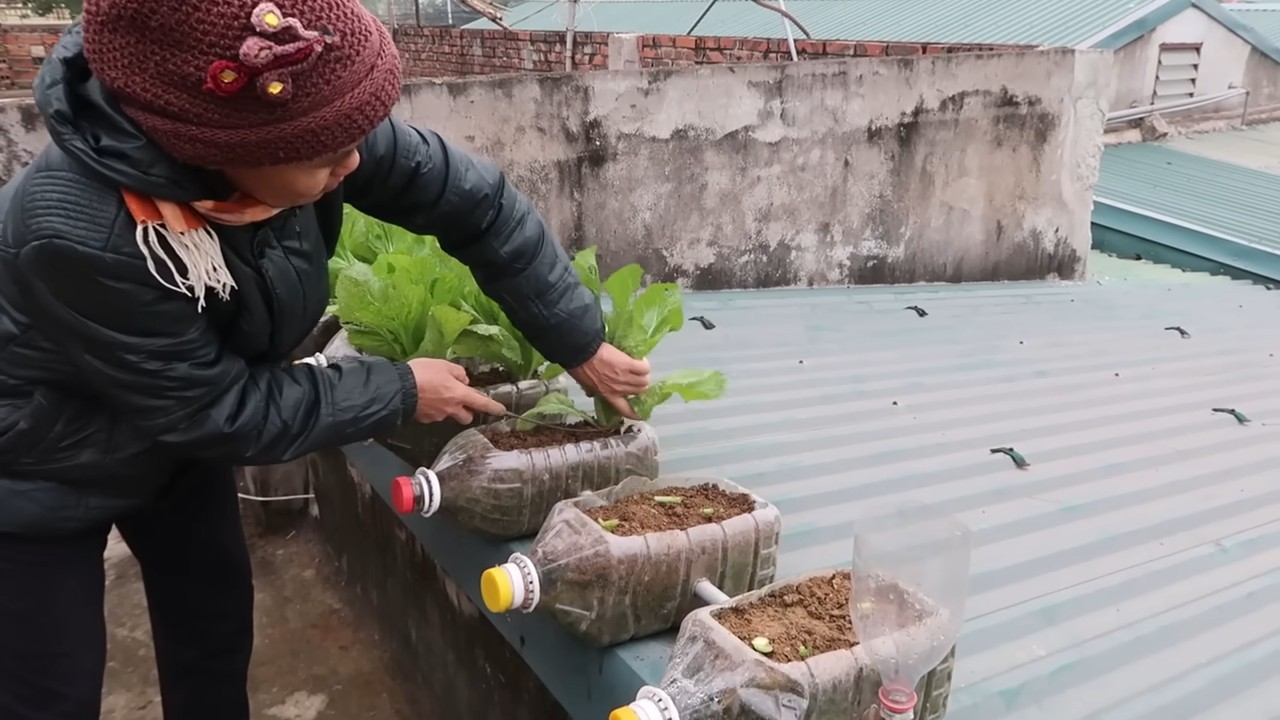
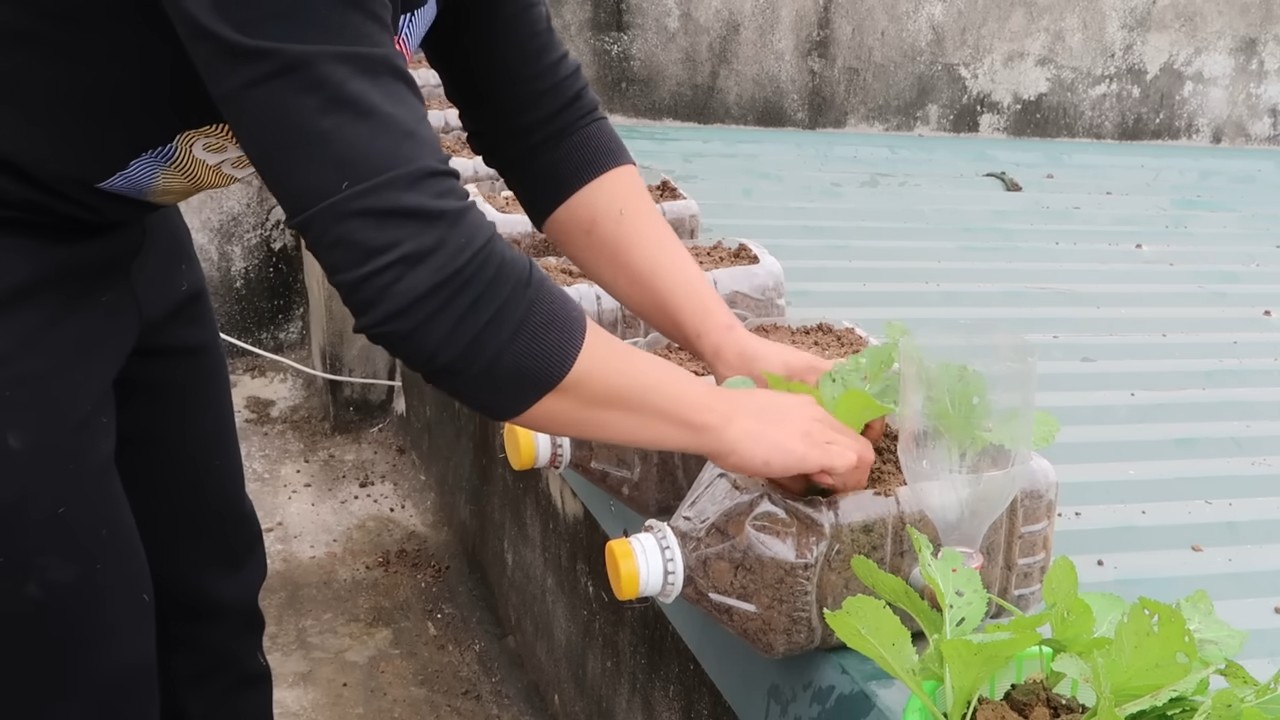
Don’t be afraid to experiment and personalize your indoor garden. Try different varieties of lettuce, herbs, and vegetables to discover your favorites. Consider adding companion plants to enhance growth and deter pests. Explore different growing mediums, from traditional soil to hydroponics, to find what works best for you. You can even get creative with your containers, repurposing old jars, cans, or even plastic bottles into charming planters.
Variations and Suggestions:
* Vertical Gardening: If space is limited, consider vertical gardening techniques. Use wall-mounted planters, hanging baskets, or even a repurposed pallet to create a stunning vertical garden that maximizes your growing area.
* Hydroponics: For a more advanced approach, explore hydroponics. This soil-less growing method can be incredibly efficient and productive, allowing you to grow a large amount of food in a small space.
* Succession Planting: To ensure a continuous harvest, practice succession planting. Sow new seeds every few weeks to stagger your crops and avoid periods of scarcity.
* Grow Lights: If you don’t have access to a sunny windowsill, invest in a grow light. These lights provide the necessary spectrum of light for plants to thrive indoors, even in the darkest corners of your home.
* Seed Starting: Start your seeds indoors a few weeks before you plan to transplant them. This will give them a head start and ensure a more successful harvest.
We wholeheartedly encourage you to embark on this exciting journey of year-round homegrown kitchen veggies. It’s a simple, rewarding, and sustainable way to enhance your life and connect with the natural world. Don’t be intimidated by the prospect of gardening; start small, learn as you go, and most importantly, have fun!
We’re eager to hear about your experiences. Share your successes, your challenges, and your favorite tips and tricks in the comments below. Let’s create a community of indoor gardeners who are passionate about growing their own food and sharing their knowledge with others. Together, we can transform our homes into thriving oases of fresh, flavorful produce, all year round. So, grab your seeds, your soil, and your enthusiasm, and let’s get growing!
FAQ
What are the easiest vegetables to grow indoors year-round?
The easiest vegetables to grow indoors year-round are typically leafy greens and herbs. Lettuce, spinach, kale, and arugula are all relatively low-maintenance and can thrive under artificial light. Herbs like basil, mint, chives, and parsley are also excellent choices for indoor gardening. They require minimal space and can be easily harvested as needed. Radishes are also a good option, as they mature quickly and don’t require a lot of space.
How much sunlight do indoor vegetables need?
Most indoor vegetables need at least 6-8 hours of sunlight per day. If you don’t have a sunny windowsill, you can supplement with grow lights. LED grow lights are a great option because they are energy-efficient and provide the necessary spectrum of light for plant growth. Position the lights about 6-12 inches above the plants for optimal results. The specific light requirements will vary depending on the type of vegetable you are growing, so it’s always a good idea to research the specific needs of your chosen plants.
What kind of soil should I use for indoor vegetable gardening?
Use a well-draining potting mix specifically formulated for vegetables. Avoid using garden soil, as it can be too heavy and may contain pests or diseases. A good potting mix will provide the necessary nutrients and drainage for healthy plant growth. You can also amend your potting mix with compost or other organic matter to improve its fertility and water retention. Consider using a soilless mix like coco coir or perlite for hydroponic systems.
How often should I water my indoor vegetables?
The frequency of watering will depend on several factors, including the type of vegetable, the size of the container, and the humidity level in your home. As a general rule, water when the top inch of soil feels dry to the touch. Avoid overwatering, as this can lead to root rot. Make sure your containers have drainage holes to allow excess water to escape. Check the soil moisture regularly and adjust your watering schedule accordingly.
How do I deal with pests on my indoor vegetables?
Prevention is key when it comes to pests on indoor vegetables. Inspect your plants regularly for signs of infestation, such as aphids, spider mites, or whiteflies. If you spot any pests, you can try to remove them manually by hand or with a strong spray of water. You can also use insecticidal soap or neem oil to control pests. Be sure to follow the instructions on the product label carefully. Consider introducing beneficial insects like ladybugs or lacewings to help control pests naturally.
Can I grow tomatoes indoors year-round?
Yes, you can grow tomatoes indoors year-round, but it requires a bit more effort than growing leafy greens or herbs. Choose a compact or dwarf variety of tomato that is well-suited for container gardening. Provide plenty of light, either from a sunny windowsill or grow lights. You may also need to hand-pollinate the flowers to ensure fruit production. Provide support for the plants as they grow, such as stakes or cages.
How do I fertilize my indoor vegetables?
Fertilize your indoor vegetables regularly with a balanced liquid fertilizer. Follow the instructions on the fertilizer label carefully. Avoid over-fertilizing, as this can damage the plants. You can also use organic fertilizers like compost tea or fish emulsion. Fertilize every 2-4 weeks, depending on the type of vegetable and the fertility of your soil.
What are the benefits of growing my own vegetables indoors?
There are many benefits to growing your own vegetables indoors. You’ll have access to fresh, healthy produce year-round, regardless of the weather. You’ll save money on groceries and reduce your carbon footprint by avoiding transportation costs. You’ll have more control over the quality of your food, as you can choose to grow organically and avoid pesticides. Growing your own vegetables is also a therapeutic and rewarding activity that can improve your overall well-being.
How do I choose the right size container for my indoor vegetables?
The size of the container will depend on the type of vegetable you are growing. Leafy greens and herbs can be grown in smaller containers, while larger vegetables like tomatoes and peppers will need larger pots. As a general rule, choose a container that is at least 6-8 inches in diameter for leafy greens and herbs, and at least 12-14 inches in diameter for larger vegetables. Make sure the container has drainage holes to allow excess water to escape.
What is the best temperature for growing vegetables indoors?
Most vegetables prefer a temperature range of 65-75°F (18-24°C). Avoid exposing your plants to extreme temperatures or drafts. You can use a thermometer to monitor the temperature in your growing area and adjust accordingly. If your home is too cold, you can use a heat mat to warm the soil. If your home is too hot, you can use a fan to circulate the air.
Leave a Comment