Easy College Packing List: Dorm Room Essentials
The ultimate college packing list is here to banish those frantic last-minute dashes and the dreaded “did I forget something?” feeling. Are you staring at a mountain of clothes, textbooks, and random essentials, wondering how it will all magically fit into a dorm room that suddenly feels much smaller? I know I’ve been there, facing the chaos of unpacking into a tiny space and realizing I’m missing something crucial, or worse, brought way too much.
Imagine this: your dorm room is not just organized, it’s a cozy, functional haven. Everything has its place, making studying a breeze and downtime relaxing. This comprehensive guide will help you achieve that dream without breaking the bank or spending weeks preparing. We’ll cover essentials that typically cost a few hundred dollars and can be gathered over a weekend. You’ll learn exactly what you truly need to thrive in college, from the practical to the personal, ensuring you feel prepared and settled from day one.
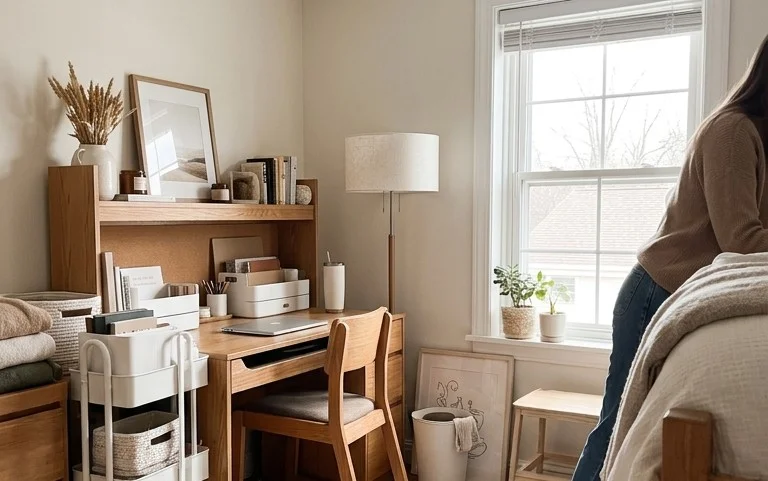
College is an exciting new chapter, and one of the biggest hurdles you’ll face is packing for your new life away from home. It can feel overwhelming, but with a strategic approach, you can ensure you have everything you need without overpacking or forgetting essentials. My goal with this guide is to make your college packing process as smooth and stress-free as possible. Let’s dive into creating your ultimate college packing list, 2025 edition!
The Foundation: Measuring and Planning Before You Pack
Before you even think about throwing a single item into a box, take some time to plan. This is where you’ll save yourself a lot of headaches later.
Understanding Your Space
The absolute first step is to get a clear picture of your dorm room or apartment. If possible, visit it in person before move-in day. If not, reach out to your housing office for floor plans or typical dorm dimensions. A standard dorm room is often around 10-12 feet by 14-16 feet. Knowing the basic layout and the size of your bed (twin XL is common for dorms) will help you visualize where everything will go. Measure your existing storage solutions – like under-bed space or existing closet rods – to see what you can work with.
Budgeting for Success
College life isn’t cheap, and outfitting your new space is a significant expense. Before you start buying, set a realistic budget. For essentials like bedding, towels, basic kitchenware, and initial organizational items, I’d budget anywhere from $500 to $1000. This can fluctuate greatly depending on whether you’re buying new or opting for second-hand items. Look for sales, student discounts, and consider buying some items with roommates to share costs (like a microwave or mini-fridge).
Prioritizing Needs vs. Wants
It’s easy to get carried away with all the fun decor options, but focus on the necessities first. Think about what you *truly* need to live comfortably and study effectively. You can always acquire more items once you’re settled in and have a better sense of what you’re missing or what will enhance your space.
Your Step-by-Step College Packing Walkthrough
Now that you’ve planned, let’s get packing! Here’s a clear, numbered process to guide you.
1. **Assess Existing Belongings:** Go through your current belongings at home. What can you realistically bring? What will fit? What’s essential for your academic and personal life? Start a “keep” pile and a “donate/sell” pile.
2. **Create Your Master List:** Based on your space assessment and needs, start building your master packing list. I’ll provide a comprehensive breakdown below, but tailor it to your specific situation.
3. **Categorize and Conquer:** Break your list down into categories: Bedding, Bath, Kitchen/Food, Study, Organization, Cleaning, Personal Care, and Miscellaneous. This makes shopping and packing much more manageable.
4. **Shop Smart:** Purchase items in stages. Start with the big-ticket essentials like bedding and towels. Look for deals and discounts. Consider waiting until you’re on campus for some items that might be easier to transport locally.
5. **Pack by Category:** When it’s time to pack, keep items within their categories. Use sturdy boxes, suitcases, and duffel bags. Label everything clearly! This is a game-changer for unpacking.
6. **Unpack Strategically:** Once you arrive, unpack one category at a time. Start with the absolute essentials like bedding and toiletries. Then move on to your study area, followed by kitchenware and other items.
The Essential College Packing List (with Rough Costs)
Here’s a detailed breakdown of what you’ll need. Prices are estimates and can vary widely.
Bedding (Approx. $100-$250)
* **Twin XL Sheet Sets (2-3):** Look for comfortable, breathable materials. ($30-$60 each)
* **Comforter or Duvet with Cover:** Choose something that suits your style. ($50-$100)
* **Pillow (2):** One for sleeping, one for lounging. ($20-$40)
* **Mattress Topper:** Dorm mattresses can be firm; a topper adds comfort. ($40-$80)
* **Pillow Protectors and Mattress Pad:** For hygiene and longevity. ($20-$40)
Bath (Approx. $75-$150)
* **Bath Towels (2-3):** Plush and absorbent are best. ($20-$40 each)
* **Hand Towels (2-3):** ($10-$20 each)
* **Washcloths (4-6):** ($5-$10)
* **Shower Caddy:** Essential for communal bathrooms. Look for one with good drainage. ($15-$30)
* **Shower Shoes/Flip-Flops:** For hygienic reasons. ($10-$20)
* **Robe:** For walking to and from the bathroom. ($30-$50)
* **Toiletries:** Shampoo, conditioner, body wash, soap, toothbrush, toothpaste, etc. (Variable cost)
Kitchen/Food (Approx. $100-$200, depending on shared items)
* **Mini-Fridge (if not provided):** Check dorm regulations. ($75-$150)
* **Microwave (if not provided):** Again, check rules. ($50-$100)
* **Plates, Bowls, Mugs (2 each):** Durable, microwave-safe options. ($20-$40)
* **Utensils (set of 4-6):** Forks, knives, spoons. ($15-$30)
* **Water Bottle (reusable):** Stay hydrated and reduce waste. ($15-$30)
* **Food Storage Containers:** For leftovers. ($15-$30)
* **Basic Dish Soap and Sponge:** For cleaning your dishes. ($5-$10)
* **Can Opener/Bottle Opener:** ($5-$10)
* **Snacks:** Non-perishable items for late-night study sessions. (Variable cost)
Study & Electronics (Approx. $100-$300+)
* **Laptop and Charger:** Your most important academic tool. (Variable cost)
* **Desk Lamp:** Essential for late-night studying. Look for one with adjustable brightness. ($25-$50)
* **Power Strip with Surge Protector:** You’ll likely need more outlets than available. ($20-$40)
* **Extension Cords:** Be mindful of dorm rules on length. ($10-$25)
* **Pens, Pencils, Highlighters, Notebooks, Binders:** Standard school supplies. ($50-$100)
* **Backpack/Messenger Bag:** For carrying books and laptop. ($30-$70)
* **Printer (optional):** If you anticipate needing to print often. ($70-$150+)
* **Headphones:** For focus and relaxation. ($30-$100+)
Organization & Storage (Approx. $75-$150)
* **Under-Bed Storage Bins (2-4):** Maximize your space! Look for shallow ones that slide easily. ($20-$40 each)
* **Hangers (20-30):** Slim velvet hangers save space and prevent clothes from slipping. ($15-$30)
* **Drawer Organizers:** For desk drawers, dresser drawers, and closet shelves. ($10-$25)
* **Over-the-Door Organizer:** Great for shoes, toiletries, or cleaning supplies. ($15-$30)
* **Command Hooks and Strips:** Your best friend in a rental or dorm where you can’t drill. (Assorted packs $10-$20)
* **Storage Bins/Cubes:** For shelves or open spaces. ($10-$25 each)
Cleaning & Laundry (Approx. $50-$75)
* **Laundry Basket/Hamper:** Collapsible ones save space. ($15-$30)
* **Detergent and Fabric Softener:** ($15-$25)
* **All-Purpose Cleaner:** For spills and general tidiness. ($10-$15)
* **Disinfectant Wipes:** Quick clean-ups. ($5-$10)
* **Paper Towels:** ($5-$10)
* **Small Dustpan and Brush:** For quick sweeps. ($10-$15)
* **Trash Bags:** ($5-$10)
Miscellaneous (Variable Cost)
* **First-Aid Kit:** Band-aids, antiseptic wipes, pain relievers. ($20-$40)
* **Tools (basic):** Small screwdriver set, pliers, hammer (check dorm rules). ($20-$40)
* **Flashlight:** For power outages or finding things in the dark. ($10-$20)
* **Reusable Shopping Bags:** For trips to the grocery store. ($10-$20)
* **Decorations:** Posters, photos, plants, fairy lights to personalize your space. (Variable)
Styling Notes: Making Your Space Your Own
Your dorm or apartment is your sanctuary. Let’s make it look good!
Colour Palette
Stick to a cohesive color palette. This instantly makes a small space feel more organized and less chaotic. Neutrals like white, grey, beige, and light wood tones are always a safe bet and make rooms feel larger. Then, add pops of color through accent pillows, throws, artwork, or desk accessories. Think about colors that make you feel calm and focused for studying, and perhaps brighter, more energetic colors for your living area.
Texture Play
Introducing different textures can add depth and warmth to your room. Mix soft throws and pillows with woven baskets, a cozy rug, and perhaps some wooden accents. This creates visual interest and makes your space feel more inviting.
Strategic Placement
Think about function and flow. Your bed is likely the largest piece of furniture, so position it to maximize floor space. Keep your study area near a window or a good light source. Utilize vertical space with shelves or wall organizers. Personal items like photos and favorite books can be displayed on shelves or your desk, adding personality without creating clutter. Keep surfaces as clear as possible to make the room feel larger and more organized.
Adapting for Small Spaces and Rentals
Living in a dorm or a rental often comes with restrictions. Here’s how to adapt:
* **No Drilling:** This is where Command hooks and strips, tension rod shelves, and freestanding organizers become your best friends. Use over-the-door organizers for closets and bathrooms. Utilize the space under your bed and behind doors.
* **Space-Saving Furniture:** Opt for multi-functional furniture. A storage ottoman can double as a seat and a place to hide extra blankets. A foldable desk or a desk with built-in shelving can be a lifesaver.
* **Vertical is Key:** Maximize wall space with wall-mounted shelves (using Command strips!), pegboards, or fabric organizers. This keeps your floor clear and your belongings accessible.
* **Consider Shared Items:** Talk to your roommate about splitting purchases for things like a mini-fridge, microwave, or even a TV. This saves space and money.
Keeping it Tidy After Week One
The initial rush of unpacking and decorating is exciting, but maintaining that order is crucial.
* **The “One In, One Out” Rule:** When you buy something new, consider donating or getting rid of something old. This prevents accumulation.
* **Daily Tidy-Up (5-10 Minutes):** Before you go to bed each night, take a few minutes to put things back where they belong. Straighten your desk, fold your throw blanket, and put away any stray items.
* **Weekly Deep Clean:** Dedicate a bit more time each week for a more thorough clean, including vacuuming or sweeping, wiping down surfaces, and doing laundry.
* **Designated Spots:** Everything should have a home. If an item doesn’t have a designated spot, it’s more likely to end up creating clutter. Use your drawer organizers and storage bins to create these homes.
Mistakes That Make This Fail
Even with the best intentions, packing and organization can go wrong. Here are common pitfalls to avoid:
* **Overpacking:** Bringing too much “just in case” stuff is the number one mistake. You’ll regret lugging it all, and it will make your small space feel even smaller. Be ruthless in your decluttering.
* **Underestimating Storage Needs:** Not planning for how you’ll store your belongings leads to piles on the floor and a chaotic environment. Invest in good organizational tools.
* **Forgetting Practicalities:** While cute decor is fun, don’t forget essentials like enough hangers, cleaning supplies, or a good desk lamp.
* **Not Considering Dorm/Rental Rules:** Bringing prohibited items or trying to drill into walls without permission can lead to fines or having to remove things. Always check the regulations.
* **Ignoring Your Roommate:** If you have a roommate, communication is key for shared items, space allocation, and keeping the common areas tidy.
* **The “Later” Trap:** Putting off tidying up or organizing will inevitably lead to a mess that’s much harder to tackle later. Establish good habits from the start.
Packing for college is a rite of passage. By planning ahead, being strategic with your purchases, and establishing good organizational habits, you can create a comfortable, functional, and stylish space that will serve as your perfect home away from home. Happy packing!
Conclusion
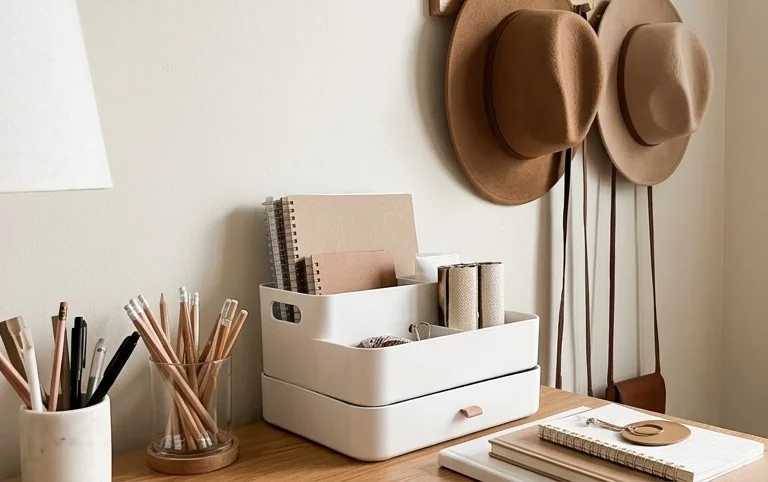
Packing for college is a huge undertaking, but remember that the right home decor and organization can make all the difference in your day-to-day life. A well-organized space fosters a sense of calm and efficiency, helping you focus on what truly matters: your studies and experiences. Don’t let the overwhelm paralyze you! Your smallest possible first step today could be as simple as tackling one drawer or shelf.
For your living area, consider investing in a stylish storage ottoman. If your budget is tight, a few decorative bins can work wonders in your closet. This ultimate college packing list is just the beginning!
We invite you to explore more ideas on sofiasolisb.com to create a comfortable and functional college home that’s uniquely yours.
