Easy DIY Pumpkin Crafts: Toilet Paper Roll Decor
How to transform your toilet paper rolls into festive pumpkins is a craft that’s about to bring a smile to your face and a dash of autumn charm to your home! Are you tired of that slightly bare, uninspired feel creeping in as the seasons change, or maybe you just have a pile of empty cardboard rolls staring back at you, wondering what their purpose is now? Well, get ready to say goodbye to those drab little cylinders and hello to adorable, miniature pumpkins that look like they belong on a Pinterest board!
Imagine a collection of these delightful little gourds gracing your mantelpiece, adding a pop of color to your bookshelves, or even tucked into a decorative bowl. They’re incredibly inexpensive to make, using materials you likely already have, and the whole process can take less than an hour. In this guide, I’ll show you exactly how to turn those humble rolls into a charming seasonal display, step-by-step. We’ll cover everything from simple cutting techniques to the perfect finishing touches.
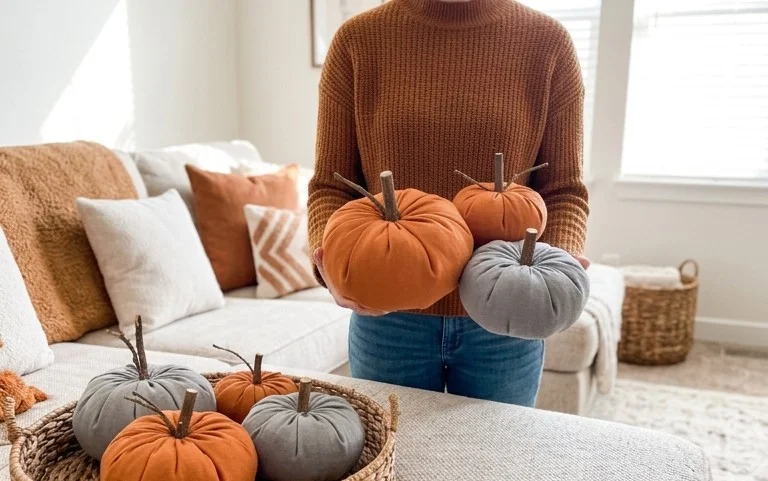
Transforming Toilet Paper Rolls into Festive Pumpkins: A DIY Delight for Your Home
Autumn is a magical time, isn’t it? The air gets crisp, the leaves turn fiery shades of red and gold, and our homes start to feel cozier. One of my favorite ways to embrace the season is by bringing in little touches of festive decor. And this year, I’ve discovered a surprisingly charming and budget-friendly way to do just that: transforming humble toilet paper rolls into adorable little pumpkins! It sounds a little quirky, I know, but trust me, the result is surprisingly effective and adds a warm, handmade charm to any space. Plus, it’s a fantastic way to repurpose something we all have lying around.
What You’ll Need and Roughly What It Costs
This project is wonderfully economical, which is always a win in my book. Here’s a breakdown of what you’ll need and an estimated cost:
* **Toilet Paper Rolls:** You’ll likely need at least 10-15 rolls to make a decent cluster of pumpkins, depending on how many you want. These are free if you save them up!
* **Craft Glue (PVA glue):** A standard 4oz bottle should be more than enough. Expect to pay around $3-$5.
* **Scissors:** You probably already have these!
* **Orange Craft Paint:** Acrylic paint works best. A 2oz bottle will suffice for a good number of pumpkins. Budget around $2-$4.
* **Brown Craft Paint (for stems):** A small amount of brown paint is all you need. You might even have some leftover from another project, but if not, a tiny bottle is usually less than $2.
* **Small Paintbrushes:** A set of a few small brushes will be perfect for painting the rolls and adding detail. A basic set can be found for $5-$8.
* **Optional: Green or Brown Cardstock/Construction Paper:** For the pumpkin stems and leaves, if you don’t want to paint them. A small pack of assorted colors is usually around $5.
* **Optional: Twine or Raffia:** To add a rustic touch to the finished pumpkins. A small spool can be purchased for $3-$6.
The total cost for this project, if you need to buy everything new, is roughly $15-$30, which is incredibly affordable for a seasonal decor update.
Measuring and Planning Before You Start
Before you dive in with glue and paint, a little bit of planning goes a long way. This project is forgiving, but having a general idea of what you want will make the process smoother.
* **Consider Your Space:** Think about where these pumpkins will live. Will they be on a mantelpiece? A bookshelf? A small side table? This will influence how many you want to make and their size. For a small apartment entryway, a cluster of 3-5 might be perfect. For a larger living room, you might want 10-15.
* **Pumpkin Size:** While toilet paper rolls are a standard size, you can vary the ‘plumpness’ of your pumpkins by how you flatten and cut them. For this project, we’ll be aiming for a general size, but you can experiment.
* **Color Palette:** Are you going for traditional orange? Or perhaps you want to add a touch of cream, white, or even a deep burgundy for a more unique look? Decide on your color scheme before you buy your paint.
* **Stem Style:** Will you use painted cardboard for stems, or prefer a more textured look with real twigs (if you’re lucky enough to find some suitable ones)? This might influence whether you buy cardstock.
Your Step-by-Step Guide to Pumpkin Perfection
Now for the fun part! Let’s get crafting.
1. **Prepare Your Rolls:** Take each toilet paper roll and flatten it as much as you can by pressing down on the top and bottom.
2. **Measure and Mark:** Using a ruler, measure down from one end of the flattened roll and make a mark at approximately 1 inch (2.5 cm). You want to create segments that will form the pumpkin’s ‘ribs’.
3. **Cut the Segments:** Carefully cut along the lines you’ve marked. You’re essentially creating a series of strips, but they will remain attached at the ends of the roll. For a standard toilet paper roll, you’ll end up with about 8-10 ‘petals’ or segments per roll.
4. **Shape the Pumpkin:** Gently unflatten the roll. You’ll see that the cuts allow the roll to expand and take on a more rounded, segmented shape. This is the basic form of your pumpkin!
5. **Glue the Ends:** To secure the shape and give your pumpkin a solid base, apply a thin layer of craft glue to the inside of the top and bottom edges of each segmented roll. Press them together firmly for a few seconds until the glue starts to set. You can then gently pull the segments outwards slightly to give it a more rounded appearance.
6. **Paint Your Pumpkins:** Once the glue is dry, it’s time to paint! Apply a coat of orange craft paint to the outside of each pumpkin. You might need two coats for good coverage. Let each coat dry completely before applying the next.
7. **Create the Stems:** While your pumpkins are drying, you can create the stems.
* **Painted Cardstock Method:** Cut a piece of brown or green cardstock into a strip about 1 inch wide and 3-4 inches long. Fold it in half lengthwise. Then, cut small, irregular slits along the folded edge to create a curly, stem-like effect.
* **Natural Stem Method (if using twigs):** Find small, twiggy pieces that look like they could be pumpkin stems. You might need to trim them to size.
8. **Attach the Stems:** Once your painted pumpkins are completely dry, add a dab of glue to the top center of each pumpkin and firmly press on your prepared stem.
9. **Add Finishing Touches (Optional):**
* **Twine/Raffia:** Tie a small piece of twine or raffia around the base of the stem for an extra rustic touch.
* **Leaf:** Cut a small leaf shape from green cardstock and glue it next to the stem.
* **Shading:** For a more realistic look, you can use a darker shade of orange or even a touch of brown to lightly dry-brush along the natural creases of the pumpkin segments.
Styling Notes: Making Them Shine in Your Space
Now that you have your charming DIY pumpkins, let’s talk about how to style them to really make a statement.
* **Colour Coordination:** Don’t feel limited to just orange! Creamy whites, soft yellows, and even muted burgundies can create a sophisticated autumnal display. Mix and match different shades for visual interest.
* **Texture Play:** Combine your paper pumpkins with natural elements. A wooden bowl, a cozy knit throw, or a scattering of real (or faux) leaves can create a beautiful textural contrast.
* **Placement is Key:**
* **Mantelpiece:** Arrange a cluster of pumpkins in varying sizes. Place taller ones towards the back and smaller ones in front. You can weave in some faux autumn leaves or fairy lights for an added glow.
* **Bookshelf:** A few pumpkins nestled amongst your favorite books can instantly add seasonal flair.
* **Entryway Table:** Create a welcoming vignette with a small group of pumpkins, perhaps alongside a potted mum or a decorative candle.
* **Centerpiece:** A collection of these pumpkins can make a charming and unique centerpiece for your dining table.
* **Vary Heights and Depths:** Don’t line them all up in a single row. Stagger them, place some slightly behind others, and vary the heights for a more dynamic and natural look.
Keeping It Tidy After Week One
One of the beauties of this DIY is that once they’re made, they require very little maintenance.
* **Dusting:** A gentle dusting with a soft brush or a microfiber cloth is usually all that’s needed. If a pumpkin gets particularly dusty, you can wipe it gently with a slightly damp cloth, but be sure to let it dry completely afterwards.
* **Storage:** At the end of the season, these are lightweight and easy to store. You can stack them carefully in a box or bin. If you’ve used strong craft glue, they should hold their shape well.
Mistakes That Make This Project Fail
Even the simplest DIY projects can have their pitfalls. Here are a few common mistakes to avoid to ensure your toilet paper pumpkins are a roaring success:
* **Impatience with Drying Times:** This is probably the biggest culprit for failure. If you try to paint over wet glue or assemble parts before the paint is fully dry, you’ll end up with smudges, peeling paint, and a messy result. Always allow adequate drying time between steps.
* **Cutting Too Much or Too Little:** If you cut the segments too close together, the roll might tear easily when you try to shape it. If you don’t cut enough, you won’t get that characteristic pumpkin segmentation. Aim for segments that are roughly 1 inch (2.5 cm) apart.
* **Over-Gluing:** Too much glue can seep through the paper and create unsightly blobs. Use a thin, even layer of glue.
* **Skipping the Second Coat of Paint:** While one coat might seem okay initially, a second coat will give your pumpkins a richer, more opaque color and a more finished look.
* **Forgetting About the Base:** If you don’t properly glue the ends of the flattened roll, your pumpkin might not hold its shape, or it could splay open unattractively.
* **Rushing the Stem Attachment:** Make sure the pumpkin surface is dry before attaching the stem. Apply a firm but gentle pressure to ensure it adheres well.
With a little care and attention to these details, you’ll have a charming collection of festive pumpkins that will bring a touch of handmade joy to your home all season long! It’s a simple project, but the satisfaction of creating something beautiful from everyday materials is truly rewarding. Happy crafting!
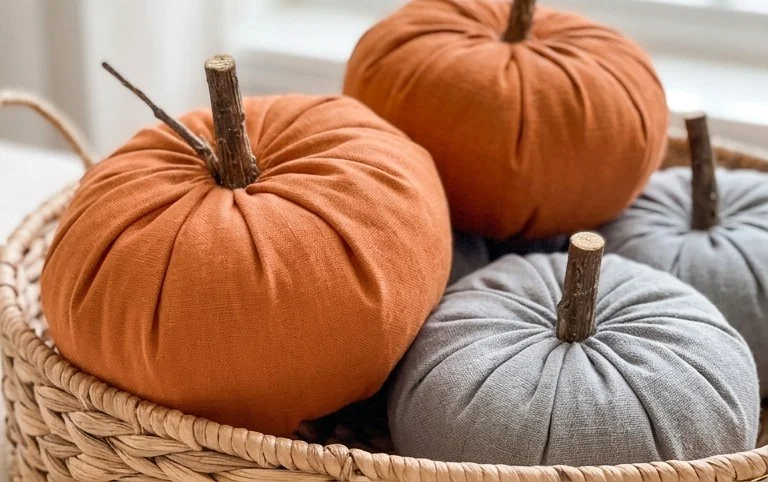
Conclusion
Transforming everyday items into charming decorations can bring a surprising amount of joy and festive spirit into your home. These little toilet paper roll pumpkins are a perfect example! They might seem small, but the cheerful touch they add can truly brighten your bathroom or any small corner, making your daily routine feel a little more special.
Ready to add a touch of autumn charm? Your smallest first step is to grab just one empty toilet paper roll and a few craft supplies. You might be surprised at how quickly you can create your first festive pumpkin!
For a different vibe, try these rolls as miniature ghosts for a playful Halloween touch in a child’s room. On a tighter budget, simply use colored paper scraps instead of paint for a vibrant, eco-friendly alternative.
We hope this inspires you to get creative! There are so many more delightful ways to infuse your living space with personality and seasonal flair. Keep exploring for more home decor and organization ideas!
