Easy Crochet Pumpkin Decor Ideas: Cute Granny Squares
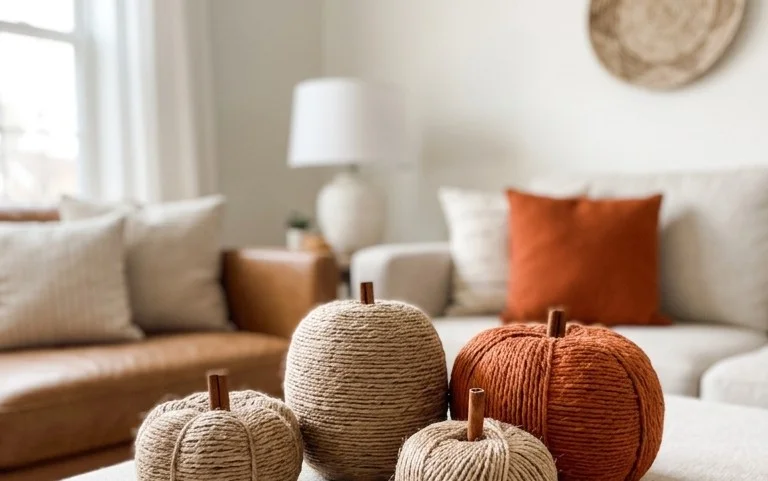
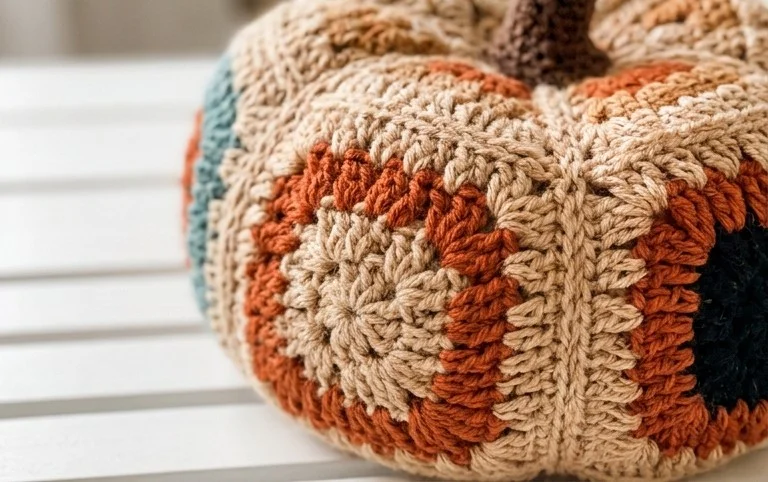
Cute Granny Square Pumpkins are the perfect way to infuse your home with that cozy, nostalgic fall charm! Do you ever feel like your autumn decor is missing that special, handcrafted touch? Maybe your shelves feel a little bare, or you’re tired of the same old mass-produced decorations that clutter your space? Well, imagine little pops of cheerful, textured orange, accented with a sweet crocheted stem, nestled on your mantelpiece, scattered across your coffee table, or even adorning your entryway. These aren’t just decorative; they’re a warm hug for your home!
For a small investment in yarn and just a few hours of your time, you can create an entire collection of these irresistible pumpkins. In this article, I’m going to guide you step-by-step through this wonderfully classic crochet pattern. You’ll learn how to create the iconic granny square, seamlessly join them into pumpkin shapes, and add those charming finishing touches that make them truly unique.
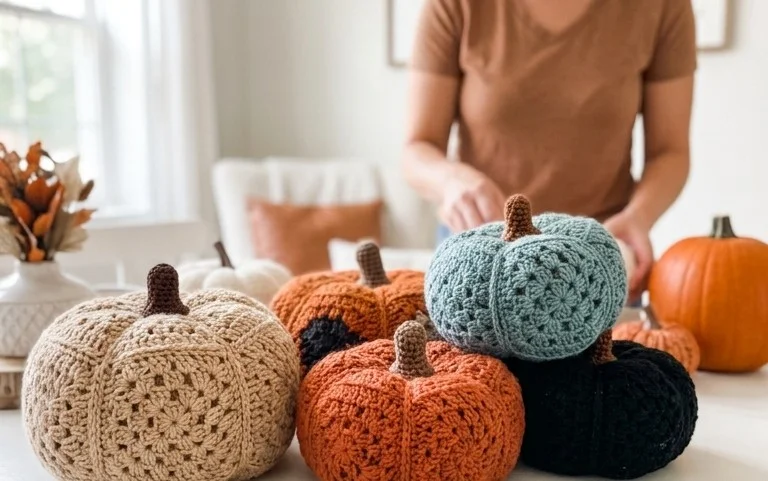
Cute Granny Square Pumpkins: An Irresistibly Classic Fall Crochet Pattern
As the leaves begin to turn and the air gets that crisp, nostalgic chill, my thoughts inevitably drift to all things cozy and autumnal. And for me, that means yarn! Specifically, crochet projects that capture the essence of fall. This year, I’ve fallen head over heels for a delightful and surprisingly simple project: the cute granny square pumpkin. They’re not just adorable; they’re a fantastic way to add a touch of handmade charm to your home decor without breaking the bank or requiring extensive crafting skills.
Why Granny Square Pumpkins?
The beauty of the granny square pumpkin lies in its classic appeal and adaptability. The granny square is a foundational crochet stitch, instantly recognizable and incredibly satisfying to create. When fashioned into a pumpkin shape, it evokes a feeling of warmth, tradition, and that unmistakable feeling of home. Plus, they are perfect for adding a seasonal touch without being overly kitschy.
What You’ll Need (and Roughly What It Costs)
The best part about this project is its affordability and accessibility. You don’t need a huge stash of fancy materials.
* **Yarn:** For a set of 3-5 medium-sized pumpkins, you’ll likely need around 3-4 skeins of worsted-weight yarn. I recommend a blend of acrylic for durability and washability, or a wool blend for a cozier feel. For classic fall colors like orange, cream, and a deep brown or green for the stem, aim for approximately 200-250 yards per skein.
* **Cost:** Worsted-weight acrylic yarn can range from $4 to $8 per skein, so expect to spend around $16 to $32 for enough yarn for a small collection of pumpkins. If you opt for wool blends, the cost might be slightly higher, around $8 to $15 per skein.
* **Crochet Hook:** A common hook size for worsted-weight yarn is a 5.0 mm (H/8) or 5.5 mm (I/9). Check your yarn label for a recommended hook size.
* **Cost:** A good quality crochet hook usually costs between $3 and $7.
* **Stuffing:** Polyester fiberfill is your best friend here. You’ll need a bag that’s at least 12 ounces to adequately stuff 3-5 pumpkins.
* **Cost:** A 12-ounce bag of fiberfill typically costs between $5 and $10.
* **Tapestry Needle:** For weaving in ends and sewing your pumpkin pieces together.
* **Cost:** Around $3 to $5 for a pack.
* **Scissors:** Every crafter needs a good pair!
* **Cost:** You probably already have these, but a decent pair is about $5.
* **Optional for Stem:** Brown or green embroidery floss or a thicker yarn.
* **Cost:** A skein of embroidery floss is around $1, and a small ball of thicker yarn would be $2-$3.
**Rough Total Cost:** For a beginner looking to get started, you’re likely looking at an investment of approximately $27 to $59 for all the materials, depending on your yarn choice and any existing supplies.
Measuring and Planning Before You Start
Before you even pick up your hook, a little planning goes a long way.
* **Pumpkin Size:** Decide how large you want your pumpkins to be. The beauty of the granny square method is that you can easily adjust the size. For a medium pumpkin, I usually aim for a granny square that measures about 10-12 inches across when laid flat.
* **Color Scheme:** Think about where you’ll be displaying these pumpkins. Do you want a traditional orange and brown look? Or perhaps a more modern palette with creams, whites, muted blues, or even a pop of deep burgundy? Consider your existing decor.
* **Number of Pumpkins:** How many do you envision? A single statement pumpkin or a cluster of three or five can have very different impacts.
* **Stitch Count:** For a standard granny square, you’ll typically start with a magic circle (or chain 4 and join) and work in multiples of 3 stitches. For a 10-12 inch square with worsted weight yarn and a 5.0 mm hook, you’ll likely need 4-5 rounds of granny clusters (groups of 3 double crochet stitches).
The Process: A Clear Walkthrough
Creating these pumpkins is a straightforward process, even for those new to crochet. Here’s how I do it:
1. **Crochet the Granny Squares:**
* Start with a magic circle or chain 4 and slip stitch to form a ring.
* **Round 1:** Chain 3 (counts as first double crochet), work 2 double crochet into the ring, chain 2, work 3 double crochet into the ring, chain 2, work 3 double crochet into the ring, chain 2, work 3 double crochet into the ring, chain 2. Join with a slip stitch to the top of the beginning chain-3. (This creates your first four sides).
* **Round 2:** Slip stitch to the first chain-2 space. Chain 3, work 2 double crochet into the same space, chain 2, work 3 double crochet into the same space (this is your first corner cluster). Chain 1. Move to the next chain-2 space and work (3 double crochet, chain 2, 3 double crochet) – this is your next corner. Repeat this for all four corners, chaining 1 between each corner. Join with a slip stitch.
* **Subsequent Rounds:** Continue working in the same manner, working (3 double crochet, chain 2, 3 double crochet) in each chain-2 corner space and 3 double crochet in each chain-1 space between corners. Fasten off when your square reaches your desired size (about 10-12 inches). You’ll need to crochet two identical squares for each pumpkin.
2. **Prepare for Assembly:** Once you have your two squares for a pumpkin, lay them flat, right sides facing out.
3. **Sew the Squares Together:**
* Using your tapestry needle and a length of yarn in the same color as your squares, begin to whip stitch or mattress stitch around the edges of the two squares. Leave one side partially open (about a 3-4 inch gap) for stuffing. I find it easiest to start at a corner and work my way around.
4. **Stuff the Pumpkin:**
* Begin to gently stuff the pumpkin through the opening you left. Use your stuffing tool (or the blunt end of a pencil) to push the fiberfill into all the corners. You want it to be firm but not so overstuffed that the stitches stretch.
5. **Close the Opening:**
* Once you’re happy with the fullness, carefully whip stitch the remaining opening closed. Weave in any loose ends securely.
6. **Add the Stem:**
* For the stem, you can either crochet a simple rectangle and roll it up, or use embroidery floss.
* **Embroidery Floss Method:** Thread your tapestry needle with several strands of brown or green embroidery floss (or a thicker yarn). Insert your needle from the inside of the pumpkin, up through the center, and out the top. Make several stitches to create a thick, textured stem, or wrap the floss around your needle and pull it through the pumpkin multiple times to create a coiled effect. Tie off securely on the underside of the pumpkin.
* **Crocheted Stem Method:** Using brown or green yarn, chain about 6-8 stitches. Work a few rows of single crochet or half double crochet to create a small, sturdy rectangle. Fold the rectangle in half and sew the sides together to form a tube. Attach this tube to the top center of your pumpkin with your tapestry needle.
Styling Notes: Making Them Shine
These cute pumpkins aren’t just for the mantelpiece! They are incredibly versatile for styling.
* **Color Harmony:** Stick to a cohesive color palette. For a traditional look, a mix of muted oranges, creams, and deep browns or greens works beautifully. For a modern farmhouse vibe, consider whites, creams, greys, and muted sage green.
* **Texture Play:** Combine your crochet pumpkins with other textures. They look fantastic nestled amongst chunky knit blankets, faux fur pillows, wooden bowls, or galvanized metal trays. The contrast in textures makes them pop.
* **Strategic Placement:**
* **Entryway:** A cluster of 3-5 pumpkins on a console table or entryway bench welcomes guests with festive charm.
* **Coffee Table:** A single, larger pumpkin or a small group can be the centerpiece of your coffee table, surrounded by seasonal candles or a decorative tray.
* **Mantelpiece:** This is a classic for a reason! Arrange them alongside greenery, fairy lights, or other fall-themed decor.
* **Bookshelves:** Tuck a small pumpkin onto a shelf for a subtle nod to the season.
* **Rental-Friendly Touches:** Since you can’t drill, these are perfect! Place them in baskets, on shelves, on side tables, or use command strips to attach a small felt leaf to the wall next to them.
Keeping It Tidy After Week One
The beauty of crochet is that it’s generally quite low-maintenance.
* **Dusting:** A gentle dusting with a soft brush or a microfiber cloth is usually all that’s needed to keep them looking fresh.
* **Spot Cleaning:** If a small spill occurs, use a damp cloth with a tiny amount of mild detergent. Blot gently and allow to air dry completely. Avoid rubbing vigorously, as this can damage the yarn fibers.
* **Storage:** At the end of the season, gently compress them for storage. You can place them in a breathable fabric bag or a plastic bin. Avoid storing them in humid conditions or direct sunlight, which can cause colors to fade.
Mistakes That Make This Fail
While this is a forgiving project, a few common pitfalls can lead to a less-than-perfect pumpkin:
* **Overstuffing:** This is the most common mistake! If you stuff your pumpkin too tightly, the stitches will stretch open, revealing the stuffing and detracting from the cute granny square pattern. You want a firm but yielding feel.
* **Uneven Stitching:** If your granny squares are significantly different in size or your tension is very inconsistent, your pumpkin might end up looking lopsided. Try to maintain a relatively even tension throughout your crochet.
* **Poorly Secured Ends:** Always weave in your yarn ends securely. Loose ends can unravel over time, especially with repeated handling.
* **Ignoring the Pattern for Shape:** Remember, you’re sewing two flat squares together and then stuffing them. This naturally creates a plump, rounded shape. Don’t expect it to be a perfectly symmetrical geometric sphere – the charm is in its slightly imperfect, cuddly form.
* **Using the Wrong Hook/Yarn Combination:** If your hook is too small for your yarn, your stitches will be too tight and your square won’t lay flat. If your hook is too big, your stitches will be too loose, and the stuffing will show through easily. Always check your yarn label for recommendations.
Creating these granny square pumpkins is more than just a craft project; it’s a way to weave a little bit of handmade joy and cozy tradition into your home. So grab your hook, choose your favorite fall colors, and get ready to crochet some irresistible autumnal charm!
Conclusion
These cute granny square pumpkins are more than just a charming seasonal craft; they bring a tangible touch of cozy warmth into your home, making everyday moments feel a little brighter. Just one little pumpkin can transform a shelf or a tabletop, reminding you of the season’s simple pleasures. So, why not start today? Pick up your hook and some yarn and create your very first granny square pumpkin.
For a larger impact, try a cluster of three in varying sizes for your mantelpiece. Or, if you’re looking for a quicker, budget-friendly option, crochet a single, smaller pumpkin to adorn your office desk or bedside table. We have so many more delightful crochet patterns and home decor ideas waiting for you. Explore our collections and continue to fill your home with handmade happiness!