Easy Budget Faux Plants for Outdoor Planters
How to use artificial plants for outdoor planters is your secret weapon to achieving that lush, vibrant look without the constant upkeep or hefty price tag. Are you tired of seeing your real plants wilt under the sun, or perhaps you’ve struggled to keep your patio looking polished because of the demanding nature of live greenery? I totally get it! Imagine stepping out onto your porch to a stunning display of flourishing foliage, welcoming you home every single day. This transformation can be yours for under $50 and in just an afternoon. In this article, I’ll show you exactly how to select convincing artificial plants, arrange them beautifully for maximum impact, and keep your outdoor space looking magazine-worthy, all while being kind to your wallet and your schedule. Get ready to unlock effortless outdoor beauty!
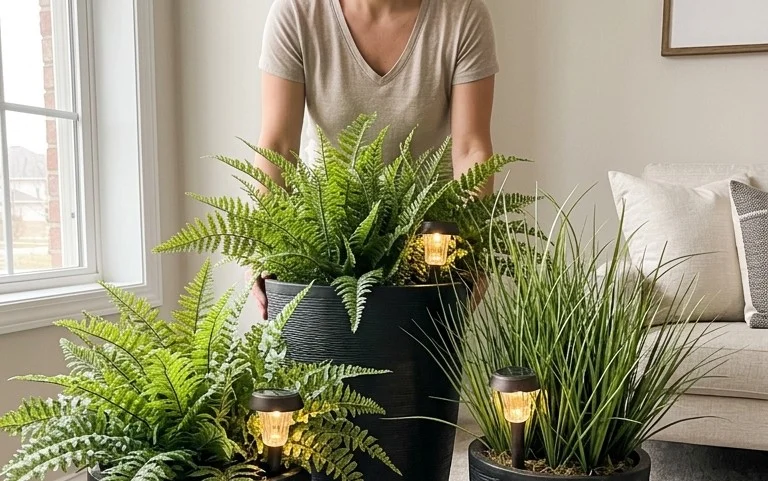
Bring the Green: Budget-Friendly Faux Foliage for Your Outdoor Planters
Let’s be honest, keeping plants alive outdoors can be a jungle. Between unpredictable weather, hungry pests, and our own busy schedules, sometimes a vibrant, thriving display feels like an impossible dream. But what if I told you there’s a way to achieve that lush, green aesthetic without the constant upkeep or the hefty price tag of a landscaping service? Enter the humble artificial plant, your secret weapon for stunning, hassle-free outdoor planters. Yes, you read that right – artificial plants! And the best part? We’re doing it all on a budget.
I know what some of you might be thinking: “Faux plants outside? Won’t they look tacky?” I used to think so too, but the quality of artificial plants has come a long way. With a little planning and the right choices, you can create outdoor displays that are not only beautiful but also remarkably convincing. This guide is all about transforming your patios, balconies, and front steps into green oases without breaking the bank or dedicating your weekends to watering.
Getting Started: What You’ll Need (and What It Costs)
The beauty of this project is its affordability. We’re aiming for impact without extravagance. Here’s a breakdown of what you’ll generally need, along with some rough price estimates. Keep in mind these are ballpark figures and can vary wildly depending on where you shop and the sales you snag.
* **Artificial Plants:** This is your main investment. For outdoor use, look for plants specifically labeled as UV-resistant or outdoor-safe. This is crucial to prevent fading. You’ll find a huge range. For a medium-sized planter (think roughly 18 inches in diameter), you might need 3-5 plants.
* *Cost Estimate:* Small, single-stem plants (like grasses or ferns) can range from $5-$15 each. Larger, fuller plants (like faux boxwood balls or trailing ivy) might cost $20-$40 each. For a substantial planter, budget around $50-$150.
* **Planters:** If you don’t already have suitable planters, this is where you can save. Look for sales at discount home stores, thrift shops, or even repurpose old buckets or barrels.
* *Cost Estimate:* New, good-quality plastic or resin planters can range from $20-$60. Thrifted or repurposed options can be as low as $5-$15.
* **Potting Soil (for weight and stability):** You don’t need to fill the entire planter with soil. A few bags will be enough to weigh it down and give your plants something to anchor into.
* *Cost Estimate:* A bag of potting soil typically costs $5-$10. You might need 1-2 bags.
* **Gravel or Rocks (for drainage and weight):** This will go at the bottom of your planter.
* *Cost Estimate:* A bag of decorative gravel or small river rocks costs $5-$15.
* **Floral Foam or Landscape Foam (optional, for securing plants):** This can help you position your plants at the right height and angle, especially if you’re using multiple smaller plants. Look for dense foam that’s designed for outdoor use if possible, though standard craft foam will work in a pinch if it’s protected from direct rain.
* *Cost Estimate:* A block of floral foam is usually $5-$10.
* **Wire Cutters or Strong Scissors:** For trimming stems or adjusting the floral foam.
* *Cost Estimate:* You likely already have these, but if not, $10-$20.
* **Gloves:** To keep your hands clean.
* *Cost Estimate:* $5-$10.
**Total Estimated Budget:** For one to two medium-sized planters, a reasonable budget would be between $100-$250. This is a one-time investment that will keep giving you curb appeal for years.
Measure Twice, Plant Once: Planning Your Perfect Planter
Before you even think about buying plants, grab your measuring tape. This is where smart budgeting meets smart design.
Assessing Your Space
* **Planter Size:** Measure the dimensions of your chosen planter. This will dictate how many plants you can fit and what size they should be. A planter that’s 12 inches deep will accommodate different plant lengths than one that’s 24 inches deep.
* **Location:** Where will these planters live?
* **Sun Exposure:** Even though your plants are fake, the planter itself and any surrounding materials can fade in direct, intense sun. If it’s a very sunny spot, consider lighter-colored planters and UV-protected plants.
* **Wind:** If your planters are in a windy area, you’ll need to ensure they’re heavy enough not to blow over. This is where that potting soil and gravel really come in handy.
* **Visibility:** From where will you see these planters most? From across the street? From your kitchen window? This will influence how much detail you need in your plants and how you arrange them.
Choosing Your Faux Foliage
* **Think About Realism:** What plants grow naturally in your area? Even if you can’t keep them alive, mimicking their forms and textures will make your faux plants blend in better.
* **Variety is Key:** Don’t just buy a bunch of the same thing. Mix different heights, textures, and shapes. Think about:
* **Thriller:** A taller, more dramatic plant that stands out.
* **Filler:** Bushy plants that fill in the space.
* **Spiller:** Trailing plants that cascade over the edge.
* **Color Palette:** Stick to a cohesive color scheme. Greens are a safe bet, but you can add pops of faux color with flowering plants (though these can sometimes look less realistic).
Sketch it Out
Grab a piece of paper and sketch a bird’s-eye view of your planter. Draw circles representing where each plant will go. This simple step helps you visualize the arrangement and prevent overcrowding.
The Step-by-Step: Bringing Your Faux Garden to Life
Now for the fun part! Follow these steps to assemble your beautiful, budget-friendly outdoor planters.
1. **Prepare Your Planter:** Ensure your planter is clean and has drainage holes (if it doesn’t, you might want to drill a few yourself if it’s a permanent fixture and you own it, or rely on careful watering if it’s a rental).
2. **Add Drainage and Weight:** Pour a layer of gravel or rocks (about 2-3 inches) at the bottom of the planter. This helps with drainage and adds crucial weight for stability.
3. **Add Potting Soil:** Fill the planter with potting soil, leaving enough space at the top for your plants. You don’t need to fill it to the brim, as the plants will add volume. Aim to fill it about 4-6 inches below the rim.
4. **Position Your Floral Foam (if using):** If you’re using floral foam, cut a piece to fit snugly into the planter, resting on top of the soil. This will act as a stable base for your plants.
5. **Arrange Your “Thriller”:** Place your tallest, most dramatic plant in the center or slightly off-center. Push its stem into the soil or floral foam, ensuring it’s firmly anchored.
6. **Add Your “Fillers”:** Position your bushier plants around the thriller, filling in the gaps. Again, secure their stems firmly.
7. **Incorporate Your “Spillers”:** Place your trailing plants towards the edge of the planter, allowing them to cascade downwards.
8. **Adjust and Refine:** Step back and look at your arrangement from all angles. Do you have good balance? Is there any visual “hole”? Adjust the plants as needed. You can trim stems if they’re too long, or add more soil around the bases to lift plants if they’re too low.
9. **Final Touches:** Top off the soil around the base of your plants with a bit more soil or a layer of decorative mulch or small rocks to hide the foam and soil. This also adds to the realism.
Styling for Success: Making it Look Real (and Good!)
The difference between a tacky faux plant display and a chic one often comes down to styling.
Color Harmony
* **Complement Your Home:** Choose plants whose colors enhance your home’s exterior. If you have a red brick house, deep green foliage will look stunning. A modern gray home might benefit from softer greens and varied textures.
* **Seasonal Touches:** While your base plants are faux, you can add seasonal flair with real (or very convincing faux) accents. Think a small, real pumpkin in the fall, or a few colorful faux berries in the winter.
Texture, Texture, Texture!
This is where you can really elevate your display.
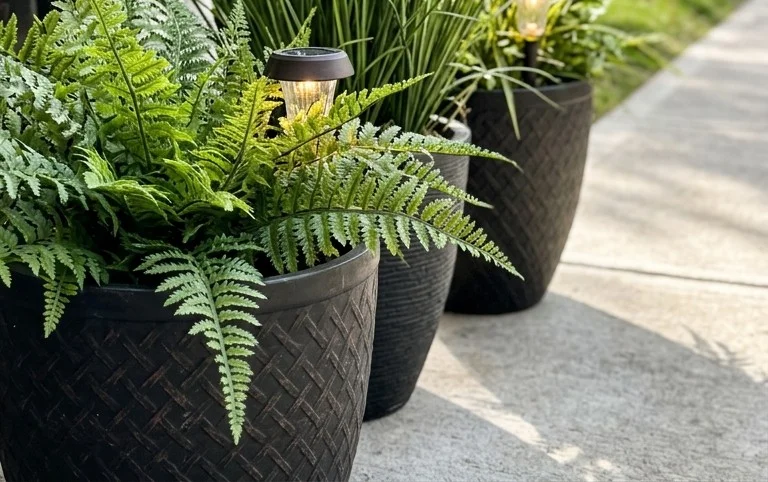
* **Mix it Up:** Combine plants with different leaf shapes and textures. Think the broad leaves of a faux hosta, the delicate fronds of a faux fern, and the fine blades of faux ornamental grass.
* **Varying Heights:** As mentioned in the planting process, a variation in height creates visual interest and depth.
Strategic Placement
* **Front Door Welcome:** Planters flanking your front door are a classic for a reason. Make them inviting and impactful.
* **Balcony Bliss:** In a small balcony space, a few well-placed planters can create a lush, private retreat. Consider taller planters that take up less floor space but offer more planting depth.
* **Rental Solutions:** If you can’t drill or permanently alter anything, opt for lightweight planters that can be easily moved. Heavy faux plants in lighter planters can be a good compromise. You can also use larger, heavier decorative rocks to anchor lighter planters on windy days.
Keeping It Tidy: Post-Week One Maintenance
The beauty of faux plants is the minimal upkeep, but “no upkeep” doesn’t mean “no maintenance.”
* **Dusting:** Over time, dust can settle on the leaves. A quick wipe-down with a damp cloth or a gentle hose spray (if the plants are washable) every few weeks will keep them looking fresh.
* **Debris Removal:** Remove any actual leaves, twigs, or other debris that might accumulate in your planters naturally.
* **Weeding (the real kind!):** If you’ve used real soil, you might get a few opportunistic weeds. Pull them out as soon as you see them.
* **Position Check:** Periodically, just give your plants a little nudge to make sure they haven’t shifted or become loose.
The Pitfalls: Common Mistakes That Make Faux Plants Fail
Even with the best intentions, there are a few common pitfalls that can make your faux plant display look… well, fake.
* **No UV Protection:** This is the cardinal sin of outdoor artificial plants. Without UV protection, your vibrant greens will turn a sad, faded yellow or brown within a single summer. Always look for the UV-resistant label.
* **Overcrowding:** Just like with real plants, overcrowding makes for an unnatural and messy look. Give your faux plants a little breathing room.
* **Lack of Texture and Variety:** Using only one type of plant, or plants that all have the same texture, will immediately scream “artificial.” Mix it up!
* **No Weight or Anchoring:** This is especially true for windy locations. If your planters are too light, they’ll blow over, and your beautiful arrangement will be scattered. Use soil and gravel generously.
* **Ignoring Scale:** Using tiny plants in a giant planter, or massive, overpowering plants in a small one, will throw off the entire aesthetic. Ensure the scale of your plants matches the scale of your planter and your space.
* **Poor Quality Plants:** While we’re on a budget, sometimes you do get what you pay for. Extremely cheap, flimsy artificial plants are often easily spotted. Invest a little more in a few key pieces if you can.
* **Forgetting the Base:** Leaving the soil or floral foam exposed at the top looks unfinished. A layer of decorative mulch, rocks, or moss helps tie it all together and adds realism.
By following these tips, you can create stunning, budget-friendly outdoor planters that will bring you joy and curb appeal for seasons to come. Happy decorating!
Conclusion
You see, transforming your outdoor space with beautiful, low-maintenance artificial plants doesn’t have to break the bank. The difference these pops of greenery can make to your everyday enjoyment is truly remarkable – imagine stepping outside to a consistently vibrant and welcoming area, no matter the weather or your busy schedule!
Ready to begin? The smallest possible first step is to simply identify one planter that could use a touch of life.
For a different room, consider the living room: budget-friendly artificial succulents can add a touch of nature to a bookshelf. Or, for a larger budget, invest in a striking artificial palm for a statement piece.
We hope these ideas inspire you to create your own stunning, hassle-free outdoor oasis. Keep exploring for more creative home decor and organization solutions!