Easy Ghost Crochet Patterns: Budget Decor Ideas
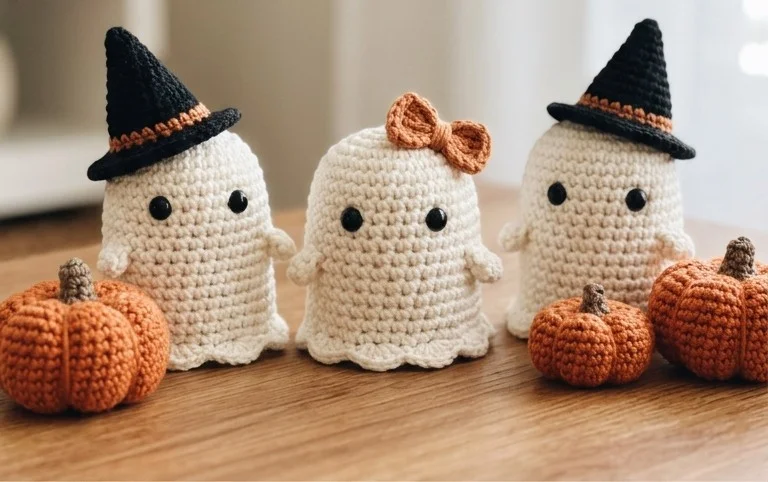
Adorable ghost crochet patterns are just what your home needs to add a touch of whimsical charm without breaking the bank! Do you ever feel like your shelves or tabletops are just a little too bare, a little too ordinary? Perhaps you have a few empty corners that could use a friendly face. Imagine tiny, plush ghosts peeking out from behind your plants, adorning your mantelpiece, or even adding a festive touch to your workspace. These sweet little creations are surprisingly quick to make, often taking just an hour or two, and cost next to nothing in yarn. In this article, I’ll guide you through some super simple, free patterns that anyone, from beginner crocheters to seasoned pros, can enjoy. Get ready to learn how to bring these delightful little non-alcoholic spirits to life and inject some serious cuteness into your everyday decor!
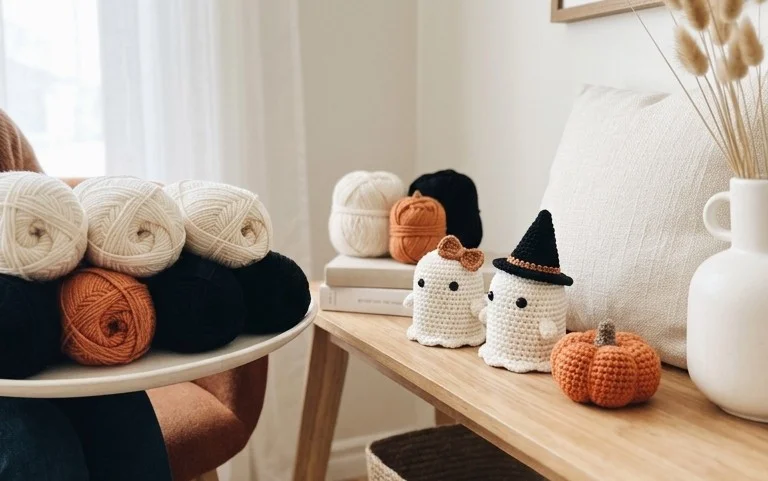
Boo-tiful & Budget-Friendly: Adorable Ghost Crochet Patterns for Effortless Home Organization!
Halloween is my absolute favorite time of year. The crisp air, the spooky movies, and, of course, all the adorable ghost-themed decor! This year, I wanted to get a little creative and combine my love for crafting with a practical need: home organization. And let me tell you, I’ve stumbled upon a treasure trove of free, adorable ghost crochet patterns that are perfect for adding a touch of whimsical charm to any space while keeping things delightfully tidy. These aren’t just cute; they’re incredibly versatile and surprisingly easy to make, even for beginner crocheters. So, let’s dive into how you can bring these little spectral helpers into your home!
What You’ll Need and Roughly What It Costs
The beauty of this project is its affordability. You really don’t need much to get started, and many of us likely have some of these items already stashed away.
- **Yarn:** For a basic small ghost (think coaster size), you’ll likely need around 50-100 yards of worsted weight yarn. Acrylic yarn is a fantastic choice because it’s durable, washable, and comes in a huge array of colors. For a pack of three 100g skeins (which will make quite a few ghosts), you’re looking at roughly $10-$15. If you opt for a single skein in white or grey, you might spend as little as $3-$5. For larger ghosts or multiple projects, you might need 2-3 skeins, bringing the yarn cost to $15-$30.
- **Crochet Hook:** A common hook size for worsted weight yarn is a 5.0mm (H-8) hook. If you don’t have one, a single hook will cost around $3-$5.
- **Stuffing (Optional):** If you want your ghosts to have a bit of puff and volume, you’ll need some stuffing. A small bag of polyester fiberfill is usually around $5-$7 and will last you for countless projects.
- **Safety Eyes or Embroidery Floss (Optional):** For the ghost’s eyes, you can use small black safety eyes (a pack is usually $3-$5) or simply use black embroidery floss to stitch them on.
- **Stitch Marker:** Very helpful to keep track of your rounds, especially in amigurumi-style patterns. A pack of ten is just a few dollars.
- **Yarn Needle:** For weaving in ends and attaching embellishments. A basic set is around $3-$5.
So, for a few adorable ghost organizers, you’re looking at an initial investment of roughly $20-$35, which is fantastic value for creating multiple functional decor pieces.
Measuring and Planning Before You Start
Before I even pick up my hook, I like to have a clear idea of where these little ghosts will live and what they’ll hold. This helps me determine the size and style of the ghost pattern I’ll choose.
- **Identify Your Needs:** What do you need to organize? Small items like keys, loose change, hair ties, or crafting supplies? Or something a bit larger like remote controls or a small notepad?
- **Measure Your Space:** If you’re thinking of hanging your ghosts or placing them on a shelf, measure the available area. For example, if you want a few hanging by your entryway, measure the wall space you have available. If you’re planning to put them on a desk, measure the surface area.
- **Consider the Pattern’s Size:** Most free patterns will give you an approximate finished size based on the yarn and hook you use. Look for patterns that match your measured needs. If a pattern seems too small, you can often upsize it by using a slightly larger hook. If it’s too big, try a smaller hook or a thinner yarn.
- **Visualize the Functionality:** How will the ghost hold things? Will it be an open pouch, a basket, or a stuffed decorative item with a pocket? This will influence the pattern you select.
For me, I’ve found the simple, rounded pouch-style ghosts are perfect for holding my earbuds, lip balm, and a few coins by my bedside. I measured the small shelf space and decided I wanted three ghosts, each about 5 inches tall. This led me to a pattern that recommended a worsted weight yarn and a 5.0mm hook, which I knew would give me the right size.
A Clear Walkthrough of the Process
Most free ghost crochet patterns follow a similar amigurumi-style construction. Here’s a general walkthrough of what you can expect. Remember to always refer to your specific chosen pattern for exact stitch counts and instructions!
- **Starting the Base:** You’ll usually begin by creating a magic ring (also known as a magic circle). This is a flexible loop that allows you to crochet in the round without a hole in the center.
- **Increasing for the Body:** The pattern will then instruct you to increase stitches in each round. This is how you’ll form the rounded, bulbous body of the ghost. You’ll typically work single crochet (sc) stitches and increase (inc) stitches (which means working two single crochets into the same stitch) in a specific sequence for each round.
- **Crocheting Even Rounds:** Once the body reaches a certain diameter (for example, around 3-4 inches for a medium-sized ghost), you’ll stop increasing and work a series of even rounds (single crochet in each stitch around). This builds the height of the ghost’s body.
- **Shaping the Top (The Ghostly “Head”):** At some point, you’ll start decreasing stitches to shape the top of the ghost. This is done by working decrease stitches (dec) (which means crocheting two stitches together as one). This creates that iconic ghost silhouette.
- **Adding Facial Features (Optional):** Before closing off the top, this is usually when you’ll either attach safety eyes or embroider on your ghost’s face. If you’re using safety eyes, make sure to place them securely before stuffing.
- **Stuffing (If Desired):** If you want a plump ghost, this is the time to loosely stuff it with fiberfill. Don’t overstuff, as it can distort the stitches.
- **Closing the Top:** You’ll continue decreasing until you have just a few stitches left. Then, you’ll use your yarn needle to thread the yarn tail through the remaining stitches and pull it tight to close the opening. Weave in the tail securely.
- **Creating a Hanger (Optional):** For hanging organizers, you can crochet a simple chain of stitches and attach it to the top of the ghost before you close it off.
The beauty of these patterns is that they are typically worked in continuous rounds, meaning you don’t join and turn at the end of each round. This creates a seamless look.
Adapting for Small Spaces or Rentals
My current living situation is a rental, so drilling holes into walls is a big no-no. Thankfully, these ghost organizers are super adaptable!
- **Adhesive Hooks:** For hanging your ghosts, I highly recommend using strong, damage-free adhesive hooks. Brands like Command offer a variety of hooks that can hold a surprising amount of weight and peel off cleanly. You can find small adhesive hooks for as little as $5 for a pack of 6-10.
- **Freestanding Decor:** If you can’t use hooks at all, don’t worry! Many of these patterns create little baskets or pouches that can stand on their own on shelves, desks, or nightstands. The stuffed ghosts are also adorable as standalone decorative elements.
- **Over-the-Door Organizers:** For a more involved solution, you could crochet several small ghosts and attach them to a sturdy fabric strip, creating a hanging organizer that can be draped over a closet door.
- **Drawer Inserts:** Smaller ghosts can be used to create little compartments within drawers, keeping smaller items from rolling around.
I’ve successfully used adhesive hooks for my wall-mounted ghosts, and they look fantastic holding my keys and sunglasses by the door.
Styling Notes: Color, Texture, and Placement
This is where the fun really begins! Styling these little ghosts is all about balancing their playful nature with practical functionality.
- **Color Palette:** While white is the classic ghost color, don’t be afraid to experiment! Soft greys, pale blues, and even muted purples can create a sophisticated yet spooky vibe. For a bolder look, consider contrasting colors for the eyes or a small bow. I’ve seen some amazing black ghosts with glow-in-the-dark eyes – so fun!
- **Texture Play:** The crochet texture itself adds a lovely tactile element. Combine your ghosts with other textures like chunky knit blankets, smooth ceramic bowls, or natural wood accents for a cozy and inviting feel.
- **Strategic Placement:** Think about the function. If it’s a key holder, place it by the entryway at a comfortable height (around 5 feet from the floor). For bedside organization, place it on your nightstand or hang it from the headboard. On a desk, group a few together to hold pens, paperclips, or small succulents.
- **The “Less is More” Principle:** Even though they are small, too many identical ghosts can look cluttered. I find that a grouping of 2-3 in a complementary color scheme is usually perfect for a specific area.
- **Consider the Contents:** What you put inside your ghosts will also contribute to the overall look. For example, a ghost holding neatly rolled-up earbuds looks tidier than one stuffed with tangled charging cables.
I have a trio of pale grey ghosts on my vanity, holding hair ties, bobby pins, and my favorite lip gloss. The soft grey works beautifully with my marble countertop and gold accents.
Keeping it Tidy After Week One
The beauty of these organizers is that they encourage tidiness. However, like any organizational system, they require a little upkeep.
- **The “One In, One Out” Rule:** If your ghost is meant to hold specific items (like keys), try to put them back in their designated spot immediately after use. This prevents clutter from accumulating.
- **Regular Decluttering:** Every week or so, take a moment to quickly assess what’s inside your ghosts. Are there things that no longer belong there? Remove them and put them in their proper home.
- **Cleaning the Ghosts:** Acrylic yarn is generally machine washable (check your yarn label!). I usually put my ghosts in a mesh laundry bag and wash them on a gentle cycle with my regular load. For a quick refresh, a damp cloth can usually wipe away dust.
- **Re-stuffing (If Applicable):** If your stuffed ghosts start to look a bit flat after a while, simply open up a seam (or unravel the top a bit), add a little more stuffing, and close it back up.
My key-holding ghosts are the most used, and I’ve trained myself (and my family!) to put keys straight into them. It’s a simple habit that makes a big difference.
Mistakes That Make This Fail
Even with the best intentions, sometimes organizational projects don’t quite stick. Here are a few common pitfalls to avoid with your adorable ghost crochet organizers:
- **Overstuffing:** This is the most common mistake! Trying to cram too much into a small ghost will distort its shape, stretch out the stitches, and make it look messy and unprofessional. It also makes it harder to retrieve items.
- **Using the Wrong Hook Size:** If your pattern specifies a hook size, try to stick close to it. Using a hook that’s too large will result in a very loose, holey fabric that won’t hold small items well. A hook that’s too small will make your fabric stiff and difficult to work with.
- **Skipping the “Even Rounds”:** Those even rounds are crucial for building the height and capacity of your ghost. Skipping them will result in a very short, squat ghost that might not be as functional as you intended.
- **Not Securing Your Ends:** When you’re weaving in your yarn tails, make sure to do it securely. Loose ends can unravel over time, especially with use and washing, leading to a sad, de-ghostified organizer.
- **Ignoring the Functionality:** While the cuteness factor is high, remember that these are organizers. If you choose a pattern that’s too small for what you need to store, or place it in an inconvenient location, you’re unlikely to use it consistently.
- **Over-Reliance on Adhesives:** While adhesive hooks are great for rentals, be mindful of their weight limits. Hanging something too heavy on a small adhesive hook is a recipe for disaster (and potentially damaged paint).
These little ghosts are such a joy to create and use. They add a unique, handmade touch to your home and solve those everyday organization challenges in the most charming way possible. So grab your hook, find a free pattern, and get ready to add some spectral sweetness to your space! Happy crocheting!
Conclusion
Bringing a touch of handmade charm into your home with these adorable ghost crochet patterns can truly make a difference day to day. Imagine the smiles these little specters will bring as they peek out from shelves or desks, adding a playful and cozy vibe to your space.
Ready to get started? The smallest possible first step is to pick just one pattern and gather your yarn and hook. You might be surprised at how quickly you can bring one of these friendly ghosts to life!
For a different room, consider a larger ghost to grace a mantelpiece. On a tighter budget, try using scrap yarn to create a collection of mini ghosts to adorn houseplants.
We hope these patterns inspire you! Explore more ideas for heartwarming home decor and organization on our site.